Pages

.

Company of Heroes Walkthrough - Operation Market Garden - Mission 2 - Wolfheze: September Snow

Company of Heroes Walkthrough - Operation Market Garden - Mission 2 - Wolfheze: September Snow

Click here for the index of our Company of Heroes Mission Walkthrough Index and our gameplay paradigm.

This is a moderately easy mission on Expert Difficulty, depending on how many troop losses you are willing to sustain.
Also, if you ended Mission 1 - Wolfheze with more than 50 points of unit Population, you may be initially limited in what you can field (artillery pieces are mostly transferred to (yellow) allied forces).
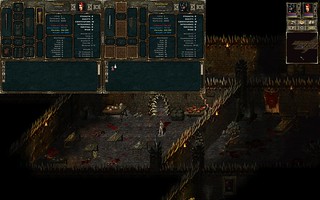
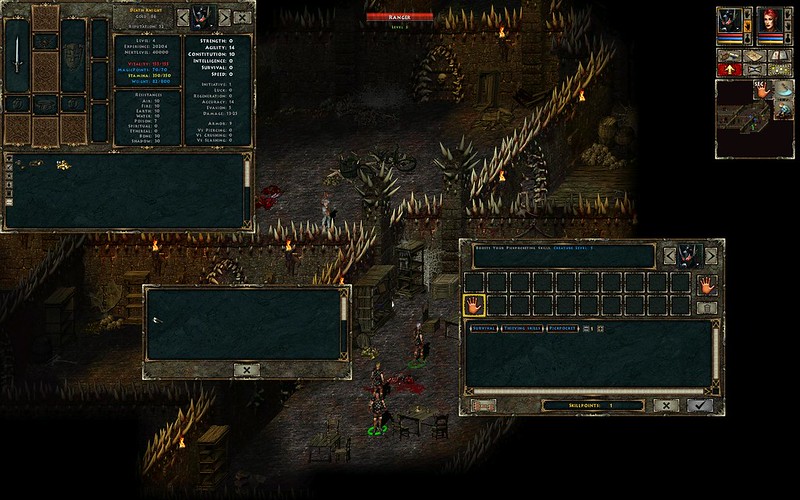
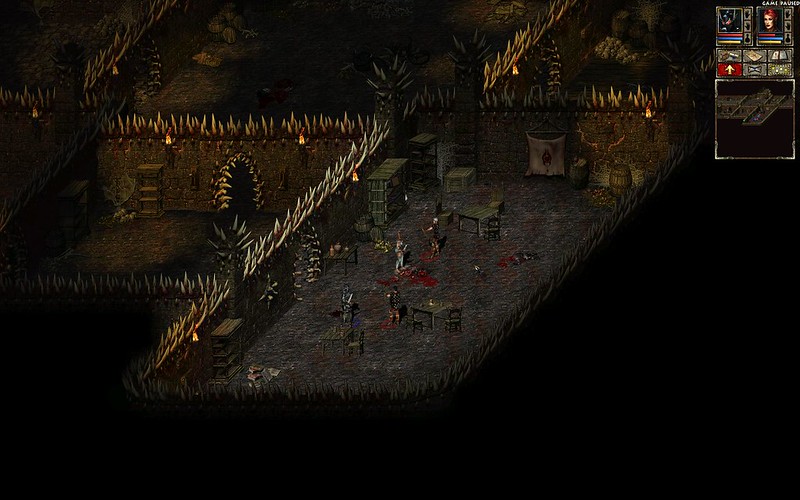
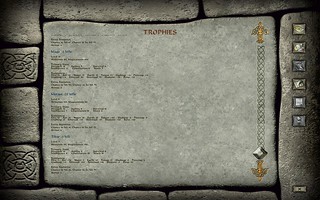
In the following pictures, we show the units we ended Mission 1 with, and the troops we began Mission 2 with. Since we started with 54 population and the cap was 50, and our gameplay paradigm did not allow for recycling units just to make new ones of the types we wanted, we had to play with the units we began with. We did end up saving all units (no losses), although in the process we had to experiment with various tactics against the Tetrach Tanks.

Campaign 2 Mission 1 - final troops
.
Campaign 2 Mission 1 - mission 2 starting troops

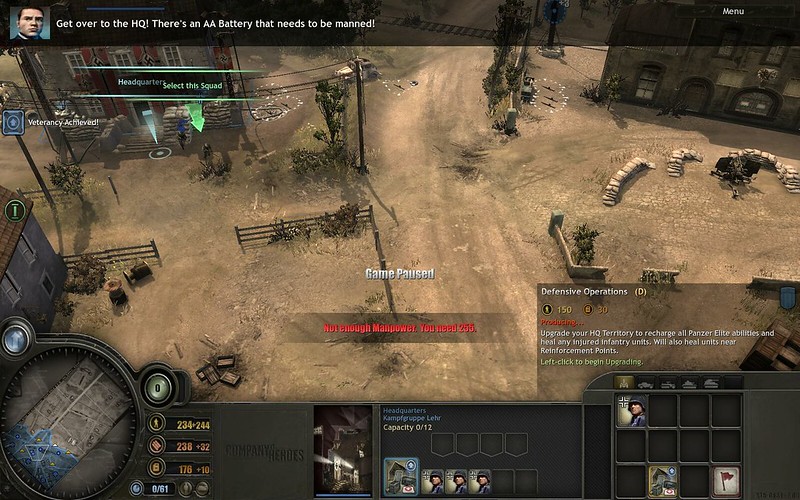
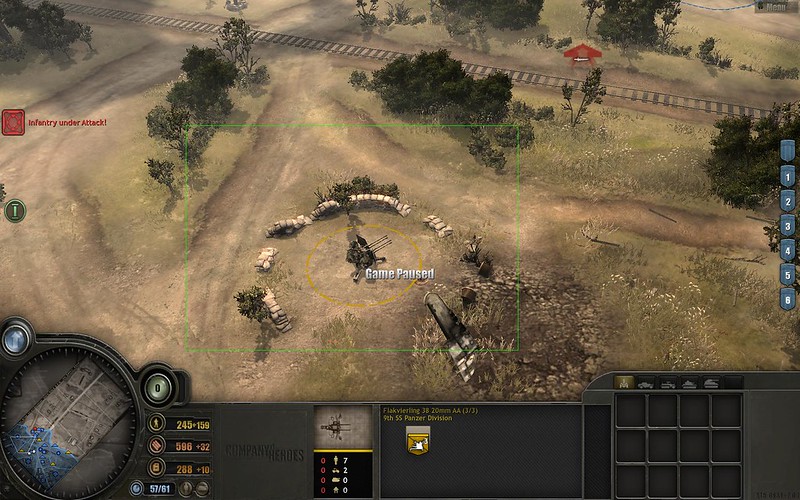
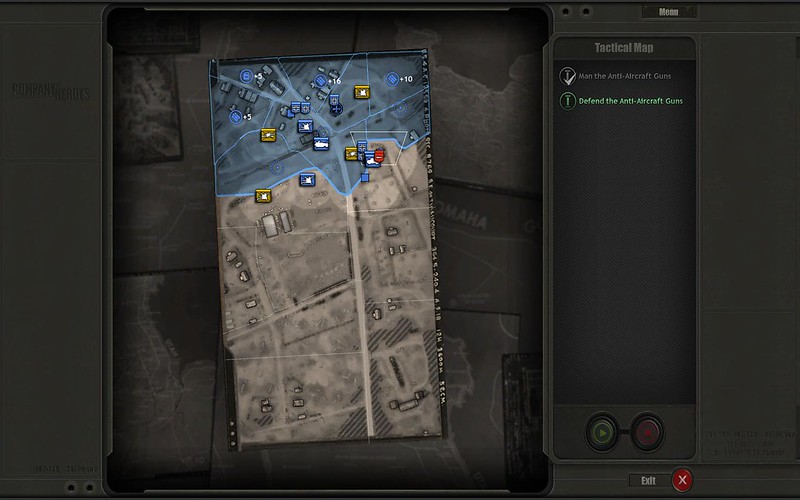
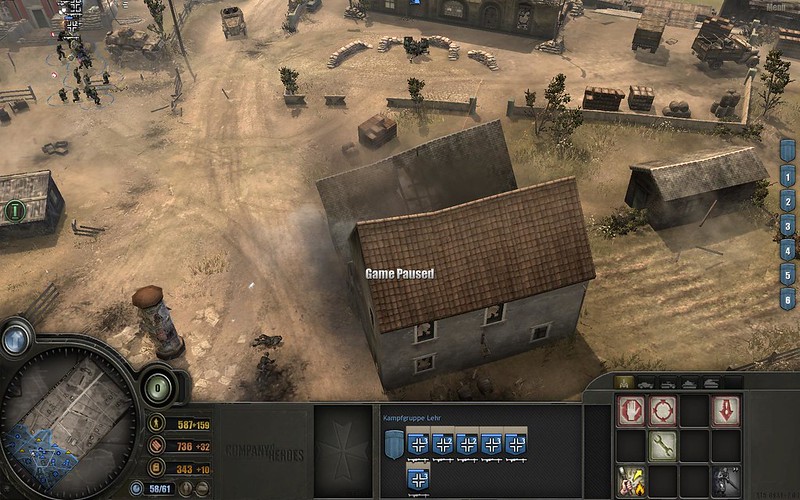
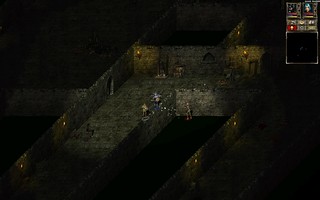
Part 1 - Rescue the AA Gun
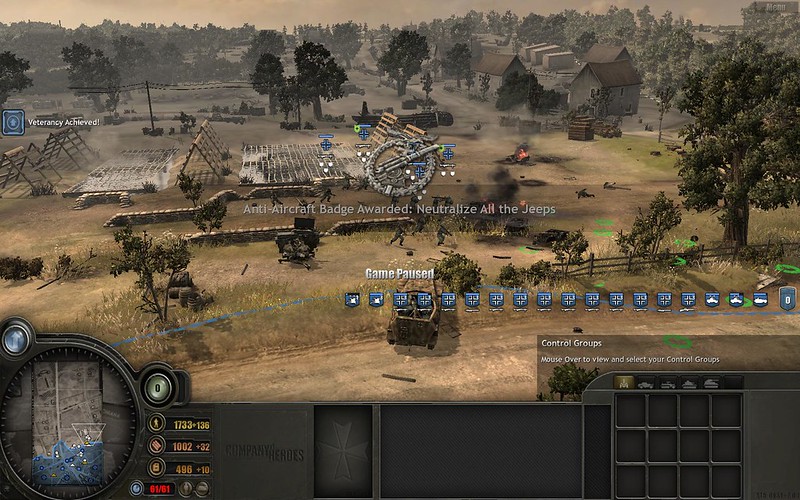
Send in your vehicles to protect the AA gun nearby. There are two snipers, making it tricky to send in infantry. If you fail to protect the crew, you'll have to man it, but it's really only useful in the final defense phase of the mission.

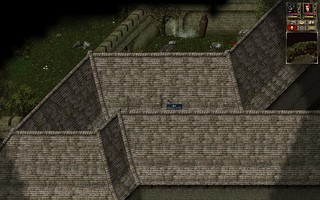
Part 2 - Find Snipers
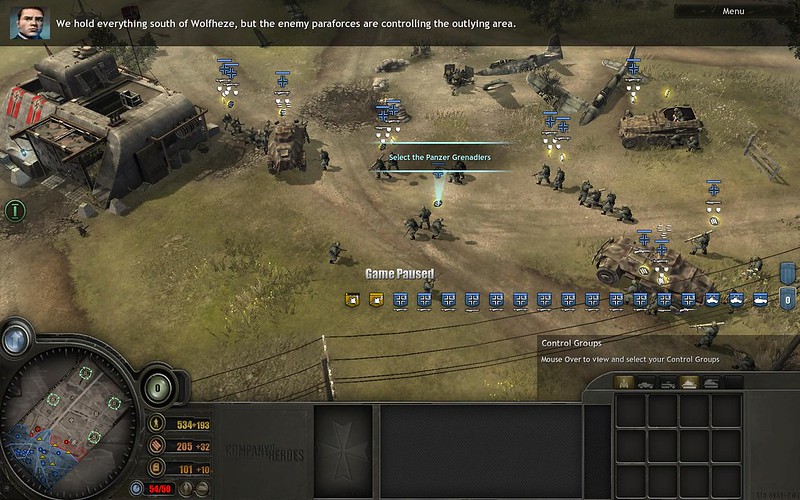
Move up the left side and take point with vehicles. Unlike American vehicles, the lightly armoured vehicles look like they should be immune to infantry fire, but they aren't, so retreat them to be repaired. For now, keep sending them ahead to find and kill snipers until you receive the medal.

Part 3 - Anti-Tank Enemies
Anti-Tank guns and some medium tanks are further ahead in the map. On Expert difficulty they can one-shot your vehicles. If you see any, immediately retreat and mortar their position or send in infantry.
Against Tetrarch Tanks, your best bet for minimizing losses is actually to swarm them with Infantry. We chose Defensive veterancy upgrades for infantry and almost all squads have a Panzerschrek (from Mission 1). Try not to engage more than one at a time. They will also quickly flee, so that can help as well.
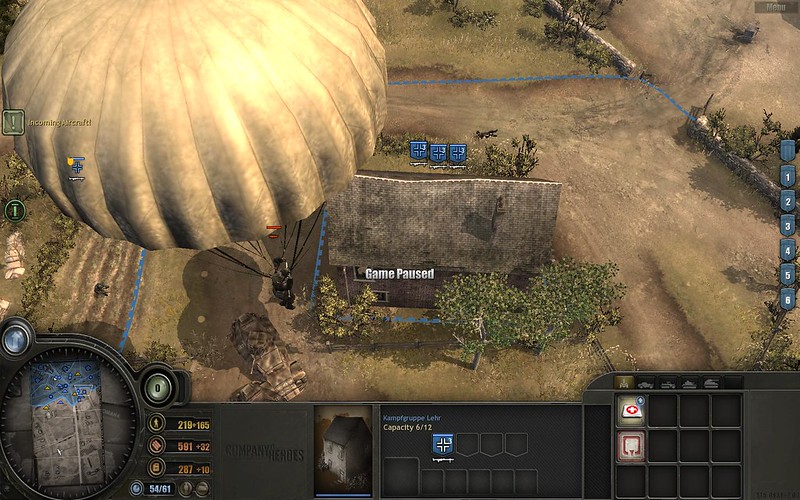
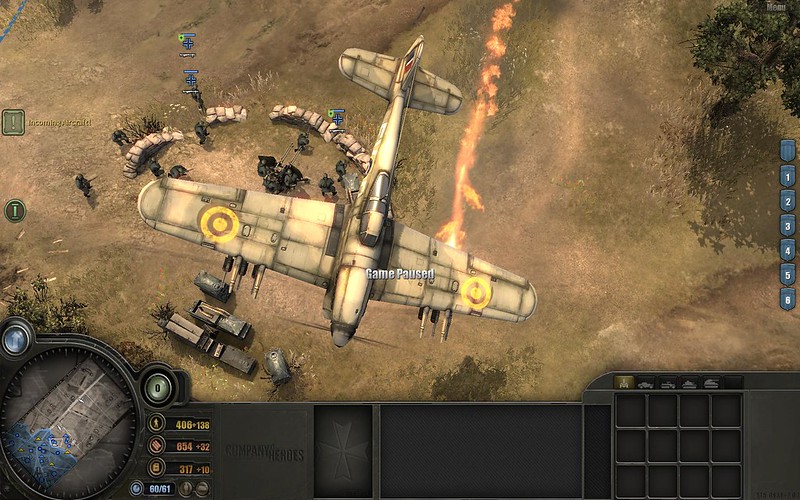
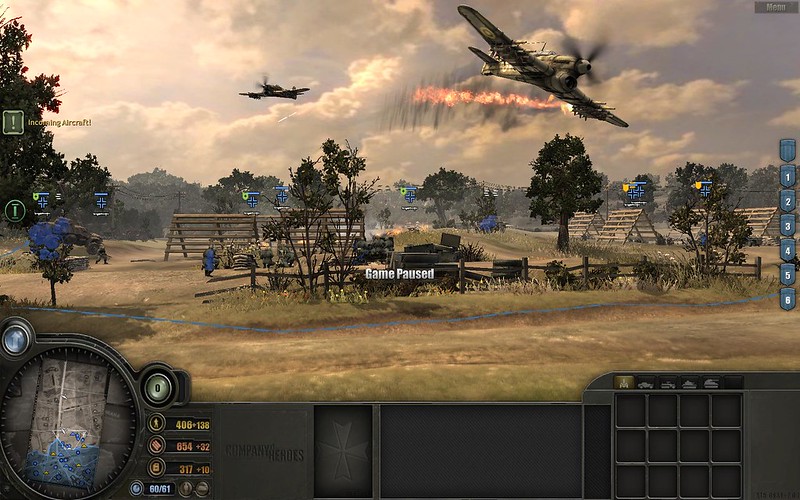
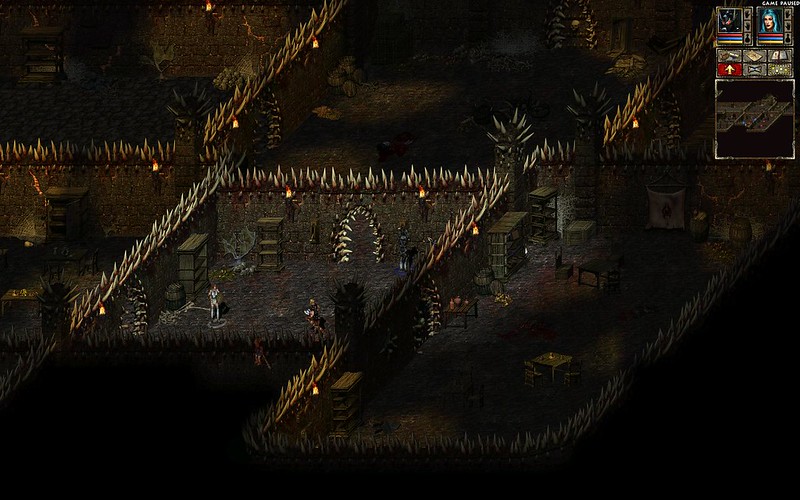
Part 4 - Paradrop
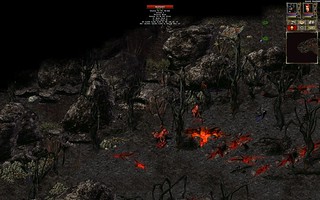
After taking the final strategic point, there is another paradrop. Retreat all units to the artillery line and just hold out until enemy infantry and jeeps stop coming. You don't have to hold any strategic points and the enemy does not try to capture any.
You can destroy some of the initial drops of infantry, but it is better to simply pull back and present an organized defensive line backed by powerful artillery.

reade more... Résuméabuiyad

Company of Heroes Walkthrough - Operation Market Garden - Mission 1 - Wolfheze

Company of Heroes Walkthrough - Operation Market Garden - Mission 1 - Wolfheze

Click here for the index of our Company of Heroes Mission Walkthrough Index and our gameplay paradigm.

This is a pretty easy mission on Expert Difficulty. If you are moderately careful you can easily avoid losses of entire squads. Still, there are ways to enhance your domination of the mission.
For Infantry we went with all-Defensive upgrades to enhance the survivability of these most vulnerable units and to maximize regeneration. For vehicles we went with full-Offensive upgrades because they have no regeneration.

Part 1 - Prepare Forces
The first mission objective is to crew a Flakvierling 38 20mm AA gun. You have no choice for the first gun as the map is sharply limited and there is basically nothing else you can do.
The next mission objective (see screen below) is to crew a second AA gun behind the train station.

Campaign 2 Mission 1 - delay the objective to build your forces, definitely upgrade HQ

The map is still limited, but there is actually a lot you can do. So DO NOT immediately crew it. This is your first opportunity to take a breather and prepare your forces. Also, if you do crew it, you might not be able to save the first allied 88mm Flak 36 AT/AA gun from commando attack, which will then force you to crew it.

The population Cap is 61 and you start this mission phase with 9/61. When you crew the AA gun it will be 12/61. Plus three light vehicles coming after this phase = 24/61.
Prior to clicking the unit initially designated to man the AA gun, allied units remain allies (yellow) if you click on them. THIS IS THE CRUCIAL PART: After you have selected the unit designated to man the AA gun, clicking on any allied (yellow) guns makes them blue (yours) and uses up your Population Cap.
Therefore defend them all successfully to not be forced to man them, thereby preserving your population cap.

If you want to inspect an allied unit without recruiting them, use area selection (see below).

Campaign 2 Mission 1 - use area select to view ally unit without taking it over as your own

If you have to man them, or if you accidentally click on them, things get tighter. The two 88mm Flak 36 AT/AA guns are 11 population each, and adding one allied Flakvierling 38 20mm AA is another 6 population, for a total of +28 Population. Suddenly your Population after the three vehicles that will shortly be given to you will become 52/61 -- That means you will have only three (3) Panzer Grenadier Teams, and that can makes things very tight, especially in the final phase of the mission where the enemy swarms you with jeeps.

Since the vehicles come later, you can, prior to continuing the game, fill out your Population Cap and let it be exceeded later. I recommend against this, since you will not be able to reinforce squads if they lose a man. And you will have to use infantry because of the overwhelming forces coming your way, so partial squad losses are inevitable.
  • Upgrade your HQ with Defensive Operations and upgrade the train station building into a Reinforcement Point.
  • Create 3 teams of 3 squads each of Panzer Grenadiers (total 9 teams or +27 Population for a total of 51/61 after the three vehicles arrive).
    • Delay creating any Panzer Grenadiers until you have almost the required 2295 Manpower because each team you create lowers your Manpower accumulation rate.
    • Give each squad one and only one MG42 where possible (four guns to the left of your HQ will be inaccessible until you crew the second AA gun behind the train station).
    • Later have these teams pick up a Panzerschrek. If they already have two heavy weapons, you won't be able to do this and you may be hampered in the kill-the-jeeps portion of the mission.
    • It is not necessary to upgrade them with rifles and in any case do not do so prior to deciding whether to give them 1 or 2 heavy weapons and which ones to give them. The rifle upgrade gives them two rifles and uses up both weapon slots.
  • There are machineguns and mortars on the map, but don't pick them up. Setting them up will only hamper you during this mission.
THERE IS A TIME LIMIT before you fail the objective to crew the AA gun, so do not delay. After making your three teams, queue another three and send the original Panzer Grenadier squad given to you to man the AA gun.

Part 2 - Paratroopers
Check your mission briefing screen for early warning of where the Commandoes are dropping. They will first be visible to your troops and the mission briefing screen. Only when they have basically landed will they show on your tactical map -- and that is way too late to properly intercept them. Surround them and cut them down quickly. If you do this well, you will have the luxury of time in between the drops.
In the pictures below, we show paratroopers visible from a particular angle on the screen, and visible on the mission briefing tactical map, but the same unit is not visible on the minimap.

Campaign 2 Mission 1 - commando paratrooper not visible on minimap
.
Campaign 2 Mission 1 - same commando paratrooper visible on briefing map

Watch out for scripted events such as strafing runs and this building always being destroyed:

Campaign 2 Mission 1 - this building is scripted to be destroyed

Part 3 - Gliders
This is your chance to regroup.
There are three gliders and they are located on your minimap as mission objectives. Kill all defenders and destroy two out of three, then wait while you get your forces healed up and in order before destroying the last glider.

Part 4 - Jeeps
Basically follow the prompts and defend the points located as that is where the Jeeps will go. Putting heavy weapon units in buildings at the defense point or along the path (especially when they come from the right side, there are buildings along the road) will help a lot.
Panzerschreks magically appear at each of the three defense points. However, even the initial squad-carried MG42s can do good damage to jeeps, and in some ways are more reliable because if a Panzerschrek misses, there is a long reload period before it can fire again.

In the screens below, you can see our final troops at victory, and the starting troops for Mission 2.
  • One of our AA guns lost 2 of its 3 crew to a scripted plane attack run and could not be reinforced, so with the available Population Cap we produced one additional squad of Panzer Grenadiers.
  • Mission 2 reassigns the artillery pieces, setting some to neutral. Also it gives you one squad of Panzer Grenadiers.
Campaign 2 Mission 1 - final troops
.
Campaign 2 Mission 1 - mission 2 starting troops
.
Campaign 2 Mission 1 - plane shot down 1
.
Campaign 2 Mission 1 - plane shot down 2
reade more... Résuméabuiyad

Beyond Divinity Unofficial Elite Hardcore Strategy Guide - Battlefield

Click here for a list of our Beyond Divinity Elite Hardcore Strategy Guide posts.

We recommend you buy Beyond Divinity from Good Old Games (GOG) as you can get more prompt support. Also, it is an older game, and GOG offers a risk-free money-back guarantee.

Battlefield

We do NOT recommend you exploit the Battlefield.
Battlefield is basically a huge exploit where you can temporarily drop out of the main game to build up your character and amass resources and skills. The main game has limited and randomized resources, and no respec for stats. So if you made unplayable choices or just have bad luck with resources, you can take a side trip to the Battlefield to level up or get more resources.

To preserve your Hardcore gameplay, we recommend you only use the Battlefield to:
  • Buy/sell stuff (faster and more convenient than waiting for local merchants to refresh their inventory)
  • Cache gear
  • Buy Holy Water if it appears in a store
If you want to exploit the Battlefields, then get the Keys as soon as possible and clear out as much of the Battlefield as you can each time.
The reason is the Battlefield monsters have a fixed level (except any Battlefield quest boss creatures). If you come here later when your level is (creature level +8) or more, you will get zero XP.
In contrast, some of the monsters in the game have a variable level.

On Hardcore difficulty, there are more creatures in the main game. One set are duplicates and have a fixed level. But the non-duplicates typically have a level that is an offset of your own.
  • For example, although the Arena Cell ghosts may be level 5 when you first encounter them. If you come back at level 10 after some Battlefield experience, you may see one still at level 5 but the other at level 11+ (see picture below).
  • Similarly, the Skeletons in the Pit Level may be Level 2, but if you enter at level 10, some will be Level 2 and others Level 7.
  • Complicating this observation is the fact that some creatures have a minimum level and some have a maximum level, so not every creature will indefinitely scale. Also, the scaling doesn't necessarily happen at every level above the expected level characters will be when they arrive at a location.
after battlefield entrance 1, hero level 10 and one ghost upgraded to level 11

Leave any Battlefield bosses until you are ready to leave Act 1 since their levels are much higher and therefore there is no hurry to kill them before you can't get XP from them.

Obviously a Battlefield exploit is to rush the game and quickly look for Battlefield Keys, then do those first and that way try to level up quickly. I recommend against it because it is "not natural" and in any case can make you too powerful for the game (already pretty easy) to be fun.

Battlefield Dungeon Quirks
    skeleton mage in inaccessible Battlefield dungeon location
  • Some enemies spawn incorrectly behind walls in the Battlefield dungeons.
    • You can try to sight them by walking near the corners. Sometimes you can see them (and they can see and shoot at you!).
    • If you can't spot and target them, you can still blindly target them with [Wizard > Elemental Attack > Focused > Missile], which can be fired at a location and which will hit the first enemy along the way.
  • Some Battlefield Dungeon maps do NOT allow seeing through open doorways.
    • This also means enemies can't cast spells or shoot at you unless they fired their arrow/spell/attack before you went through a door (whether that attack hits before or after you go through the door).
    • You can therefore lure shooters through a doorway and immediately engage them in melee on the other side.
      • This can also work on Skeleton Mages. Once they spot you, they tend to run to you. But once they are too close they back away, usually before they completely pass through the doorway. Eventually they will run out of Stamina and walk, whereupon as soon as they are through the doorway they may melee you or be too slow to walk away before you can melee back.
    • It also means that sometimes an enemy is between rooms and non-targetable, although they can attack you. Just back off a bit to force them to advance.
  • Too many enemies trying to go through a door may also mean some will look for alternate route because of the traffic jam, so watch your rear if you try to pull them through a door for a Whirlwind attack.
  • Sometimes a chest might be in a corridor but not visible because it is obscured by the south wall. Mouse over to look for containers this way.

reade more... Résuméabuiyad

Beyond Divinity Unofficial Elite Hardcore Strategy Guide - Act 2

Click here for a list of our Beyond Divinity Elite Hardcore Strategy Guide posts.

We recommend you buy Beyond Divinity from Good Old Games (GOG) as you can get more prompt support. Also, it is an older game, and GOG offers a risk-free money-back guarantee.

Act 2
  • Starting level:
    • Using the Battlefields but without using Wisdom, we exited Act 1 at Level 14 without using the Wisdom skill. Enemies were of a slightly higher level (e.g., Level 9 mutants, level 15 Ancient Stone Biters).
    • Without Battlefields, but having killed all the Rats, we started Act 2 at level level 11. Mutants were level 8, Ancient Stone Biters level 12.
    • Many vermin are of a fixed level, and some are fixed at level 1 so you can't get XP from them no matter what, or shortly after you are into this Act, except the irritation they cause will follow you around everywhere.
  • One of the things to watch out for throughout this act is pathfinding. Sometimes one or both characters will suddenly swing wide because there is impassable terrain and not enough width for both characters at the time their path was calculated. If you're not paying attention, this can leave one character solo in a fight or pull enemies you aren't ready for.
  • We will be shooting much more here, so again a high Agility build benefits us by giving us strong archery. Where possible we will actually melee just out of principle (saving expendable resources) and we will provide melee tactics. But honestly, many enemies are so annoying that you really just want to shoot them.
  • Unless you want to drink Mana Potions like water (any why not since you have probably over 100 if you didn't use any in Act 1), you still need strong melee or ranged attacks. We will use magic, but our paradigm is still not to use expendable resources unnecessarily, so it is in reserve.
  • Apparent barriers like large mounds of boulders are sometimes passable. However, if you engage enemies there, you risk their treasure dropping inside a rock or onto impassable areas, and impossible to pick up.
  • Ending level:
    • We finished this Act at level 20. We did not kill any neutrals nor did we exploit the Polymorph spell to get more XP (see below).
Character Development
Agility
If you haven't already, get your Agility to around 37+ to use Daggers (Agility 12 requirement + Agility 25 from Sharpening = Agility 37 requirement). Your damage rating should be respectable enough for you to stop and develop Intelligence for Mana or Strength for the Hero.

Magic
The [Wizard > Elemental Attack > Focused] and [Wizard > Elemental Attack > Spread] are no longer Mana efficient once you can use anything from [Wizard > Shaman Magic]. [Wizard > Shaman Magic > Weather Magic > Lightning Storm] is the earliest you can learn (Guide page 126) but it is weak without the Extra Duration/Extra Damage upgrade. Instead go for [Wizard > Shaman Magic > Weather Magic] from the Hermit in the Spider Forest (Guide page 98).
  • Even without these spells you can get through this Act just fine with melee and bow, so feel free to first reach the ultimate Agility target of 65 and/or develop some Strength and Constitution. If you absolutely insist, you can do some risky tactics to get through with melee only against some of the most annoying enemies to date.
  • The damage numbers for spells are basically all incorrect. Experiment with the spells to find out what they can really do. Except Spikes, which can be hard to place, all the spells you learn from the Hermit are good so get at least 171 Mana to cast them.
    • Insect Swarm is also very good in case you are yourself swarmed in melee; however, it costs 308 Mana and you will want to have more than that to also Heal yourself if necessary.
    • Hammer is probably the best choice overall. Damage is strong, there is a moderate area of effect, and stun is more or less guaranteed -- making it better than [Wizard > Body Magic > Offensive > Paralyze] from the Plague Ghost (Guide page 90).
  • If you are short on Skill Points, hold off on developing Lightning Storm until you read about Polymorph and Hammer, accessible later in this Act.
    Immediate Battlefield Access
    If you kept the Battlefield Keys from Act 1, you can immediately access the Battlefield in Act 2. Clicking on any of them will give you back your Battlefield access skill. This is however an exploit since your Battlefield skill was taken away. But since the whole concept of the Battlefield is an exploit anyway, you might as well set up your cache now. If you are worried about possible save game screw-ups through a possibly unintentional exploit, the first key is to the far west in a prison.

    "Rats"
    The "rats" in this area are Tibar and Stone Biters, both of which give a lot of XP initially. Also, Stone Biters also almost always drop treasure, often a potion. Tibar can also drop loot. You will shortly after get no XP from them at all and instead just be irritated, so you may consider not attacking them at all. For loot, just rob merchants with Pickpocket. It's faster and less irritating.
    For our run, we played without killing Rats, so we will continue without killing neutral non-hostile Tibar and Stone Biters.
    As "rats" they use the same tactics as Rats in Act 1, only it is much more effective here because there are swarms of vermin just about everywhere.

    Ancient Stone Biter
    Actually pretty easy to kill if you Sneak and wait out their "fire aura" -- They go Berserk and can inflict crazy damage. They then become apparently immobile for a while during their Berserk cooldown but are restored to about half health afterwards.
    Since they are easy to melee to begin with (if you followed our Character Generation guidelines and build, you are probably using Hunter's Knives or Daggers and have a Piercing damage rating of 100+), you can then finish them off safely.
    The real "problem" is that they are too close to the Drunken Soldiers, who can charge in and fight -- and possibly steal your kill from you. So hug the far northern wall and lead them away first.

    Mage
    Unlike Skeleton Mages, they will not flee when they sight you, and instead try to Paralyze you. So try to isolate them with Sneaking and shoot them from out of their sight range. Contrary to the Guide (page 73), Sneak close and kill the Guards first if you can so you can concentrate on shooting the Mages (there will be two on Hardcore Difficulty) and backing out if you have to. Stay hidden by Sneaking!

    Muro the Hunter - Traps
    Although we will not be relying on Traps (because they are an expendable resource so we won't rely on you having any to use), you should consider training in traps because they are extremely useful in cheesy ways:
    • They can be set at range:
    • Even in the fog of war.
    • Behind barriers.
    • Not on impassable terrain, although you will still lose one unit of Trap Material.
    • Not when a hostile creature is nearby, so you cannot use it as a direct attack. You can however set it in the path of a creature coming toward you while it is still a range.
    • A single high-level Scorpion is probably the best trap:
      • Once summoned, the Scorpions are mobile.
      • Their poison does damage over time in addition to physical attacks.
      • As a creature it can be your distraction while you Sneak off.
      • It's repeated attacks will eventually kill several creatures, whereas a single-attack trap will probably not. Therefore, it has high utility per unit of Trap Material, and all traps cost a single unit of Trap Material.
    Imp Village
    • After the lengthy initial cutscene, immediately leave the Village so you can be kidnapped and sent to the Abbey (Guide page 125). This will happen even if you try to enter the Battlefields, although you will still be able to go to the Battlefields from the Abbey. Going to the Abbey also gets you access to the powerful Lightning Storm spell as well as a permanent +60 Mana boost. Once you are out you can set up easy-access Battlefield caching to-and-from the Imp Village and environs.
      Mushroom Farmer's House (Guide page 83)
      Click on the "Strange Chest" to experience a hallucination. Thereafter that piece of furniture will be locked. If unlocked with the Lockpicking skill, it will be empty.
      There is a DIFFERENT Mushroom Farmer OUTSIDE this house. Speak with that one for a different quest.

      Polymorph Spell (Guide page 90)
      Have someone buy the [Wizard > Body Magic > Offensive > Polymorph] spell to ONE level only. Theoretically this gives you a lousy chance of polymorphing a target into a weak one, and a good chance a strong enemy may be polymorphed into a stronger one, like a Level 29 Shadow Creature.
      This is actually a GOOD thing because:
      • Extremely strong enemies, like Blood Knights in Act 3, always get transformed into easier-to-kill targets. Even a Level 29 Shadow Creature will be easier to kill, AND it will give a lot more XP.
      • Weak creatures that don't give any XP anymore can be transformed into strong ones that will give XP. This is one way to get XP out of the hundreds of low-level neutral critters.
        • Therefore don't bother with the Wisdom skill if you are short on XP. If you really want to maximize your XP, use Polymorph on weak critters everywhere.
      Note that unlike other attack spells, if the target is out of range, you will still spend the Mana casting the spell.
      In Act 3 you can get the "cloud" (area effect) version of this spell. It lasts half as long but can hit multiple enemies, so you can neutralize some temporarily into weak enemies while you kill the stronger ones.

      The Hero's Wife (Guide page 89)
      If you speak with her and receive this quest BEFORE you rescue the Imp Hero (Guide page 96), it will probably be bugged. After you rescue the Imp Hero and return to find him in the Imp Village, if you tell him about his wife the first time you speak with him in the Imp Village, he will run off but the cutscene won't end and you will not get player control back.
      In such a case, when he speak with you, abort dialogue with the "X" button, until he starts the boast that begins, "Blood was flowing from hundred wounds...". Abort listening to the whole thing by clicking "1" to choose the dialogue option about his wife. You will then get XP for the The Hero's Wife quest and there will be a cutscene where he runs off. But this time you will regain player control.
      If you let that last boast finish on its own, the game will automatically choose the dialogue option about his wife and the quest will complete, but you will not get XP.

      Necromancer Task 1 - Abbey
      • Despite what the Witch says, even if you spare all the Paladins by rushing or sneaking, Achim still claims you killed all his men, and the Paladins that were hostile remain hostile after you get the Crystal. So forgo stealth.
      • look behind roof for item containers
      • Mouse-over the roof when you are at the north end of the compound to find Pits and other "containers" that may contain loot. This is the graveyard area, and a lot of it is obscured by the roof (see picture on the right for an example).
      • Skeleton warriors and arbalesters use Bone weapons in melee. The Deathknight has a natural 30 Bone Resistance, so further improve that with the Crystal Bag and have him take point.
      • Skeleton arbalesters have a respectable 21 Agility and therefore almost always hit, making them very dangerous in melee. They also swing pretty fast.
      • Paladins and Skeleton warriors using Bone Clubs can hit remarkably hard.
      • We did this right after first entering the Imp Village and before doing any quests there. We exited at level 14, which put us very far ahead of many monsters -- the Fire Area southeast of the Imp Village has the strongest monsters at level 15, while the Little Mushroom Forest to the north has the weakest at level 8 -- worth zero XP if we hit level 16. So we followed the Guide, which is probably also the intended path based on monster levels.
      Little Mushroom Forest

      Imp Elf (Guide page 94)
      If you abort the conversation, you can decide later. But if you then pick up the mushroom, the Imp Elf becomes hostile. Before concluding this decision, you can Pickpocket him for 100 Splitting Arrows.

      Spider Forest

      Flamestinger (Guide page 100)
      When you open the Spider Cocoon, a homing critter hops to you and explodes for well over 300 damage. If you are standing still when you open the Spider Cocoon, there will be an animation that will freeze you in place long enough for the critter to explode.
      Instead, start very close to the Spider Cocoon. Click a location to run to far away and when the character is starting to move, pause the game, open the Spider Cocoon, grab the item, and the unpause the game to continue moving. The trap may not even trigger in this way.

      This sort of grab-and-go is possible with any container that is close enough to you when you are running past.

      Summoning Doll - Demon (Guide page 98)
      When you have two Summoning Dolls, the second doll is summoned at the current location of one that is already summoned.

      The Hermit (Guide page 98)
      Have at least one character learn just 1 level of [Wizard > Shaman Magic > Nature Magic > Hammer].
      • It almost always inflicts stun, which is basically the same as [Wizard > Body Magic > Offensive > Paralyze] except it is much more reliable.
      • It can be targeted and it inflicts all its damage immediately, unlike many other Shaman spells that inflict damage over time and the target can wander out of the area, thus taking less damage.
      • It has a decent area of effect, so if you are swarmed, drop this and take advantage of the Stun effect.
      Mushroom Forest

      Earth Elementals
      • Easier to kill than Fire Elementals, but once they start an Earthquake, you must either kill them fast to stop it before the damage is inflicted, or run out of the area.
        • Damage from an Earthquake is dealt once the screen shaking stops, and the closer you are to the origin (the elemental), the more damage you take.
      • You can bait them into using their Earth Cone attack (and flee sideways to quickly get out of it, although damage is low) or Earthquake (just run away) by simply getting close, but that usually involves not Sneaking, which is still advised when engaging to not pull more Earth Elementals to you.
      • Sniping is the easier way to kill them of course.
      • If you lead them too close to Imps, the Imps will attack and either kill them for you (you get no XP) and/or be killed by them. Imps from the Village are pretty tough but not invincible.
      Fire Elementals
      • Very tough to melee without some divide and conquer and lots of Sneaking to not pull too many enemies at once.
      • Their Fire Circle is pretty wide and damaging, and doesn't care about how much Evasion you have. If you watch them you can sometimes realize they are about to cast it, and have your characters flee.
      • You can let some of them spot you and chase you, then Sneak and heal before picking them off. If you are having a lot of trouble, Sneaking and sniping with bows is faster and cheaper than using area effect magic and drinking potions.
      • You can also ease your time in melee by baiting it into using its Fire Circle attack or Whirlwind Attack and move out of the way. 
      • With just ~200 Health on your characters it can be hard to melee unless you can overwhelm it quickly with powerful attacks. Some tricks to use are to cast a Heal spell before your Health bar drops too low, as the heal-over-time will absorb some incoming damage as it heals.
      • It moves slowly, so outdistancing it by running is easy to do, as is running out of melee to heal.
      Invincible Imps
      The Imp With Ring (Guide page 104) and the Imp Farmer (Guide page 108) cannot be killed by monsters on this map, so if they pull several Earth Elementals, either reload or stand off and shoot the weakest ones before the Imps kill them, causing you to lose any potential XP.

      Pickled Herring Tavern

      Sir Patrick's Gems (Guide page 132)
      In the chest with the Crystal Fragment, first take the Crystal Fragment, then close the chest. One random item will be generated and placed in the chest. Re-open the chest to get that item before taking any of the gems to talk to Sir Patrick.

      reade more... Résuméabuiyad

      Beyond Divinity Unofficial Elite Hardcore Strategy Guide - Character Generation

      Click here for a list of our Beyond Divinity Elite Hardcore Strategy Guide posts.

      We recommend you buy Beyond Divinity from Good Old Games (GOG) as you can get more prompt support. Also, it is an older game, and GOG offers a risk-free money-back guarantee.

      Character Generation
      We build and play our characters to use the minimum number of resources -- that is, no potions or other emergency/expendable resources unless necessary. Obviously for convenience you can use them like water since there are literally hundreds to acquire. Normal Arrows are also so plentiful (you end up with literally thousands after Act 1, possibly over 10000) that we can use them, although whenever possible we will not -- just because we're stingy that way.

      We recommend a custom character to start, with all stats zero (yes, zero) except Constitution 10 and Agility 4.
      • Constitution also gives you Stamina, which also gives you:
        • You can fight for an extended amount of time while Sneaking, and may regularly do so in order to pull less enemies.
          • When you run out of Stamina while sneaking, you move very slowly, probably too slowly to escape back into hiding or retreat from other enemies while still Sneaking.
        • The ability to run farther, longer.
          • This saves you a heck of a lot of time as you traverse the game's vast geography.
          • It can let you outrun an enemy, getting you out of a suddenly bad situation.
          • Do not count on chasing down an enemy until they run out of stamina and start walking, since more often than not they will just lead you through enemy lines and archer fire. Some enemies also seem to have a stupid amount of stamina and can run a very long distance.
        • You can use Whirlwind Attack several times. Sometimes on Hardcore difficulty you will be swarmed because enemies are doubled. Sometimes you will want to be swarmed to clear out enemies quickly.
        • Most importantly, you can Sneak for a long time and scout deeply.
          • Instead of blundering into the enemy and just reacting, scout first and take the initiative.
          • You can fight most encounters in Sneak mode, reducing the number of enemies you pull toward you.
      • Agility helps you hit. We are not looking to acquire a lot of Evasion.
        • Evasion helps you dodge hits, but Evasion is limited and in any case useless against magical attacks that either always hit or are area effect so they don't need targeting.
        • Evasion is pretty costly to acquire through stat points so we won't initially look at getting a lot of Speed to increase Evasion.
      • Agility increases damage with key weapons (Guide page 489).
        • Same with Strength, but the derived stats you get from Agility are much more useful than merely being able to carry more gear.
        • You can further leverage your investment in Agility with the Sharpen Weapon skill -- Knives are your best weapon, followed by Spears. Bows are superior to both because you can snipe easily in this game.
      An interesting alternative is to develop the Death Knight aggressively as a Wizard and sink points into Intelligence for aggressive spellcasting AND tanking support in combat: A deep Mana pool means a lot of consecutive Healing spells are possible while the Hero keeps whacking at the boss enemy (or tough, hard-hitting enemy) unmolested.
      Even without a lot of Mana, this is a viable strategy in the game when you encounter enemies that are unexpectedly strong and/or hardy, such as the Arena Cell Ghosts or Gargoyles in Act 1.
      Since we are playing Hardcore difficulty with minimal resources, we used wizardry as a secondary attack only as drinking Mana potions was to be avoided. Therefore our character builds were Agility-fighter with magic secondary.

      Obviously there are alternate ways to get a combat-viable character, such as using Warrior skills to get bonuses to weapon use. However, by carefully building a character with good stats, you can instead save a lot of Skill Points for optional skills such as Pickpocket and Lockpicking instead of constantly unlearning and relearning skills.

      As you gain levels, aim for:
      • Enough Intelligence to cast Heal (58 Mana) once or maybe twice. In general, you should have tactics and patience (or Sleeping) to not get yourself into so much trouble that you need to heal more than once in combat, or at all.
      • More and more Agility.
        • For the Deathknight, leave Strength at 0 for a long time because the only armor that requires it will be belts. Later in the game, depending on Agility-based weapon stat requirements, a bit of Strength may be necessary depending on your luck at acquiring weapons. Your benchmarks are 4, 9, and 16 -- the basic requirements for bows and staves.
        • For the Hero, you can get away with 0 Strength for a long time as well but you will miss being able to wear some armour (Guide page 368+) along the way.
          • That said, armour Strength requirements are ridiculous -- some pieces have requirements in the 20's and 30's in exchange for increased Durability, but apparently provide the same protection as a no-Strength-requirement version of the item.
          • Aim for around 16-20 to be able to use most of the Agility-based gear and some set item armor.
        • Strength of course increases damage for most weapons in some way, but so does Agility. And combined with [Warrior > Craftsmanship > Sharpen Weapon], keeping your Agility high means you can outpace most other weapons while getting the benefits of other Agility derived stats.
          • With Sharpen Weapon and specialization in Agility, even a Kitchen Knife (after Agility bonus) can be one of your best weapons, on top of having no Strength requirement and extremely low Accuracy / Speed / Initiative penalties.
          • Strength of around 9-16 should be good enough to use the better Bows, which cannot be Sharpened. But if you develop a deep enough Mana pool with Intelligence, you shouldn't need ranged weapons once we get some cheesy Nature spells and can afford a deeper Mana pool in the mid-game (around late Act 2 or Act 3).
        • Your first target number is 65: (40 to use a Ranaar Dagger or Ranaar Spear) + (25 for Sharpen level 5), which is the highest level you can learn in the main game. Since you are unlikely to get either of these, you can probably leave Agility at 40-50 for now and work on Strength if necessary, some Health, then Intelligence.
        • After this, your next Agility target number will depend on what weapon you want to use. Enchanted weapons can often have a much higher Required Agility than the unenchanted versions.
          • 200 Vitality, although you can get away with not developing this for a long time.
            • 200 is the target number because 1 level of [Wizard > Body Magic > Defensive > Healing] restores 200 Vitality over several seconds.
            • Because it restores Vitality over time, you may want to consider adding a second level of Healing instead of more Vitality. It will heal more Vitality than your maximum Vitality, but in an intense fight, as you are healing enemy damage is taken off the 400 total, so you will in effect have more than 200 maximum Vitality shortly after you cast.
          • About 116 Mana, to cast level 1 Healing twice in combat. Increase this to 180-360 if you want to cast maximum-power Paralysis in Act 2. Work towards to 308+ in Act 3 so that you can cast some of the more powerful [Wizard > Shaman Magic].
            • In the early game we will not relying much on magic primarily as that can force us to start drinking too many Mana Potions in mundane combat. Instead, concentrate on tactics to divide and conquer whenever possible and use melee first, magic as backup, bows if you have to (since arrows are expendable compared to Mana, which regenerates).
            • You should still get Focused Attack in Act 1 to level 5 in order to shoot at things through obstacles.
              • It always hits when you have a target selected, so it is more reliable than arrows, which automatically miss if the target moves sideways (and therefore has a good chance of missing no matter your Accuracy if the enemy is running); and which are stopped by cover.
            • If you are exploiting the Battlefield then get it high quickly so that you can learn the powerful and cheesy area effect spells in Act 2 and start using those right away.
            Permanent Stat Boosts
            • Throughout the game there are permanent stat boosts that you can use on either the Hero or the Deathknight. I recommend concentrating on the Hero so that they have excess points to increase Strength to 40-50 and use all gear. Also, after the main game, you won't have the Death Knight with you if you want to continue playing in the Battlefields.
            Act 1
            +1 Survival (Guide page 28)
            +60 Vitality (Guide page 36)

            Act 2
            +60 Mana (Guide page 129)
            +3 Luck to both characters (Guide page 106)
            +7 Intelligence (Guide page 112 -- apparently NOT permanent? Bugged?)
            +0 permanent potion using Holy Water (Guide page 99) - theoretically possible but you cannot learn Alchemy to the required level 4 in the main game

            Act 3
            +1 Constitution (Guide page 175 - reward from Rebel Elder)
            +1 Survival (Guide page 170)

            Act 4
            +7 Intelligence (Guide page 202 -- apparently NOT permanent? Bugged?)
            +60 Mana (Guide page 222)
            +60 Vitality Constitution (Guide page 222)
            +25 Stamina (Guide page 222)
            +1 Constitution (Guide page 222)
            +0 Permanent Restoration Potion (Guide page 246 -- Apparently does nothing permanent. Bugged?)
            +60 Mana (Guide page 246)

            Initial Skills
            • If you accept our recommendation to use the Battlefield in only a very limited way, then consider going with Warrior/Warrior to get access to [Warrior > Craftsmanship > Repair] right away.
              • It is otherwise only available very late in Act 1.
              • You only get it up to 2 levels, but that is good enough till you can learn it to 5 levels in late Act 1.
              • On the other hand most of the item drops are the same type of weak item, so you can just keep swapping with new weapon drops until you get the Repair skill.
            • Otherwise, go with:
              • Wizard/Wizard if you want access [Wizard > Body Magic > Defensive > Healing] at the very start of the game.
                • Limited benefit except if you want to keep your Constitution low to begin with, and may therefore have trouble with Fergus.
              • Survivor/anything to get the important [Survival > Thieving > Sneak] skill early on, as well as the useful [Survival > Thieving > Poison] skill.
              • Except for Repair, you can learn everything you need fairly early in the game.
            Experience Optimization
            We will not be trying to optimize experience gain in a complicated way. For example, since quest XP is fixed, it is worth more when your character is at a higher level because if you can keep your level low, you can possibly get more XP from creatures. This is too much work to really try to optimize, so we won't. Your results should still be roughly the same whether you do this or not.

            Sneaking
            • Sneak reduces an enemy's detection radius (red area around enemies when your party is Sneaking) to [normal radius / (sneak level + 1)]. There is therefore diminishing returns when you get more levels, but some enemies have a very wide detection radius. At least 1 level is recommended against enemies that shoot or cast spells in Act 1.
            • You pretty much want to start Sneaking when there might be ranged enemies. This lets you check where they are and decide on your strategy. Very quickly the game starts with potentially overwhelming archer support and you will need either a lot of band aids (vitality potions) or good strategies. Sneaking is one of the ways to force them in to melee before they can fire (see our notes on Archers and Skeleton Mages in Act 1).
            • Also, you may want to Sneak even when fighting enemies as it helps to isolate them so you can fight them one at a time. Having a high Constitution (we started off at 10+) means you can do this easily and possibly even use Whirlwind Attack frequently as well. Also, you don't drain Stamina when Sneaking if you are standing still, so don't be afraid to park yourself and wait for one or two of the enemies that were in a clump to wander farther off from the pack.
            • You can also pull enemies one at a time while Sneaking by hitting them with a ranged weapon or spell. Any hit causes them to run toward the source briefly.
            • Sometimes there are forced cutscenes as soon as a character is spotted. Sneak can reduce that sighting radius, allowing you to take some action (such as Pickpocketing) before the dialogue cutscene actually begins.
              Poison
              [Survival > Thieving > Poison] is extremely powerful in the early game but also has drawbacks:
              • It does not stack.
                • So two characters with Poison won't inflict more damage, nor will repeatedly hitting the same target.
                • If you use Poisonous weapons later (Guide page ), they won't stack either. Moreover, your Poison skill takes precedence over the continuous poison damage from Poisonous weapons, whether your skill does more poison damage or not.
                • Therefore, have only 1 character get 1 level of it.
                • Also, do not get increased duration because hit-and-run is very slow in this game.
              • It often does not kill. Instead, at 0 Vitality the creature starts to vomit, but is helpless during that animation. If left alone it will function with 0 Vitality and, like all creatures, start regenerating Vitality over time.
              • You do not have to hit. Even a "Missed" result can inflict poison.
              • It only applies to melee weapons, but Spiritual weapons like Bark and Willow can inflict Poison.
              • It applies to all targets hit by Whirlwind Attack.
              Caching / Hoarding with Little or No Strength
              Since we are deprioritizing Strength, you may wonder how to carry stuff. Obviously, you don't. Know how to use Chests:
              • Some chests are 0 Weight when the lid is open. Choose those chests if you can, although ultimately it won't matter since you'll be overloading them like Portable Holes. Don't take Barrels because if you accidentally click to open them with a weapon drawn, you'll smash the Barrel.
              • You can pick up a check by click-and-hold, drag it unreasonably far and "throw it" as long as you have line of sight to the destination location -- you'll know you can put it there when there isn't a red "X" where you are hovering your mouse. Weight is not an issue.
              • You can put a chest of any weight on a character. They will obviously be over-encumbered if it is too heavy, but that is not critical. You can then:
                • Have the other character walk to and use an area transition, such as a ladder, and both characters will appear at the entrance of the next area, regardless of their distance to the area transition point.
                • You can drag any inventory item, including your massively-overloaded chest, to another character by dropping it on their portrait. Distance is irrelevant.
                  • For unclear reasons, sometimes a container cannot be dragged into the inventory of a particular character, even though it can be put in the inventory of another character. Try changing containers or putting it in another container first.
                • You can put containers inside containers. Therefore, use as many containers as you like to keep things sorted.
              Once you have a Battlefield Key, set up your containers in the Battlefield entry location and teleport to the Battlefield whenever you need to sell or cache gear. This will of course re-set your location if you are exploring in the Battlefield itself, so you will have to revert to heaving chests around while you are exploring the Battlefield.

              Once you have a Summoning Doll, you can use it like a container and just summon them whenever you need to put stuff on it. Obviously it won't be very useful in combat, but the Skeleton doll isn't that necessary anyway.

              To pack up everything between Acts (after which previous areas and Battlefields will no longer be accessible), put all your chests into a single chest, and put that chest on your Summoning Doll. Unsummon the Doll and summon it again in the next Act.

              Good Loot with No Luck from Survival
              Sneaking around to set up our fights means Resistances and Evasion are less important, which in turn means no Survival or Speed stats. But Survival also gives you Luck, which supposedly gets you better loot.
              To make up for it, regularly check for gear in the Battlefield that gives you bonuses to Luck. In Act 1, the maximum bonus is +5 Luck; in Act 2 it is +10. If you are not exploiting the Battlefield, then you are basically out of luck and relying on a good character build.
              Loot is not generated until you mouse-over a container. Therefore, an exploit is to not mouse-over any containers until you save the game. That way you can reload until you get decent loot from a container (same exploit as in the original Divine Divinity). This, however, can be very tedious. If you are going to use it, save it for the best containers, the ones that seem to only drop great loot to begin with.
              If you experiment with the mousing-over exploit, you will also notice that the range of loot is very wide even when you have 30-60+ points of combined Luck from the Deathknight and the Hero, so it is not really clear how much Luck is required to make a difference.
              You can experiment by editing ...\Beyond Divinity\Common\CharSelStats.dat to create a starting characters with 200 Survival (which gives +100 luck) and watch no significantly better loot dropping from creatures and barrels.

              Pickpocketing
              One way to use Pickpocket on merchants is as follows:
              • Amass a lot of money any way you can. Sell potions if you like because you will get enough profit to buy them all back anyway.
              • For a particular merchant, buy up everything they have in their inventory.
                • If the value of everything they have is less than the value of a particularly pricey item (e.g., Yit-Iceri from Act 1 - Guide page 45), just barter with that item. You just want to leave the merchant with only one item in inventory that you can steal.
                • The maximum amount of money a merchant can have in inventory is 50000, which is also the maximum value of a stack of gold. If you need to rob them of more, try to get a single item or large stack of something worth more than 50000 -- the goal is to leave the merchant with just one stack of something, and steal that one stack.
              • Since you just bought everything, all they will have left is a single stack of Gold, instead of a mess of overlapping inventory items hard to sift through. Pickpocket that stack of gold.
                • You have a limited number of pickpocket attempts on each target based on your Pickpocket skill level. Stealing in this way allows you to clean out a merchant with a single Pickpocket attempt.
              • Merchants eventually reset their inventory (not entirely clear when this happens). So you can repeat this until you run out of pickpocket attempts on a particular merchant, then slowly sell back to them the stuff you stole.
                • Battlefield merchants reset their gold every time you enter the Battlefields, so use that convenience to clear out your inventory instead of hauling it around for barter eventually.
                • To quickly sell items, barter them for Normal Arrows, which Battlefield merchants may have in huge quantities (sometimes in the thousands). Normal Arrows always buy and sell at 1 gold piece each, so they are as good as gold pieces.
              • In some rare cases, a "merchant" (such as the chess-playing guard -- Guide page 63) will not have what you traded them in their inventory afterwards. In that case, trade with something they had. In the case of the chess-playing guard, he has Normal Arrows, so buy up everything he has by bartering with your own Normal Arrows. Then Pickpocket that stack of arrows.
              If you use the Battlefields, this is both tedious and unnecessary: You will literally have hundreds of thousands of gold pieces by the end of Act 1. Even without the Battlefield, after Act 1 you could have over 100,000 gold unless you spent a lot of it.
              For this reason, there's little urgency to pickpocket anyone. Just do it once before you leave an Act or before the merchant becomes inaccessible.

              Also note that the range on Pickpocket is ridiculous -- As long as you can target them with your cursor, you can use Pickpocket on them. Use this fact to Pickpocket targets that will disappear after a cutscene or before they turn hostile.

              reade more... Résuméabuiyad

              Beyond Divinity Unofficial Elite Hardcore Strategy Guide - Act 1

              Click here for a list of our Beyond Divinity Elite Hardcore Strategy Guide posts.

              We recommend you buy Beyond Divinity from Good Old Games (GOG) as you can get more prompt support. Also, it is an older game, and GOG offers a risk-free money-back guarantee.

              Act 1
              • Because many enemies level up with you (see our post on Battlefields) so there's virtually no chance you'll be unable to get XP from them, there is no point in struggling with very hard encounters early in the Act. Instead, come back later.
              • Using the Battlefields but without using Wisdom, we exited Act 1 at Level 14 without using the Wisdom skill.
              • Without Battlefields, but having killed all the Rats, we were level 11.
              Character Development
              If you want to play with magic and are willing to devote Skill Points to it, 5 ranks in [Wizard > Elemental Attack > Focused] can make for some handy sniping against archers and Skeleton Mages. If you are exploiting the Battlefields, you can often one-shot all the shooters there with rank 5 magic.
              Once we reach Act 2, however, we will quickly switch it out powerful [Wizard > Shaman Magic].
              There is no need to use [Focused > Instant] with lower damage rather than [Focused > Missile] since typically you will be using all ranged attacks while Sneaking, so time isn't often an issue.

              Rats
              After being hit initially they flee, then come back. If you are in melee you often end up chasing them into other enemies, or while chasing are hit by other enemies. So just wait and they will come back.

              Water
              "Mugs of Water" and "Bottles of Water" act like Health Potions, but heal only 10 Health each. Also, there is a limit to how much you can drink before you are "full". They do not act like Food and cannot let you camp/sleep.

              Act 1 - before Fergus

              Act 1 - after Fergus
              Fergus
              Unless you start killing Rats as well, you will not get to Level 3 before you confront Fergus.
              • By killing Rats you can get ahead now, but by the time you reach the Citadel levels, you will still probably only be level 7, but closer to level 8 than if you didn't kill any Rats.
              • What one extra level can get you is +5 Agility for both the Hero and the Deathknight, for more reliable hitting. This is a significant advantage!
              • Also, if you can get to level 3, and if you chose Wizard/Wizard, the Deathknight will also have access to [Wizard > Body Magic > Defensive > Healing].
                • You can also use the Difficulty-change exploit and start at Very Easy Difficulty for 2 Skill Points for each of the Hero and the Death Knight at the start of the game, then change the Game Difficulty to Hardcore (or whatever you like). You will retain those Skill Points.
              • Whether you kill Rats or not, you should still be able to defeat Fergus, possibly without having to use any potions at all. In the pictures on the right, we show before-and-after of killing Fergus -- Hardcore Difficulty, level 2 (did not kill any Rats), and we reached level 3 on killing Fergus.
              Against Fergus, you can maximize your chances of survival by doing the following:
              • Make sure the portcullis separating the Cell Block and the Torture Rooms is open.
              • After the cutscene with Fergus, flee. Make sure he is following closely and lead him to the hole that exited from the Flight Tunnel into the storage room (Guide page 26, location 1).
              • Go through the Flight Tunnel and out into the Cell Block. Go back to the Torture Rooms and Sneak past Fergus if necessary -- don't alert him yet.
              • Grab the Hunter's Knife from the room in which you found Fergus talking to Plox; this will be your best weapon for a long time. Trigger the painting to open the secret Shrine.
              • Position the character who does NOT have the Poison skill in the Shrine.
              • Have the character with Poison hit Fergus, then run to the Shrine where you will fight him.
              • Fergus will attack one person at a time. Positioning one character behind Fergus seems to help with hitting him.
              • When Fergus's target is dangerously injured, retreat that character and try to get Fergus to engage the other one. You can try running out of the room and around a corner. Once Fergus is attacking the other character, he won't switch targets. Bring the injured character back and keep attacking.
              • When both characters are low on Mana, touch the Mana Shrine in the Shrine Room to restore party Mana to full. Do this especially if you have the Healing spell. Obviously, use the Shrines first instead of your potion resources.
              • Fergus will heal himself during the fight. He will do so again when his Mana eventually recovers enough for him to cast his spell again, so you can't really leave this fight unless you want to start all over.
              With Level 3 characters and 1 character with 1 level of Poison, I killed Fergus using no Shrines and no potions.

              Archers
              In the Battlefield as well as in the rest of the main game, there will be "archers". These can be Skeletons with bows, Skeletons that throw knives (but drop arrows when they die) or Flying Eyes that shoot fire arrows. Typically they drop a quiver of 20 arrows, minus whatever they used.
              Therefore, it is to your advantage to kill them without their firing a single shot.
              You can do it in various ways:

              Sneak
              • One level of Sneak in Act 1 will reduce their sight radius enough that if you go straight for them while Sneaking, they will put away their bow and engage you in melee because you are too close.
              Bow or Magic
              • You can Sneak out of their sight range and shoot them. If you are using [Wizard > Elemental Attack], that can go through walls and you can blindly fire into the fog of war instead of on a creature (which will cause it to home in on that creature and unerringly hit). If you are using [Wizard > Elemental Attack > Focused > Missile], it will hit the first enemy it encounters.
              • At level 5, [Wizard > Elemental Magic > Focused > Missile] can sometimes 1-shot most archers in Act 1. If you did not exploit the Battlefield, then Skill Points will be much tighter and you may have to just use a bow if you don't want to wait forever for your Mana to regenerate.
              Ambush
              • Wait at a corner or doorway (preferably with the door closed), then wait for them to walk into you, or charge out and kill them when they are close (before they switch to their ranged weapon and fire).
              Sneak and Rush (Very tricky to do)
              • If you have no levels in Sneak, then at the very edge of their sight radius, rush them: Pause the game, click them as the target, right-click to turn off Sneaking, then unpause the game. If you can rush them in a straight line (and preferably if their back was turned to you), you should be able to get there just before they fire. They will instead switch to melee.
              Ghosts
              • You will probably be around level 4 when you first encounter them in the Arena Cells, and they will be level 5 or 6 and hit really hard with Spiritual attacks.
              • Either leave them for later in the game or release them and use Sneaking to isolate one at a time. They hit very hard and are very resistant to all [Wizard > Elemental Magic].
              • You can melee them if you have Agility of around 20+, but it is still sometimes chancy. Nevertheless, it is generally possible to clear them all before proceeding down the pit in the Arena (and without farming for levels in the Battlefield).
              • Sometimes if you exit the game and load a saved game, a duplicate monster appears. This has been noticed at the Arena Cells where on Hardcore there are two Ghosts.
                • You can kill one, save, then reload and there will be two ghosts again. This is probably related to Hardcore mode typically having two times as many enemies (except those that have dialogue). It may possibly depend on which of the two ghosts in a cell you kill.
              • If you get in trouble, you can try luring them into one of the lever-locked rooms and then dashing out and locking them inside.
              Arena Guard

              The second Arena Guard ("I never saw prisoners so eager to enter the fighting arena before.") will be attacked by his allies behind if they spot him and you don't kill him first. Hmm...

              Rooms Controlled by Lever
              Some doors are closed and locked by levers. You can use this to isolate enemies and dispatch them without having other (especially archers) wandering out of the room.
              In the picture below, we positioned the Deathknight at the lever while the Hero pulled one Guard out of the room. As soon as the guard was through the door, we hit the lever with the Deathknight, locking the rest in the room until we could deal with the single Guard.

              pull an enemy and isolate them by locking door

              Something else interesting you can do at this room (and elsewhere) is to spot the archers before they are hostile, and Pickpocket their melee weapons from them (see below). You cannot steal anything currently equipped, nor can you steal from creatures already turned hostile.
              You can decide whether this is "magical Pickpocketing" and the Survivor's advantage in exchange for spending Skill Points; or a cheesy exploit.

              spot and pickpocket melee weapons from archers

              Once they are hostile, they use their already equipped bows first. If you reach them in melee, they have no melee weapon to switch to, and simply freeze -- they don't flee, and neither do they fire their bows (see below).

              archers without melee weapons freeze in melee and do not shoot

              Summoning Doll - Skeleton
              • Be very careful about your skill choice because you get no Skill Points back when you Unlearn a skill.
              • Don't develop the Skeleton yet. It is basically good as a pack mule and nothing else. More than likely it will just slow you down with micromanagement.
              • When summoned, it remembers whether it was previously Sneaking. This is separate from whether the party is currently Sneaking or not.
                • Therefore, if you are Sneaking and summon the Skeleton, it may not be Sneaking and will immediately give away its location, possibly pulling enemies to you because it is summoned right beside you.
                • You can therefore also send a non-Sneaking skeleton off to draw away the enemy while you are yourself Sneaking.
              • When you are fighting a lot of weak opponents, you can set your characters to Aggressive so they automatically engage nearby hostiles. However, the currently selected character (party leader -- you always have one) is always under manual control. You can get around this by summoning the weak Skeleton which you probably don't want to run around and fight, then select it as the party leader. Set the Hero and the Death Knight to Aggressive, and let them run around. They can go far away from a Summoning Doll without causing it to vanish.
                Taxlehix
                • When Tax asks to play a game, you can press "X" to cancel. This leaves him in the level as a merchant instead of letting him disappear. You can talk to him any time later to "play his game" by choosing the appropriate dialog option, and get the XP for it.
                • Tax can teach [Survivor > Thieving Skills] to level 10, which is the highest level in the main game. We discussed Sneak, Pickpocket, and Poison in our Character Generation guide. You can get Lockpicking cheaply now, but you can safely delay getting the skill, if at all. The problem is the ludicrous Skill Point: Reward ratio. Just the cost of unlearning this skill will probably put you in a deficit considering what you got from the barrels and occasional chest. If you want good loot, just use Pickpocket on merchants.
                Skeleton Mages
                These are irritating. You can treat them like Archers except they flee when you are close.
                • With 1 level of Sneak, they will flee as soon as you are in their sight radius; this also causes them to lose sight of you, so they just yo-yo back and forth that way. This effectively keeps them from attacking you, although if they finally run out of Stamina and stop running, they may wander in for melee or to cast spells.
                • I used bows against them in order to short-cut waiting for Mana to regenerate since I wasn't aggressively developing Intelligence yet. This is probably the fastest way to kill them especially when they are clumped, since an arrow will hit the first enemy that it encounters so you can select one of the ones in the rear and hit others in between with stray shots.
                • Do NOT chase them with melee if you are using a bow or crossbow, since that can cause them to run out of the way of your arrow, making you automatically miss.
                • Guide page 48 describes a way to basically exhaust their Stamina then close for melee. However, that can sometimes backfire since they are strong in melee with Spiritual weapons that can hit harder than their spells.
                skeleton mage treasure always drops a magical itemSkeleton Mage at Illusory Door
                (Guide page 43)
                • The spike traps along the route are probably the first you will encounter. They actually deal damage over time, so if you run out of the area you will take less damage.
                • After defeating the skeleton, a chest will appear near where the illusory door had been. This chest apparently always gives an enchanted item and is therefore great to exploit with the save-game-before-mousing-over-the-container trick. Loot is not generated until you mouse-over a container.
                how to reach the dead imp in mazeDead Imp
                Northwest of the teleport trap destination (Guide page 41, map location #10) is an inaccessible dead imp (see picture on the right). If you hover your mouse around that location and beyond, there are other items. E-mail me if you know how to reach them.

                Barrels of Poison
                In the Poison Gas Room (Guide page 43), there are two barrels of Poison near the entrance. You can put them in inventory. But if you place them on the floor, the poison is released near them for fast poison damage. You can therefore use these as grenades, albeit heavy ones to lug around. More in Act 2 in the Imp Village.

                Citadel Levels
                After quests are finished, take off your armour and kill everyone. Often if you have already spoken with someone, changing armour right in front of them won't turn them hostile. Exit to the Battlefield and come back without the Citadel Guard Armor disguise on the Hero, or move away and then back again.
                Some Guards also won't become hostile until triggered by an event, such as their superior officer noticing the Hero and ordering an attack.

                Deathknight Patrols
                If you exploited the Battlefields, when you first enter the Citadel Levels you should be able to defeat the Deathknights one at a time without potions. Otherwise you will probably be level 7 but close to level 8, and rather short on Mana and weapon damage. In such a case, instead of tediously killing them with attrition tactics, go get your weapon improved and come back later. Either way, there are various tactics you can employ:
                • Fight-and-Heal
                  • Fastest but riskiest. Make sure your weapon damage is high, around 80+ or you might not get through their armour. Either one character has a good weapon and the other has a deep Mana pool to Heal several times, or both have good weapons and both have moderate to deep Mana pools (be able to cast Heal at least twice one shortly after the other). If your Agility is high (25+) you should be able to hit reliably for this to work.
                    • If you followed our Character Generation suggestions, at least one character is a high-Agility warrior. You can quickly get a significant damage boost for your Hunter's Knife (yes, that weapon from Fergus's room is likely still your best weapon for a high-Agility character) with the [Warrior > Craftsmanship > Sharpen Weapon] skill either from the Weapons Officer on this level (Guide page 54), or the Battlefield merchant if you are exploiting the Battlefield. Once you have a damage rating of about 100 the Deathknights should fall quite easily, although a Healing spell or two will probably be necessary.
                    • If you skipped developing Strength, the Hero should have points for high Agility (which also contributes to damage) as well as good Intelligence for a decent Mana pool.
                    • Remember that Healing spells work over time, so if you are under attack you can cast it when your health bar isn't completely empty and the healing will offset incoming damage.
                  • Basically you are using the same tactics as you used against Fergus except the Deathknights are more inclined to change targets, making it a bit easier to handle when you need to switch who is coming under attack.
                  • If you run out of Mana and Health, run and Sneak to hide. Wait for your Mana to come back, then Heal, and possibly wait some more before finishing off the Deathknight.
                • Snipe
                  • Stay out of sight with Sneak and shoot.
                  • This can take a long time if your bow or crossbow damage is low. And it costs a lot of arrows. There is also a lot of micromanaging to stay hidden.
                • Snipe with Magic
                  • Same as with Sniping (above) but more reliable since magic always hits. Depending on your Mana pool and skill level, this can take a while but Health Regeneration is slower than Mana regeneration so with a deep enough Mana pool on both characters you should be able to kill a Deathknight Patrol safely.
                  • A Wizard build favouring Intelligence first over Agility can therefore be better against this particular challenge.
                There is an excellent chance one of them will drop a Two Handed Bastard Sword with NO stat requirements, which provides interesting options for a skill-based Warrior build (instead of one using raw stats like Strength and Agility).

                mutant stats from Identify Monster level 5

                Mutant stats from Trophies
                Weapon Officer - Identify
                The Weapon Officer (Guide page 54) teaches Identify (both Equipment and Monster) to level 5.
                Identify Monster is really only useful if you are stuck trying to determine how to damage a particular creature. After killing at least one of a creature you get an entry under "Trophies". This entry does not include damage, and many of the stats differ from what you get from Identify Monster -- it's therefore hard to tell which is correct, and in any case generally not important. In the unlikely case you are particularly stuck about how to kill the first specimen of one type of creature, learn the skill and unlearn it later.
                In the pictures on the right, you can see the difference between the stats provided by the skill and stats provided under Trophies.


                Parcours
                Before finishing the Parcours in the Drill Grounds (Guide page 58), check first to make sure none of the guards have accidentally wandered in, since the Parcours will be closed afterwards and you won't be able to kill any guards inside.

                Barracks - Bribing Guards
                Past Rashax's quarters is another "papers please" checkpoint (Guide page 65). Strangely, you can still choose the bribery option and get XP for it even with 0 gold in your inventory. The encounter plays out normally.

                Samuel
                However you deal with Kegan (Guide page 65) outside General Bram's Room (including not dealing with him at all), Samuel will not change his mention of it when you meet him. You go back to Kegan after speaking with Samuel and nothing will have changed.

                reade more... Résuméabuiyad

                Beyond Divinity Unofficial Elite Hardcore Strategy Guide

                This is the table of contents for our Beyond Divinity (unofficial) Hardcore difficulty Strategy Guide. Not only does it walk through playing the game on Hardcore mode, but it gives you tips on how to play it "elite" with special insights and tips into the game.
                Our game version is 1.500.

                First, where to buy:
                Although you can buy the game as a box with CDs from Amazon, I recommend you instead buy Beyond Divinity from Good Old Games (GOG) as you can get more prompt support. Also, it is an older game, and GOG offers a risk-free money-back guarantee.

                Next: Get your free copy of the Beyond Divinity version 1.3 Official Strategy Guide. It is incredibly basic but still very useful for revealing a lot of undocumented information in the game. We will not be repeating information from the guide but rather appending information for your consideration -- and will therefore refer to the Guide from time to time.

                Topics

                reade more... Résuméabuiyad

                Company of Heroes Walkthrough - Invasion of Normandy - Mission 12 - Mortain (Expert)

                Company of Heroes Walkthrough - Invasion of Normandy - Mission 12 - Mortain

                Click here for the index of our Company of Heroes Mission Walkthrough Index and our gameplay paradigm.

                Mortain is quite a difficult mission because resources are tight, and if you do not want to recycle a lot of your initial infantry, your unit choices are also very tight. Because we do not sacrifice units unnecessarily and try to keep all units alive, we were basically stuck with the initial units. This may handicap you later in Mission 13 - Mortain Counterattack because you start with the units you finished with, plus initial reinforcements of three tanks, which puts you well over your Population Cap, further limiting your ability to choose units.
                In the screenshot below, you can see our final units after defeating the final wave with a bit of time to spare. All objectives completed.


                .
                Part 1 - Initial troops and Command Points

                You do not have access to heavy tanks, and your HQ / Retreat point is far to the west. You do have a single M2 105 mm Howitzer which gives you artillery bombardment for free, but with an 85 second cooldown time. Use this early except in the second half of the mission when you will want to shell tanks.
                The enemy will have increasing amounts of infantry, some light vehicles, and then heavy tanks.
                There is a small cache of resources around north of middle of the map, hidden behind some trees.

                Instead of building any infantry units, man some of the provided AT guns. Machine Gun are not as useful so you can generally ignore them and use only the ones initially provided. Be careful not to completely use up your two veteran Riflemen squads grabbing heavy weapons. Save some Riflemen to pick up German mortars when two teams show up during one of the waves.

                For units, build one or two halftracks right away and change them into MGMCs. These will be your earliest anti-infantry units and you will run them around as "firefighters" against infantry -- that is, race them to where the enemy approach. Once a couple of waves go by, you should be able to tell where the enemy consistently come from and park them at the ready.
                Always have the MGMCs take point to protect your infantry, who should be doing pretty much nothing except building free structures like tank traps (once you get the Infantry Company: Defensive Operations ability) when they are idle, or manning AT guns.
                One additional unit of Engineers will probably come in handy, so build them after your first or second halftrack.
                Use your first halftrack to relieve the Rangers to the west and add them to your units.

                While building the halftracks, grab strategic points and start putting Listening Posts on them, starting with Fuel (to quickly get more vehicles) and then Ammo.
                Engineers should start blocking roads with Tank Traps. You don't have a lot of resources yet, so just build free structures to keep collecting Command Points. Aim to quickly get Off-Map Artillery Support to give you a second bombardment ability against enemy tanks.

                As resources come in, start adding M8 Greyhounds and fully upgrading them.
                Once your Population Cap is full, redirect resources toward building Machine Gun Emplacements. These are priceless against heavy tanks because they act as sturdy decoys to soak damage, allowing you to position AT guns further behind them and generally safe from being shot at because the Machine Gun Emplacement is in front and closer to the enemy. In this way if you know where the enemy vehicles are coming, you can shield your infantry from them with a no-population-cap structure.
                Note that even on Expert Difficulty your Greyhounds can typically take a couple of shots to the front before having to retreat, if you desperately need some cover for your infantry (e.g., for your Engineers to build something), to stall a tank for bombardment, or to just stall the enemy advance.

                Part 2 - Defending

                Initially, spread out your vehicles to intercept and delay/pin infantry as soon as possible and direct vehicles that are not engaged to the incursion location.
                Fighting infantry-versus-infantry is a losing game on Expert Difficulty because the enemy just needs to get close to flame your units with their Pioneers, or they start sniping them in the later game. For the same reason, Machine Gun Teams are useless as the first line of defense as you can't pull them back fast enough.
                MGMCs and Greyhounds can generally out-last any infantry if they can be kept pinned but enemy infantry start to have Panzerschreks so a single vehicle is dangerous to field later in the mission. They can pin units and thereby protect themselves from being hit by anti-tank weapons, but it's better not to chance it.

                As enemy waves approach, it is important to somehow get them to stop moving so you can bombard them with your Howitzer, your Off-Map Artillery Support power, or mortars. Bombardment will win this mission for you in the mid to late game.
                To get them to stop, either plant a vehicle in front of them or, in the case of tanks, have something disposable for them to shoot at, such as a Machine Gun Emplacement or a Listening Post. Even an armour-skirted Greyhound can be a temporary shield if necessary. Once they stop to shoot, call in a strike as soon as possible. Mortars are also very useful here. AT guns are vulnerable but if you can put them behind a disposable shield, they also do very well against vehicles.
                Infantry should not engage unless they really have to -- even the Rangers, which are really your emergency team against tanks.
                Keep building Machine Gun Emplacements to help pin the increasing amounts of enemy infantry.
                Reinforce infantry in the field when you can, using your MGMCs.

                In the early game, bombard with your 105mm Howitzer and go back to building or repairing. In the mid-game when tanks start showing, save your bombardments for them and try not to use infantry Grenades too often as you want to save Munitions for Off-Map Artillery Support, especially when multiple tanks start coming from different approaches.
                When you get the chance, mine the roads near the spawn points. If you are worried about infantry getting attacked suddenly, send a Greyhound to do it.

                Alternative: Turtle

                The video below (difficulty unknown) shows an interesting passive Mortain defense where infantry basically huddle on the hill and defend until the timer runs out. I haven't tried it on Expert, but if you find a wide perimeter hard to coordinate, you could try the mission this way.

                reade more... Résuméabuiyad