Pages

Showing posts with label Operation Market Garden. Show all posts

Company of Heroes Walkthrough - Operation Market Garden - Mission 2 - Wolfheze: September Snow

Company of Heroes Walkthrough - Operation Market Garden - Mission 2 - Wolfheze: September Snow

Click here for the index of our Company of Heroes Mission Walkthrough Index and our gameplay paradigm.

This is a moderately easy mission on Expert Difficulty, depending on how many troop losses you are willing to sustain.
Also, if you ended Mission 1 - Wolfheze with more than 50 points of unit Population, you may be initially limited in what you can field (artillery pieces are mostly transferred to (yellow) allied forces).
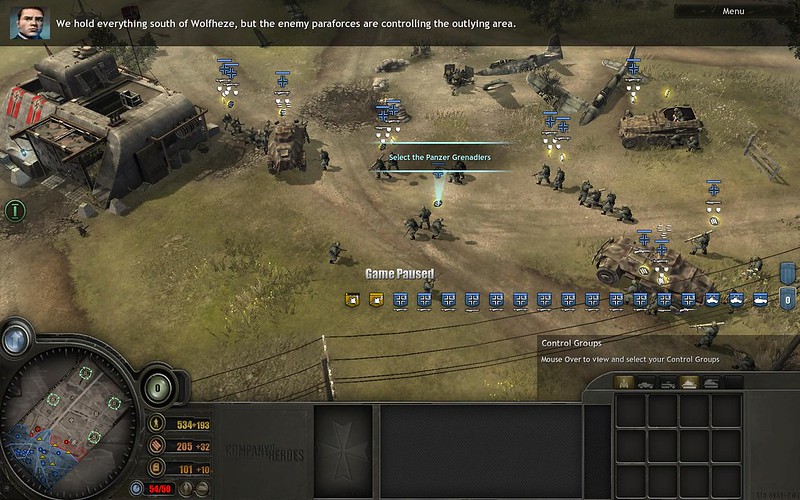
In the following pictures, we show the units we ended Mission 1 with, and the troops we began Mission 2 with. Since we started with 54 population and the cap was 50, and our gameplay paradigm did not allow for recycling units just to make new ones of the types we wanted, we had to play with the units we began with. We did end up saving all units (no losses), although in the process we had to experiment with various tactics against the Tetrach Tanks.
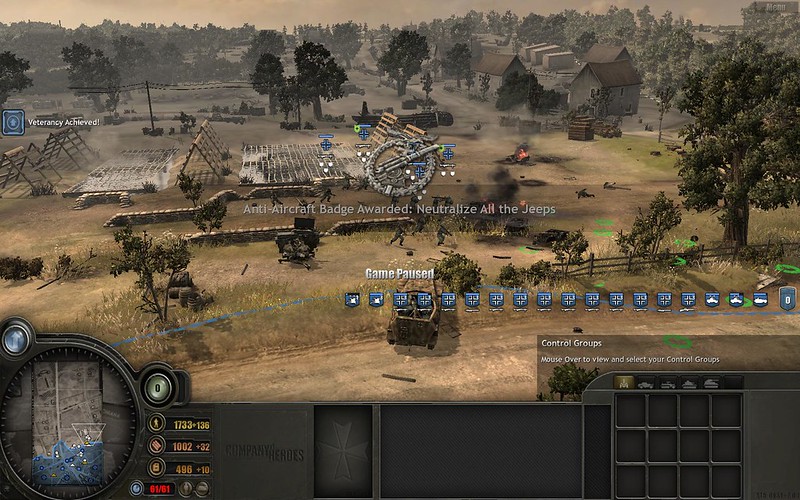
Campaign 2 Mission 1 - final troops
.
Campaign 2 Mission 1 - mission 2 starting troops

Part 1 - Rescue the AA Gun
Send in your vehicles to protect the AA gun nearby. There are two snipers, making it tricky to send in infantry. If you fail to protect the crew, you'll have to man it, but it's really only useful in the final defense phase of the mission.

Part 2 - Find Snipers
Move up the left side and take point with vehicles. Unlike American vehicles, the lightly armoured vehicles look like they should be immune to infantry fire, but they aren't, so retreat them to be repaired. For now, keep sending them ahead to find and kill snipers until you receive the medal.

Part 3 - Anti-Tank Enemies
Anti-Tank guns and some medium tanks are further ahead in the map. On Expert difficulty they can one-shot your vehicles. If you see any, immediately retreat and mortar their position or send in infantry.
Against Tetrarch Tanks, your best bet for minimizing losses is actually to swarm them with Infantry. We chose Defensive veterancy upgrades for infantry and almost all squads have a Panzerschrek (from Mission 1). Try not to engage more than one at a time. They will also quickly flee, so that can help as well.

Part 4 - Paradrop
After taking the final strategic point, there is another paradrop. Retreat all units to the artillery line and just hold out until enemy infantry and jeeps stop coming. You don't have to hold any strategic points and the enemy does not try to capture any.
You can destroy some of the initial drops of infantry, but it is better to simply pull back and present an organized defensive line backed by powerful artillery.

Company of Heroes Walkthrough - Operation Market Garden - Mission 2 - Wolfheze: September Snow

Click here for the index of our Company of Heroes Mission Walkthrough Index and our gameplay paradigm.

This is a moderately easy mission on Expert Difficulty, depending on how many troop losses you are willing to sustain.
Also, if you ended Mission 1 - Wolfheze with more than 50 points of unit Population, you may be initially limited in what you can field (artillery pieces are mostly transferred to (yellow) allied forces).
In the following pictures, we show the units we ended Mission 1 with, and the troops we began Mission 2 with. Since we started with 54 population and the cap was 50, and our gameplay paradigm did not allow for recycling units just to make new ones of the types we wanted, we had to play with the units we began with. We did end up saving all units (no losses), although in the process we had to experiment with various tactics against the Tetrach Tanks.

Campaign 2 Mission 1 - final troops
.
Campaign 2 Mission 1 - mission 2 starting troops

Part 1 - Rescue the AA Gun
Send in your vehicles to protect the AA gun nearby. There are two snipers, making it tricky to send in infantry. If you fail to protect the crew, you'll have to man it, but it's really only useful in the final defense phase of the mission.

Part 2 - Find Snipers
Move up the left side and take point with vehicles. Unlike American vehicles, the lightly armoured vehicles look like they should be immune to infantry fire, but they aren't, so retreat them to be repaired. For now, keep sending them ahead to find and kill snipers until you receive the medal.

Part 3 - Anti-Tank Enemies
Anti-Tank guns and some medium tanks are further ahead in the map. On Expert difficulty they can one-shot your vehicles. If you see any, immediately retreat and mortar their position or send in infantry.
Against Tetrarch Tanks, your best bet for minimizing losses is actually to swarm them with Infantry. We chose Defensive veterancy upgrades for infantry and almost all squads have a Panzerschrek (from Mission 1). Try not to engage more than one at a time. They will also quickly flee, so that can help as well.

Part 4 - Paradrop
After taking the final strategic point, there is another paradrop. Retreat all units to the artillery line and just hold out until enemy infantry and jeeps stop coming. You don't have to hold any strategic points and the enemy does not try to capture any.
You can destroy some of the initial drops of infantry, but it is better to simply pull back and present an organized defensive line backed by powerful artillery.
reade more... Résuméabuiyad

Company of Heroes Walkthrough - Operation Market Garden - Mission 1 - Wolfheze

Company of Heroes Walkthrough - Operation Market Garden - Mission 1 - Wolfheze

Click here for the index of our Company of Heroes Mission Walkthrough Index and our gameplay paradigm.

This is a pretty easy mission on Expert Difficulty. If you are moderately careful you can easily avoid losses of entire squads. Still, there are ways to enhance your domination of the mission.
For Infantry we went with all-Defensive upgrades to enhance the survivability of these most vulnerable units and to maximize regeneration. For vehicles we went with full-Offensive upgrades because they have no regeneration.

Part 1 - Prepare Forces
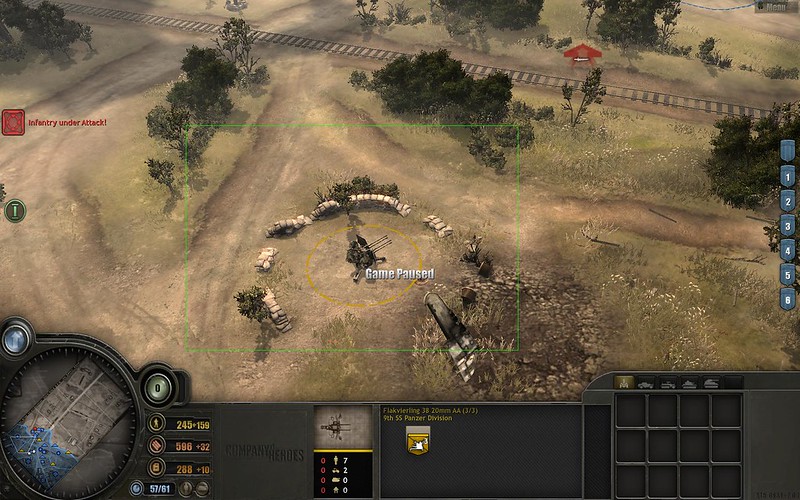
The first mission objective is to crew a Flakvierling 38 20mm AA gun. You have no choice for the first gun as the map is sharply limited and there is basically nothing else you can do.
The next mission objective (see screen below) is to crew a second AA gun behind the train station.

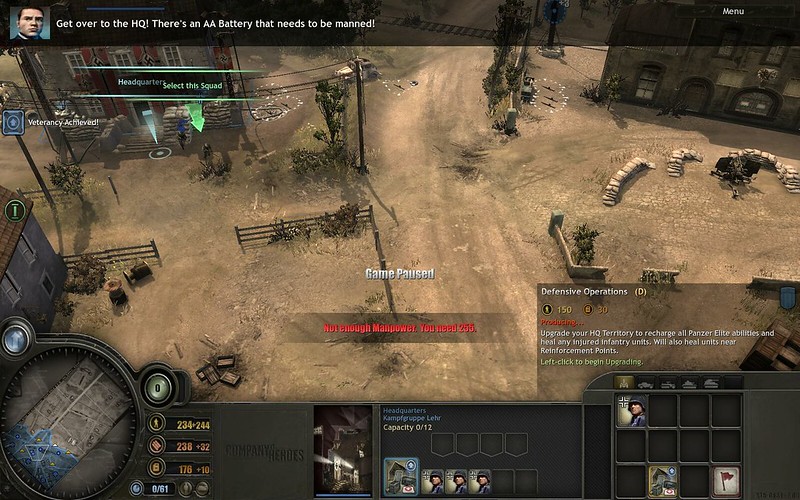
Campaign 2 Mission 1 - delay the objective to build your forces, definitely upgrade HQ

The map is still limited, but there is actually a lot you can do. So DO NOT immediately crew it. This is your first opportunity to take a breather and prepare your forces. Also, if you do crew it, you might not be able to save the first allied 88mm Flak 36 AT/AA gun from commando attack, which will then force you to crew it.

The population Cap is 61 and you start this mission phase with 9/61. When you crew the AA gun it will be 12/61. Plus three light vehicles coming after this phase = 24/61.
Prior to clicking the unit initially designated to man the AA gun, allied units remain allies (yellow) if you click on them. THIS IS THE CRUCIAL PART: After you have selected the unit designated to man the AA gun, clicking on any allied (yellow) guns makes them blue (yours) and uses up your Population Cap.
Therefore defend them all successfully to not be forced to man them, thereby preserving your population cap.

If you want to inspect an allied unit without recruiting them, use area selection (see below).

Campaign 2 Mission 1 - use area select to view ally unit without taking it over as your own

If you have to man them, or if you accidentally click on them, things get tighter. The two 88mm Flak 36 AT/AA guns are 11 population each, and adding one allied Flakvierling 38 20mm AA is another 6 population, for a total of +28 Population. Suddenly your Population after the three vehicles that will shortly be given to you will become 52/61 -- That means you will have only three (3) Panzer Grenadier Teams, and that can makes things very tight, especially in the final phase of the mission where the enemy swarms you with jeeps.

Since the vehicles come later, you can, prior to continuing the game, fill out your Population Cap and let it be exceeded later. I recommend against this, since you will not be able to reinforce squads if they lose a man. And you will have to use infantry because of the overwhelming forces coming your way, so partial squad losses are inevitable.
  • Upgrade your HQ with Defensive Operations and upgrade the train station building into a Reinforcement Point.
  • Create 3 teams of 3 squads each of Panzer Grenadiers (total 9 teams or +27 Population for a total of 51/61 after the three vehicles arrive).
    • Delay creating any Panzer Grenadiers until you have almost the required 2295 Manpower because each team you create lowers your Manpower accumulation rate.
    • Give each squad one and only one MG42 where possible (four guns to the left of your HQ will be inaccessible until you crew the second AA gun behind the train station).
    • Later have these teams pick up a Panzerschrek. If they already have two heavy weapons, you won't be able to do this and you may be hampered in the kill-the-jeeps portion of the mission.
    • It is not necessary to upgrade them with rifles and in any case do not do so prior to deciding whether to give them 1 or 2 heavy weapons and which ones to give them. The rifle upgrade gives them two rifles and uses up both weapon slots.
  • There are machineguns and mortars on the map, but don't pick them up. Setting them up will only hamper you during this mission.
THERE IS A TIME LIMIT before you fail the objective to crew the AA gun, so do not delay. After making your three teams, queue another three and send the original Panzer Grenadier squad given to you to man the AA gun.

Part 2 - Paratroopers
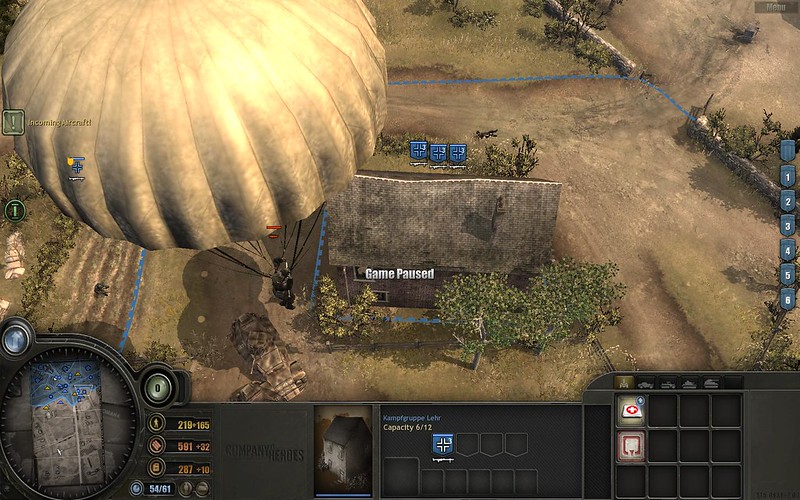
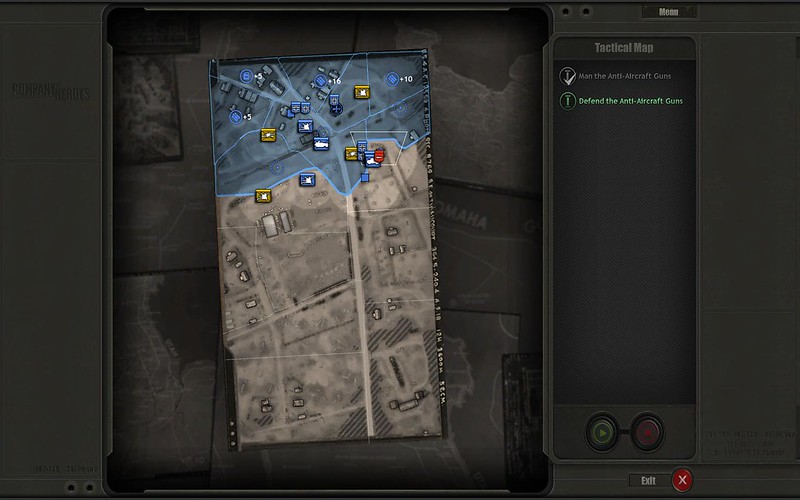
Check your mission briefing screen for early warning of where the Commandoes are dropping. They will first be visible to your troops and the mission briefing screen. Only when they have basically landed will they show on your tactical map -- and that is way too late to properly intercept them. Surround them and cut them down quickly. If you do this well, you will have the luxury of time in between the drops.
In the pictures below, we show paratroopers visible from a particular angle on the screen, and visible on the mission briefing tactical map, but the same unit is not visible on the minimap.

Campaign 2 Mission 1 - commando paratrooper not visible on minimap
.
Campaign 2 Mission 1 - same commando paratrooper visible on briefing map

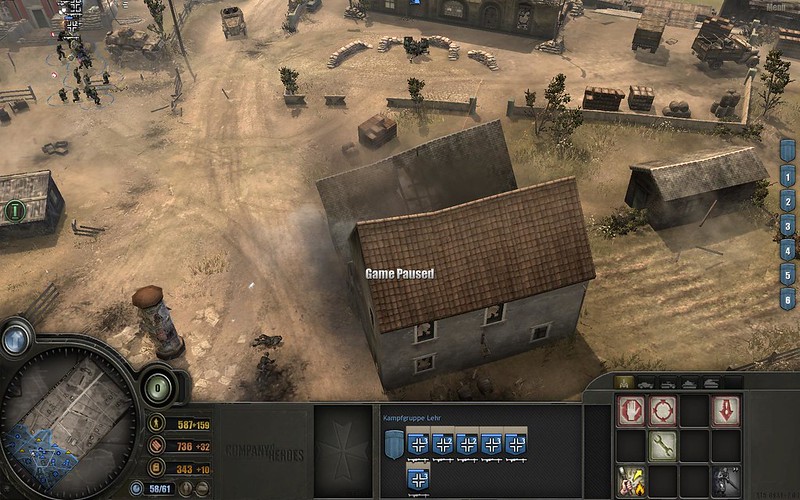
Watch out for scripted events such as strafing runs and this building always being destroyed:

Campaign 2 Mission 1 - this building is scripted to be destroyed

Part 3 - Gliders
This is your chance to regroup.
There are three gliders and they are located on your minimap as mission objectives. Kill all defenders and destroy two out of three, then wait while you get your forces healed up and in order before destroying the last glider.

Part 4 - Jeeps
Basically follow the prompts and defend the points located as that is where the Jeeps will go. Putting heavy weapon units in buildings at the defense point or along the path (especially when they come from the right side, there are buildings along the road) will help a lot.
Panzerschreks magically appear at each of the three defense points. However, even the initial squad-carried MG42s can do good damage to jeeps, and in some ways are more reliable because if a Panzerschrek misses, there is a long reload period before it can fire again.

In the screens below, you can see our final troops at victory, and the starting troops for Mission 2.
  • One of our AA guns lost 2 of its 3 crew to a scripted plane attack run and could not be reinforced, so with the available Population Cap we produced one additional squad of Panzer Grenadiers.
  • Mission 2 reassigns the artillery pieces, setting some to neutral. Also it gives you one squad of Panzer Grenadiers.
Campaign 2 Mission 1 - final troops
.
Campaign 2 Mission 1 - mission 2 starting troops
.
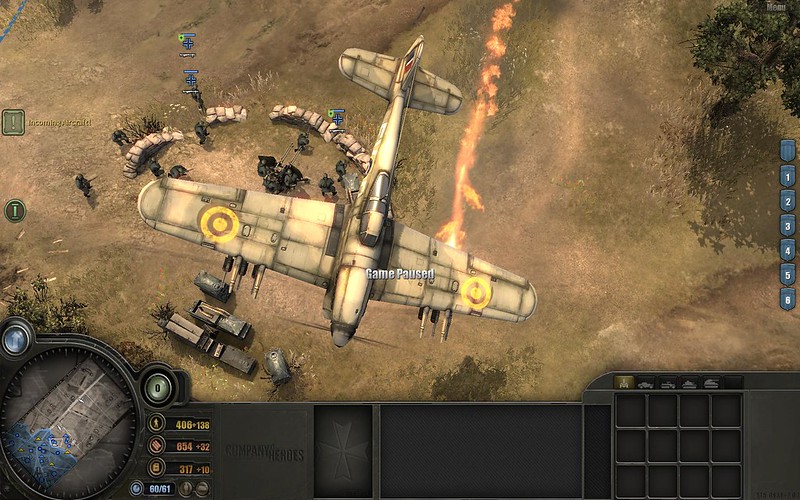
Campaign 2 Mission 1 - plane shot down 1
.
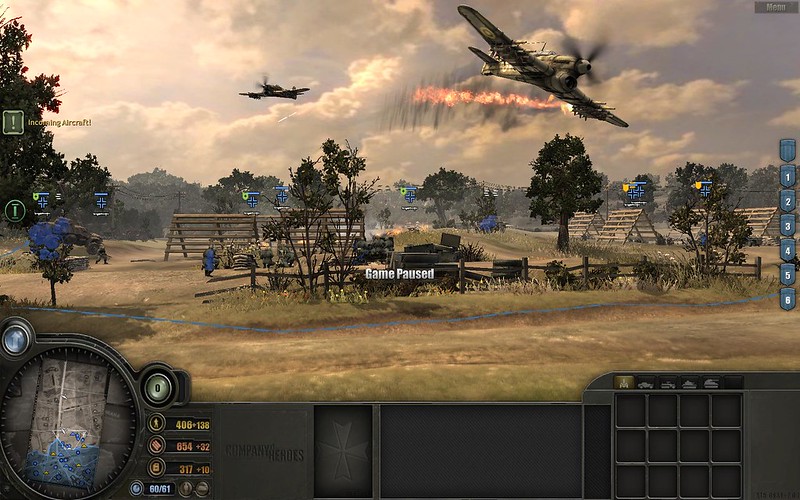
Campaign 2 Mission 1 - plane shot down 2
Company of Heroes Walkthrough - Operation Market Garden - Mission 1 - Wolfheze

Click here for the index of our Company of Heroes Mission Walkthrough Index and our gameplay paradigm.

This is a pretty easy mission on Expert Difficulty. If you are moderately careful you can easily avoid losses of entire squads. Still, there are ways to enhance your domination of the mission.
For Infantry we went with all-Defensive upgrades to enhance the survivability of these most vulnerable units and to maximize regeneration. For vehicles we went with full-Offensive upgrades because they have no regeneration.

Part 1 - Prepare Forces
The first mission objective is to crew a Flakvierling 38 20mm AA gun. You have no choice for the first gun as the map is sharply limited and there is basically nothing else you can do.
The next mission objective (see screen below) is to crew a second AA gun behind the train station.

Campaign 2 Mission 1 - delay the objective to build your forces, definitely upgrade HQ

The map is still limited, but there is actually a lot you can do. So DO NOT immediately crew it. This is your first opportunity to take a breather and prepare your forces. Also, if you do crew it, you might not be able to save the first allied 88mm Flak 36 AT/AA gun from commando attack, which will then force you to crew it.

The population Cap is 61 and you start this mission phase with 9/61. When you crew the AA gun it will be 12/61. Plus three light vehicles coming after this phase = 24/61.
Prior to clicking the unit initially designated to man the AA gun, allied units remain allies (yellow) if you click on them. THIS IS THE CRUCIAL PART: After you have selected the unit designated to man the AA gun, clicking on any allied (yellow) guns makes them blue (yours) and uses up your Population Cap.
Therefore defend them all successfully to not be forced to man them, thereby preserving your population cap.

If you want to inspect an allied unit without recruiting them, use area selection (see below).

Campaign 2 Mission 1 - use area select to view ally unit without taking it over as your own

If you have to man them, or if you accidentally click on them, things get tighter. The two 88mm Flak 36 AT/AA guns are 11 population each, and adding one allied Flakvierling 38 20mm AA is another 6 population, for a total of +28 Population. Suddenly your Population after the three vehicles that will shortly be given to you will become 52/61 -- That means you will have only three (3) Panzer Grenadier Teams, and that can makes things very tight, especially in the final phase of the mission where the enemy swarms you with jeeps.

Since the vehicles come later, you can, prior to continuing the game, fill out your Population Cap and let it be exceeded later. I recommend against this, since you will not be able to reinforce squads if they lose a man. And you will have to use infantry because of the overwhelming forces coming your way, so partial squad losses are inevitable.
  • Upgrade your HQ with Defensive Operations and upgrade the train station building into a Reinforcement Point.
  • Create 3 teams of 3 squads each of Panzer Grenadiers (total 9 teams or +27 Population for a total of 51/61 after the three vehicles arrive).
    • Delay creating any Panzer Grenadiers until you have almost the required 2295 Manpower because each team you create lowers your Manpower accumulation rate.
    • Give each squad one and only one MG42 where possible (four guns to the left of your HQ will be inaccessible until you crew the second AA gun behind the train station).
    • Later have these teams pick up a Panzerschrek. If they already have two heavy weapons, you won't be able to do this and you may be hampered in the kill-the-jeeps portion of the mission.
    • It is not necessary to upgrade them with rifles and in any case do not do so prior to deciding whether to give them 1 or 2 heavy weapons and which ones to give them. The rifle upgrade gives them two rifles and uses up both weapon slots.
  • There are machineguns and mortars on the map, but don't pick them up. Setting them up will only hamper you during this mission.
THERE IS A TIME LIMIT before you fail the objective to crew the AA gun, so do not delay. After making your three teams, queue another three and send the original Panzer Grenadier squad given to you to man the AA gun.

Part 2 - Paratroopers
Check your mission briefing screen for early warning of where the Commandoes are dropping. They will first be visible to your troops and the mission briefing screen. Only when they have basically landed will they show on your tactical map -- and that is way too late to properly intercept them. Surround them and cut them down quickly. If you do this well, you will have the luxury of time in between the drops.
In the pictures below, we show paratroopers visible from a particular angle on the screen, and visible on the mission briefing tactical map, but the same unit is not visible on the minimap.

Campaign 2 Mission 1 - commando paratrooper not visible on minimap
.
Campaign 2 Mission 1 - same commando paratrooper visible on briefing map

Watch out for scripted events such as strafing runs and this building always being destroyed:

Campaign 2 Mission 1 - this building is scripted to be destroyed

Part 3 - Gliders
This is your chance to regroup.
There are three gliders and they are located on your minimap as mission objectives. Kill all defenders and destroy two out of three, then wait while you get your forces healed up and in order before destroying the last glider.

Part 4 - Jeeps
Basically follow the prompts and defend the points located as that is where the Jeeps will go. Putting heavy weapon units in buildings at the defense point or along the path (especially when they come from the right side, there are buildings along the road) will help a lot.
Panzerschreks magically appear at each of the three defense points. However, even the initial squad-carried MG42s can do good damage to jeeps, and in some ways are more reliable because if a Panzerschrek misses, there is a long reload period before it can fire again.

In the screens below, you can see our final troops at victory, and the starting troops for Mission 2.
  • One of our AA guns lost 2 of its 3 crew to a scripted plane attack run and could not be reinforced, so with the available Population Cap we produced one additional squad of Panzer Grenadiers.
  • Mission 2 reassigns the artillery pieces, setting some to neutral. Also it gives you one squad of Panzer Grenadiers.
Campaign 2 Mission 1 - final troops
.
Campaign 2 Mission 1 - mission 2 starting troops
.
Campaign 2 Mission 1 - plane shot down 1
.
Campaign 2 Mission 1 - plane shot down 2
reade more... Résuméabuiyad