Pages

Showing posts with label Company of Heroes. Show all posts

Company of Heroes Walkthrough - Operation Market Garden - Mission 2 - Wolfheze: September Snow

Company of Heroes Walkthrough - Operation Market Garden - Mission 2 - Wolfheze: September Snow

Click here for the index of our Company of Heroes Mission Walkthrough Index and our gameplay paradigm.

This is a moderately easy mission on Expert Difficulty, depending on how many troop losses you are willing to sustain.
Also, if you ended Mission 1 - Wolfheze with more than 50 points of unit Population, you may be initially limited in what you can field (artillery pieces are mostly transferred to (yellow) allied forces).
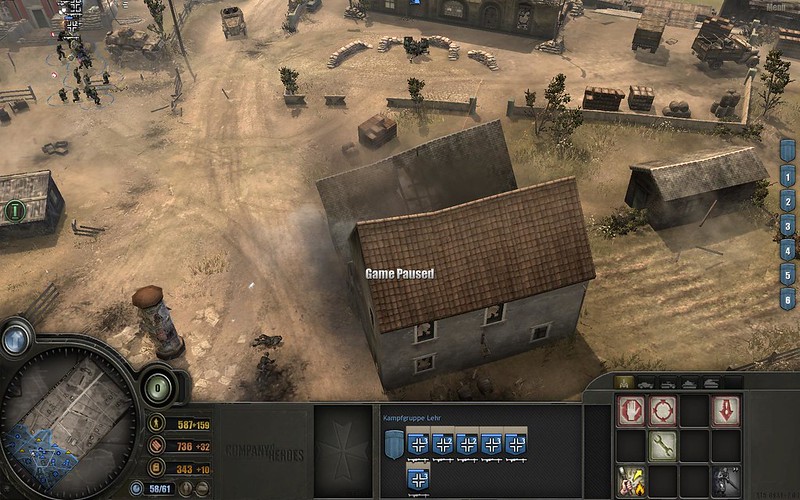
In the following pictures, we show the units we ended Mission 1 with, and the troops we began Mission 2 with. Since we started with 54 population and the cap was 50, and our gameplay paradigm did not allow for recycling units just to make new ones of the types we wanted, we had to play with the units we began with. We did end up saving all units (no losses), although in the process we had to experiment with various tactics against the Tetrach Tanks.

Campaign 2 Mission 1 - final troops
.
Campaign 2 Mission 1 - mission 2 starting troops

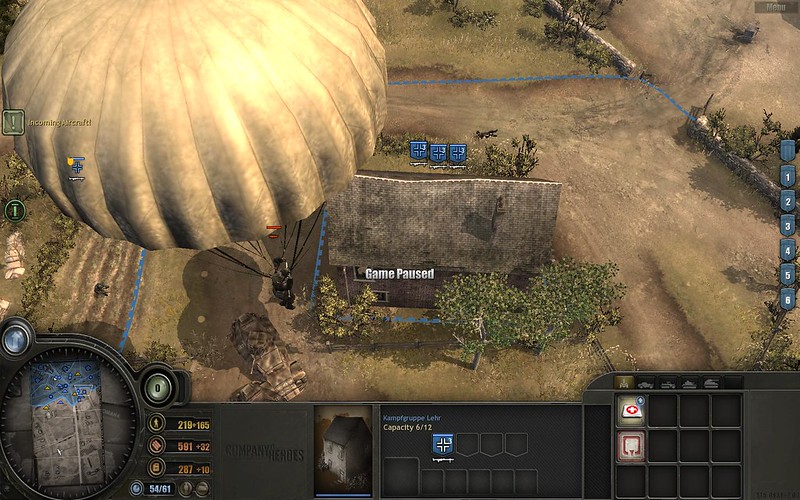
Part 1 - Rescue the AA Gun
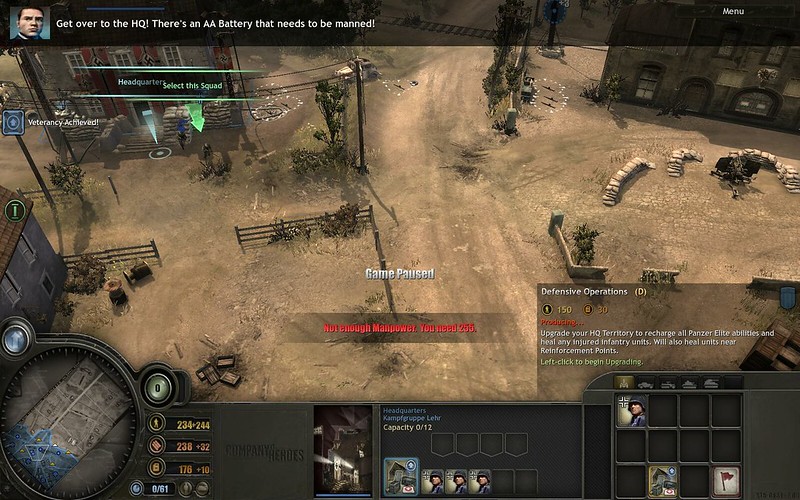
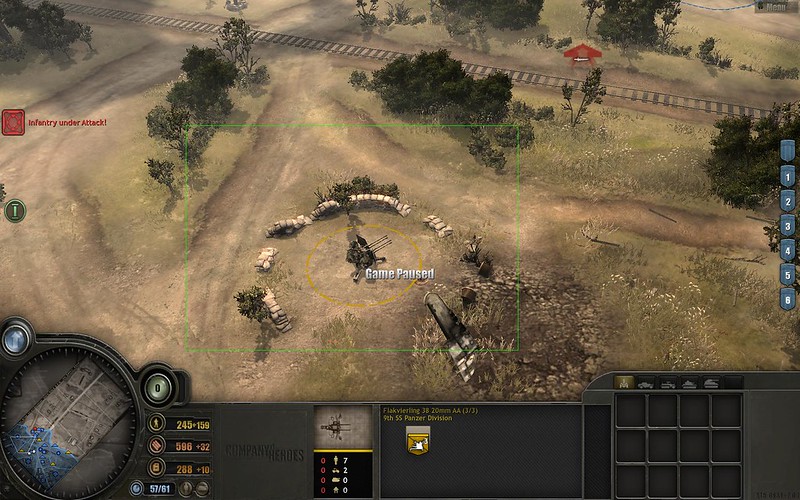
Send in your vehicles to protect the AA gun nearby. There are two snipers, making it tricky to send in infantry. If you fail to protect the crew, you'll have to man it, but it's really only useful in the final defense phase of the mission.

Part 2 - Find Snipers
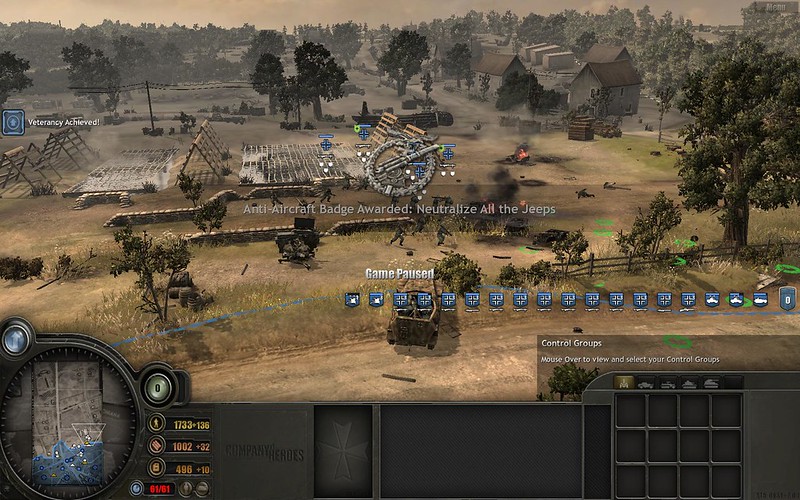
Move up the left side and take point with vehicles. Unlike American vehicles, the lightly armoured vehicles look like they should be immune to infantry fire, but they aren't, so retreat them to be repaired. For now, keep sending them ahead to find and kill snipers until you receive the medal.

Part 3 - Anti-Tank Enemies
Anti-Tank guns and some medium tanks are further ahead in the map. On Expert difficulty they can one-shot your vehicles. If you see any, immediately retreat and mortar their position or send in infantry.
Against Tetrarch Tanks, your best bet for minimizing losses is actually to swarm them with Infantry. We chose Defensive veterancy upgrades for infantry and almost all squads have a Panzerschrek (from Mission 1). Try not to engage more than one at a time. They will also quickly flee, so that can help as well.

Part 4 - Paradrop
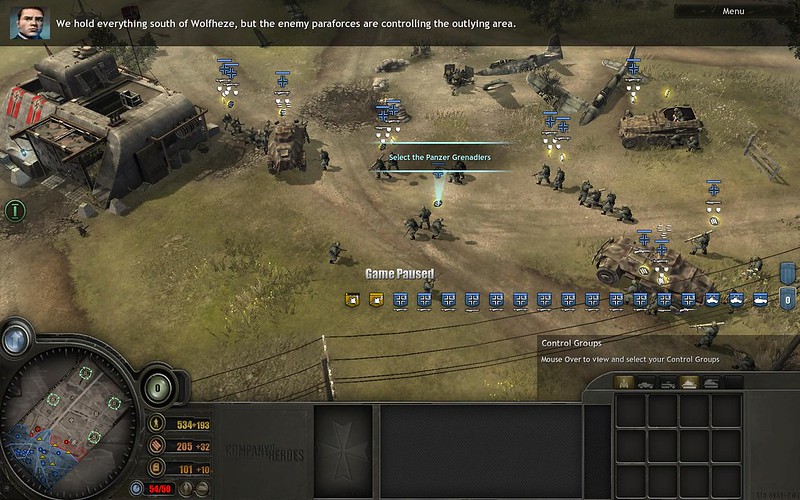
After taking the final strategic point, there is another paradrop. Retreat all units to the artillery line and just hold out until enemy infantry and jeeps stop coming. You don't have to hold any strategic points and the enemy does not try to capture any.
You can destroy some of the initial drops of infantry, but it is better to simply pull back and present an organized defensive line backed by powerful artillery.

Company of Heroes Walkthrough - Operation Market Garden - Mission 2 - Wolfheze: September Snow

Click here for the index of our Company of Heroes Mission Walkthrough Index and our gameplay paradigm.

This is a moderately easy mission on Expert Difficulty, depending on how many troop losses you are willing to sustain.
Also, if you ended Mission 1 - Wolfheze with more than 50 points of unit Population, you may be initially limited in what you can field (artillery pieces are mostly transferred to (yellow) allied forces).
In the following pictures, we show the units we ended Mission 1 with, and the troops we began Mission 2 with. Since we started with 54 population and the cap was 50, and our gameplay paradigm did not allow for recycling units just to make new ones of the types we wanted, we had to play with the units we began with. We did end up saving all units (no losses), although in the process we had to experiment with various tactics against the Tetrach Tanks.

Campaign 2 Mission 1 - final troops
.
Campaign 2 Mission 1 - mission 2 starting troops

Part 1 - Rescue the AA Gun
Send in your vehicles to protect the AA gun nearby. There are two snipers, making it tricky to send in infantry. If you fail to protect the crew, you'll have to man it, but it's really only useful in the final defense phase of the mission.

Part 2 - Find Snipers
Move up the left side and take point with vehicles. Unlike American vehicles, the lightly armoured vehicles look like they should be immune to infantry fire, but they aren't, so retreat them to be repaired. For now, keep sending them ahead to find and kill snipers until you receive the medal.

Part 3 - Anti-Tank Enemies
Anti-Tank guns and some medium tanks are further ahead in the map. On Expert difficulty they can one-shot your vehicles. If you see any, immediately retreat and mortar their position or send in infantry.
Against Tetrarch Tanks, your best bet for minimizing losses is actually to swarm them with Infantry. We chose Defensive veterancy upgrades for infantry and almost all squads have a Panzerschrek (from Mission 1). Try not to engage more than one at a time. They will also quickly flee, so that can help as well.

Part 4 - Paradrop
After taking the final strategic point, there is another paradrop. Retreat all units to the artillery line and just hold out until enemy infantry and jeeps stop coming. You don't have to hold any strategic points and the enemy does not try to capture any.
You can destroy some of the initial drops of infantry, but it is better to simply pull back and present an organized defensive line backed by powerful artillery.

reade more... Résuméabuiyad

Company of Heroes Walkthrough - Operation Market Garden - Mission 1 - Wolfheze

Company of Heroes Walkthrough - Operation Market Garden - Mission 1 - Wolfheze

Click here for the index of our Company of Heroes Mission Walkthrough Index and our gameplay paradigm.

This is a pretty easy mission on Expert Difficulty. If you are moderately careful you can easily avoid losses of entire squads. Still, there are ways to enhance your domination of the mission.
For Infantry we went with all-Defensive upgrades to enhance the survivability of these most vulnerable units and to maximize regeneration. For vehicles we went with full-Offensive upgrades because they have no regeneration.

Part 1 - Prepare Forces
The first mission objective is to crew a Flakvierling 38 20mm AA gun. You have no choice for the first gun as the map is sharply limited and there is basically nothing else you can do.
The next mission objective (see screen below) is to crew a second AA gun behind the train station.

Campaign 2 Mission 1 - delay the objective to build your forces, definitely upgrade HQ

The map is still limited, but there is actually a lot you can do. So DO NOT immediately crew it. This is your first opportunity to take a breather and prepare your forces. Also, if you do crew it, you might not be able to save the first allied 88mm Flak 36 AT/AA gun from commando attack, which will then force you to crew it.

The population Cap is 61 and you start this mission phase with 9/61. When you crew the AA gun it will be 12/61. Plus three light vehicles coming after this phase = 24/61.
Prior to clicking the unit initially designated to man the AA gun, allied units remain allies (yellow) if you click on them. THIS IS THE CRUCIAL PART: After you have selected the unit designated to man the AA gun, clicking on any allied (yellow) guns makes them blue (yours) and uses up your Population Cap.
Therefore defend them all successfully to not be forced to man them, thereby preserving your population cap.

If you want to inspect an allied unit without recruiting them, use area selection (see below).

Campaign 2 Mission 1 - use area select to view ally unit without taking it over as your own

If you have to man them, or if you accidentally click on them, things get tighter. The two 88mm Flak 36 AT/AA guns are 11 population each, and adding one allied Flakvierling 38 20mm AA is another 6 population, for a total of +28 Population. Suddenly your Population after the three vehicles that will shortly be given to you will become 52/61 -- That means you will have only three (3) Panzer Grenadier Teams, and that can makes things very tight, especially in the final phase of the mission where the enemy swarms you with jeeps.

Since the vehicles come later, you can, prior to continuing the game, fill out your Population Cap and let it be exceeded later. I recommend against this, since you will not be able to reinforce squads if they lose a man. And you will have to use infantry because of the overwhelming forces coming your way, so partial squad losses are inevitable.
  • Upgrade your HQ with Defensive Operations and upgrade the train station building into a Reinforcement Point.
  • Create 3 teams of 3 squads each of Panzer Grenadiers (total 9 teams or +27 Population for a total of 51/61 after the three vehicles arrive).
    • Delay creating any Panzer Grenadiers until you have almost the required 2295 Manpower because each team you create lowers your Manpower accumulation rate.
    • Give each squad one and only one MG42 where possible (four guns to the left of your HQ will be inaccessible until you crew the second AA gun behind the train station).
    • Later have these teams pick up a Panzerschrek. If they already have two heavy weapons, you won't be able to do this and you may be hampered in the kill-the-jeeps portion of the mission.
    • It is not necessary to upgrade them with rifles and in any case do not do so prior to deciding whether to give them 1 or 2 heavy weapons and which ones to give them. The rifle upgrade gives them two rifles and uses up both weapon slots.
  • There are machineguns and mortars on the map, but don't pick them up. Setting them up will only hamper you during this mission.
THERE IS A TIME LIMIT before you fail the objective to crew the AA gun, so do not delay. After making your three teams, queue another three and send the original Panzer Grenadier squad given to you to man the AA gun.

Part 2 - Paratroopers
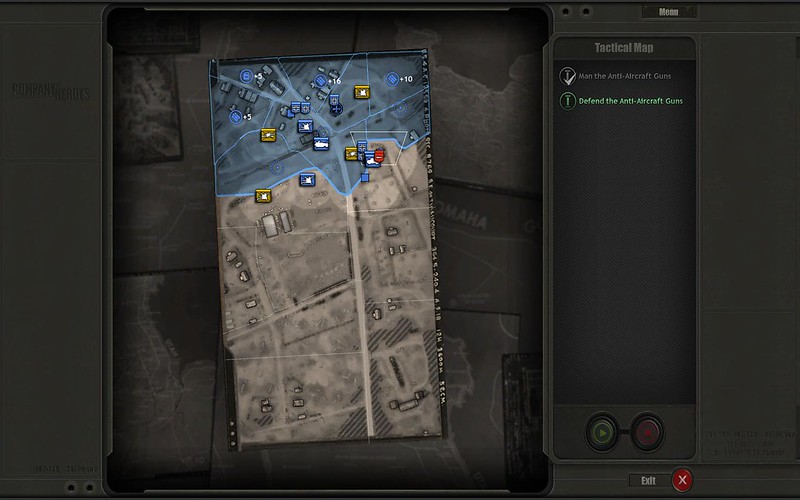
Check your mission briefing screen for early warning of where the Commandoes are dropping. They will first be visible to your troops and the mission briefing screen. Only when they have basically landed will they show on your tactical map -- and that is way too late to properly intercept them. Surround them and cut them down quickly. If you do this well, you will have the luxury of time in between the drops.
In the pictures below, we show paratroopers visible from a particular angle on the screen, and visible on the mission briefing tactical map, but the same unit is not visible on the minimap.

Campaign 2 Mission 1 - commando paratrooper not visible on minimap
.
Campaign 2 Mission 1 - same commando paratrooper visible on briefing map

Watch out for scripted events such as strafing runs and this building always being destroyed:

Campaign 2 Mission 1 - this building is scripted to be destroyed

Part 3 - Gliders
This is your chance to regroup.
There are three gliders and they are located on your minimap as mission objectives. Kill all defenders and destroy two out of three, then wait while you get your forces healed up and in order before destroying the last glider.

Part 4 - Jeeps
Basically follow the prompts and defend the points located as that is where the Jeeps will go. Putting heavy weapon units in buildings at the defense point or along the path (especially when they come from the right side, there are buildings along the road) will help a lot.
Panzerschreks magically appear at each of the three defense points. However, even the initial squad-carried MG42s can do good damage to jeeps, and in some ways are more reliable because if a Panzerschrek misses, there is a long reload period before it can fire again.

In the screens below, you can see our final troops at victory, and the starting troops for Mission 2.
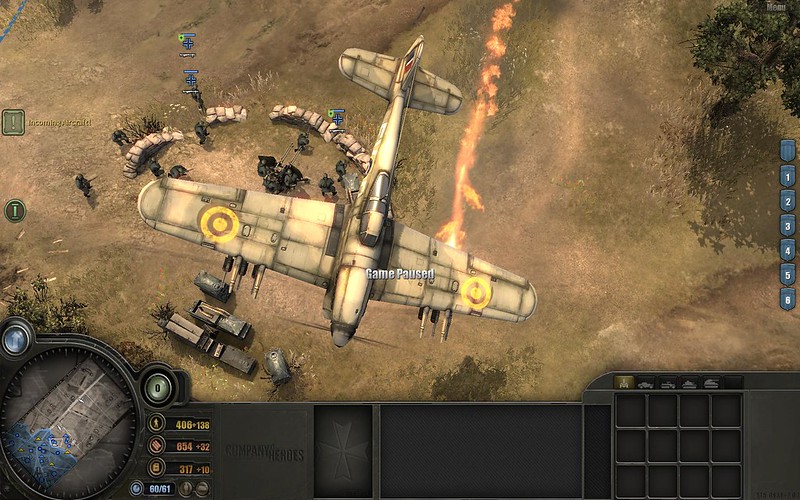
  • One of our AA guns lost 2 of its 3 crew to a scripted plane attack run and could not be reinforced, so with the available Population Cap we produced one additional squad of Panzer Grenadiers.
  • Mission 2 reassigns the artillery pieces, setting some to neutral. Also it gives you one squad of Panzer Grenadiers.
Campaign 2 Mission 1 - final troops
.
Campaign 2 Mission 1 - mission 2 starting troops
.
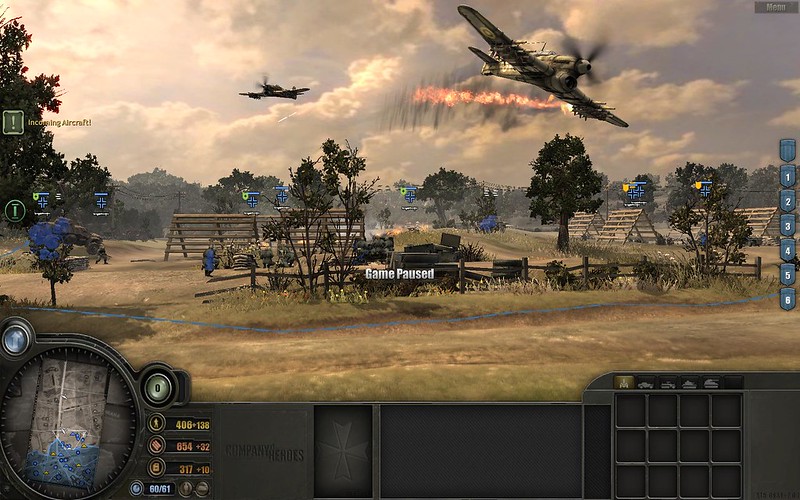
Campaign 2 Mission 1 - plane shot down 1
.
Campaign 2 Mission 1 - plane shot down 2
Company of Heroes Walkthrough - Operation Market Garden - Mission 1 - Wolfheze

Click here for the index of our Company of Heroes Mission Walkthrough Index and our gameplay paradigm.

This is a pretty easy mission on Expert Difficulty. If you are moderately careful you can easily avoid losses of entire squads. Still, there are ways to enhance your domination of the mission.
For Infantry we went with all-Defensive upgrades to enhance the survivability of these most vulnerable units and to maximize regeneration. For vehicles we went with full-Offensive upgrades because they have no regeneration.

Part 1 - Prepare Forces
The first mission objective is to crew a Flakvierling 38 20mm AA gun. You have no choice for the first gun as the map is sharply limited and there is basically nothing else you can do.
The next mission objective (see screen below) is to crew a second AA gun behind the train station.

Campaign 2 Mission 1 - delay the objective to build your forces, definitely upgrade HQ

The map is still limited, but there is actually a lot you can do. So DO NOT immediately crew it. This is your first opportunity to take a breather and prepare your forces. Also, if you do crew it, you might not be able to save the first allied 88mm Flak 36 AT/AA gun from commando attack, which will then force you to crew it.

The population Cap is 61 and you start this mission phase with 9/61. When you crew the AA gun it will be 12/61. Plus three light vehicles coming after this phase = 24/61.
Prior to clicking the unit initially designated to man the AA gun, allied units remain allies (yellow) if you click on them. THIS IS THE CRUCIAL PART: After you have selected the unit designated to man the AA gun, clicking on any allied (yellow) guns makes them blue (yours) and uses up your Population Cap.
Therefore defend them all successfully to not be forced to man them, thereby preserving your population cap.

If you want to inspect an allied unit without recruiting them, use area selection (see below).

Campaign 2 Mission 1 - use area select to view ally unit without taking it over as your own

If you have to man them, or if you accidentally click on them, things get tighter. The two 88mm Flak 36 AT/AA guns are 11 population each, and adding one allied Flakvierling 38 20mm AA is another 6 population, for a total of +28 Population. Suddenly your Population after the three vehicles that will shortly be given to you will become 52/61 -- That means you will have only three (3) Panzer Grenadier Teams, and that can makes things very tight, especially in the final phase of the mission where the enemy swarms you with jeeps.

Since the vehicles come later, you can, prior to continuing the game, fill out your Population Cap and let it be exceeded later. I recommend against this, since you will not be able to reinforce squads if they lose a man. And you will have to use infantry because of the overwhelming forces coming your way, so partial squad losses are inevitable.
  • Upgrade your HQ with Defensive Operations and upgrade the train station building into a Reinforcement Point.
  • Create 3 teams of 3 squads each of Panzer Grenadiers (total 9 teams or +27 Population for a total of 51/61 after the three vehicles arrive).
    • Delay creating any Panzer Grenadiers until you have almost the required 2295 Manpower because each team you create lowers your Manpower accumulation rate.
    • Give each squad one and only one MG42 where possible (four guns to the left of your HQ will be inaccessible until you crew the second AA gun behind the train station).
    • Later have these teams pick up a Panzerschrek. If they already have two heavy weapons, you won't be able to do this and you may be hampered in the kill-the-jeeps portion of the mission.
    • It is not necessary to upgrade them with rifles and in any case do not do so prior to deciding whether to give them 1 or 2 heavy weapons and which ones to give them. The rifle upgrade gives them two rifles and uses up both weapon slots.
  • There are machineguns and mortars on the map, but don't pick them up. Setting them up will only hamper you during this mission.
THERE IS A TIME LIMIT before you fail the objective to crew the AA gun, so do not delay. After making your three teams, queue another three and send the original Panzer Grenadier squad given to you to man the AA gun.

Part 2 - Paratroopers
Check your mission briefing screen for early warning of where the Commandoes are dropping. They will first be visible to your troops and the mission briefing screen. Only when they have basically landed will they show on your tactical map -- and that is way too late to properly intercept them. Surround them and cut them down quickly. If you do this well, you will have the luxury of time in between the drops.
In the pictures below, we show paratroopers visible from a particular angle on the screen, and visible on the mission briefing tactical map, but the same unit is not visible on the minimap.

Campaign 2 Mission 1 - commando paratrooper not visible on minimap
.
Campaign 2 Mission 1 - same commando paratrooper visible on briefing map

Watch out for scripted events such as strafing runs and this building always being destroyed:

Campaign 2 Mission 1 - this building is scripted to be destroyed

Part 3 - Gliders
This is your chance to regroup.
There are three gliders and they are located on your minimap as mission objectives. Kill all defenders and destroy two out of three, then wait while you get your forces healed up and in order before destroying the last glider.

Part 4 - Jeeps
Basically follow the prompts and defend the points located as that is where the Jeeps will go. Putting heavy weapon units in buildings at the defense point or along the path (especially when they come from the right side, there are buildings along the road) will help a lot.
Panzerschreks magically appear at each of the three defense points. However, even the initial squad-carried MG42s can do good damage to jeeps, and in some ways are more reliable because if a Panzerschrek misses, there is a long reload period before it can fire again.

In the screens below, you can see our final troops at victory, and the starting troops for Mission 2.
  • One of our AA guns lost 2 of its 3 crew to a scripted plane attack run and could not be reinforced, so with the available Population Cap we produced one additional squad of Panzer Grenadiers.
  • Mission 2 reassigns the artillery pieces, setting some to neutral. Also it gives you one squad of Panzer Grenadiers.
Campaign 2 Mission 1 - final troops
.
Campaign 2 Mission 1 - mission 2 starting troops
.
Campaign 2 Mission 1 - plane shot down 1
.
Campaign 2 Mission 1 - plane shot down 2
reade more... Résuméabuiyad

Company of Heroes Walkthrough - Invasion of Normandy - Mission 12 - Mortain (Expert)

Company of Heroes Walkthrough - Invasion of Normandy - Mission 12 - Mortain

Click here for the index of our Company of Heroes Mission Walkthrough Index and our gameplay paradigm.

Mortain is quite a difficult mission because resources are tight, and if you do not want to recycle a lot of your initial infantry, your unit choices are also very tight. Because we do not sacrifice units unnecessarily and try to keep all units alive, we were basically stuck with the initial units. This may handicap you later in Mission 13 - Mortain Counterattack because you start with the units you finished with, plus initial reinforcements of three tanks, which puts you well over your Population Cap, further limiting your ability to choose units.
In the screenshot below, you can see our final units after defeating the final wave with a bit of time to spare. All objectives completed.


.
Part 1 - Initial troops and Command Points

You do not have access to heavy tanks, and your HQ / Retreat point is far to the west. You do have a single M2 105 mm Howitzer which gives you artillery bombardment for free, but with an 85 second cooldown time. Use this early except in the second half of the mission when you will want to shell tanks.
The enemy will have increasing amounts of infantry, some light vehicles, and then heavy tanks.
There is a small cache of resources around north of middle of the map, hidden behind some trees.

Instead of building any infantry units, man some of the provided AT guns. Machine Gun are not as useful so you can generally ignore them and use only the ones initially provided. Be careful not to completely use up your two veteran Riflemen squads grabbing heavy weapons. Save some Riflemen to pick up German mortars when two teams show up during one of the waves.

For units, build one or two halftracks right away and change them into MGMCs. These will be your earliest anti-infantry units and you will run them around as "firefighters" against infantry -- that is, race them to where the enemy approach. Once a couple of waves go by, you should be able to tell where the enemy consistently come from and park them at the ready.
Always have the MGMCs take point to protect your infantry, who should be doing pretty much nothing except building free structures like tank traps (once you get the Infantry Company: Defensive Operations ability) when they are idle, or manning AT guns.
One additional unit of Engineers will probably come in handy, so build them after your first or second halftrack.
Use your first halftrack to relieve the Rangers to the west and add them to your units.

While building the halftracks, grab strategic points and start putting Listening Posts on them, starting with Fuel (to quickly get more vehicles) and then Ammo.
Engineers should start blocking roads with Tank Traps. You don't have a lot of resources yet, so just build free structures to keep collecting Command Points. Aim to quickly get Off-Map Artillery Support to give you a second bombardment ability against enemy tanks.

As resources come in, start adding M8 Greyhounds and fully upgrading them.
Once your Population Cap is full, redirect resources toward building Machine Gun Emplacements. These are priceless against heavy tanks because they act as sturdy decoys to soak damage, allowing you to position AT guns further behind them and generally safe from being shot at because the Machine Gun Emplacement is in front and closer to the enemy. In this way if you know where the enemy vehicles are coming, you can shield your infantry from them with a no-population-cap structure.
Note that even on Expert Difficulty your Greyhounds can typically take a couple of shots to the front before having to retreat, if you desperately need some cover for your infantry (e.g., for your Engineers to build something), to stall a tank for bombardment, or to just stall the enemy advance.

Part 2 - Defending

Initially, spread out your vehicles to intercept and delay/pin infantry as soon as possible and direct vehicles that are not engaged to the incursion location.
Fighting infantry-versus-infantry is a losing game on Expert Difficulty because the enemy just needs to get close to flame your units with their Pioneers, or they start sniping them in the later game. For the same reason, Machine Gun Teams are useless as the first line of defense as you can't pull them back fast enough.
MGMCs and Greyhounds can generally out-last any infantry if they can be kept pinned but enemy infantry start to have Panzerschreks so a single vehicle is dangerous to field later in the mission. They can pin units and thereby protect themselves from being hit by anti-tank weapons, but it's better not to chance it.

As enemy waves approach, it is important to somehow get them to stop moving so you can bombard them with your Howitzer, your Off-Map Artillery Support power, or mortars. Bombardment will win this mission for you in the mid to late game.
To get them to stop, either plant a vehicle in front of them or, in the case of tanks, have something disposable for them to shoot at, such as a Machine Gun Emplacement or a Listening Post. Even an armour-skirted Greyhound can be a temporary shield if necessary. Once they stop to shoot, call in a strike as soon as possible. Mortars are also very useful here. AT guns are vulnerable but if you can put them behind a disposable shield, they also do very well against vehicles.
Infantry should not engage unless they really have to -- even the Rangers, which are really your emergency team against tanks.
Keep building Machine Gun Emplacements to help pin the increasing amounts of enemy infantry.
Reinforce infantry in the field when you can, using your MGMCs.

In the early game, bombard with your 105mm Howitzer and go back to building or repairing. In the mid-game when tanks start showing, save your bombardments for them and try not to use infantry Grenades too often as you want to save Munitions for Off-Map Artillery Support, especially when multiple tanks start coming from different approaches.
When you get the chance, mine the roads near the spawn points. If you are worried about infantry getting attacked suddenly, send a Greyhound to do it.

Alternative: Turtle

The video below (difficulty unknown) shows an interesting passive Mortain defense where infantry basically huddle on the hill and defend until the timer runs out. I haven't tried it on Expert, but if you find a wide perimeter hard to coordinate, you could try the mission this way.

Company of Heroes Walkthrough - Invasion of Normandy - Mission 12 - Mortain

Click here for the index of our Company of Heroes Mission Walkthrough Index and our gameplay paradigm.

Mortain is quite a difficult mission because resources are tight, and if you do not want to recycle a lot of your initial infantry, your unit choices are also very tight. Because we do not sacrifice units unnecessarily and try to keep all units alive, we were basically stuck with the initial units. This may handicap you later in Mission 13 - Mortain Counterattack because you start with the units you finished with, plus initial reinforcements of three tanks, which puts you well over your Population Cap, further limiting your ability to choose units.
In the screenshot below, you can see our final units after defeating the final wave with a bit of time to spare. All objectives completed.


.
Part 1 - Initial troops and Command Points

You do not have access to heavy tanks, and your HQ / Retreat point is far to the west. You do have a single M2 105 mm Howitzer which gives you artillery bombardment for free, but with an 85 second cooldown time. Use this early except in the second half of the mission when you will want to shell tanks.
The enemy will have increasing amounts of infantry, some light vehicles, and then heavy tanks.
There is a small cache of resources around north of middle of the map, hidden behind some trees.

Instead of building any infantry units, man some of the provided AT guns. Machine Gun are not as useful so you can generally ignore them and use only the ones initially provided. Be careful not to completely use up your two veteran Riflemen squads grabbing heavy weapons. Save some Riflemen to pick up German mortars when two teams show up during one of the waves.

For units, build one or two halftracks right away and change them into MGMCs. These will be your earliest anti-infantry units and you will run them around as "firefighters" against infantry -- that is, race them to where the enemy approach. Once a couple of waves go by, you should be able to tell where the enemy consistently come from and park them at the ready.
Always have the MGMCs take point to protect your infantry, who should be doing pretty much nothing except building free structures like tank traps (once you get the Infantry Company: Defensive Operations ability) when they are idle, or manning AT guns.
One additional unit of Engineers will probably come in handy, so build them after your first or second halftrack.
Use your first halftrack to relieve the Rangers to the west and add them to your units.

While building the halftracks, grab strategic points and start putting Listening Posts on them, starting with Fuel (to quickly get more vehicles) and then Ammo.
Engineers should start blocking roads with Tank Traps. You don't have a lot of resources yet, so just build free structures to keep collecting Command Points. Aim to quickly get Off-Map Artillery Support to give you a second bombardment ability against enemy tanks.

As resources come in, start adding M8 Greyhounds and fully upgrading them.
Once your Population Cap is full, redirect resources toward building Machine Gun Emplacements. These are priceless against heavy tanks because they act as sturdy decoys to soak damage, allowing you to position AT guns further behind them and generally safe from being shot at because the Machine Gun Emplacement is in front and closer to the enemy. In this way if you know where the enemy vehicles are coming, you can shield your infantry from them with a no-population-cap structure.
Note that even on Expert Difficulty your Greyhounds can typically take a couple of shots to the front before having to retreat, if you desperately need some cover for your infantry (e.g., for your Engineers to build something), to stall a tank for bombardment, or to just stall the enemy advance.

Part 2 - Defending

Initially, spread out your vehicles to intercept and delay/pin infantry as soon as possible and direct vehicles that are not engaged to the incursion location.
Fighting infantry-versus-infantry is a losing game on Expert Difficulty because the enemy just needs to get close to flame your units with their Pioneers, or they start sniping them in the later game. For the same reason, Machine Gun Teams are useless as the first line of defense as you can't pull them back fast enough.
MGMCs and Greyhounds can generally out-last any infantry if they can be kept pinned but enemy infantry start to have Panzerschreks so a single vehicle is dangerous to field later in the mission. They can pin units and thereby protect themselves from being hit by anti-tank weapons, but it's better not to chance it.

As enemy waves approach, it is important to somehow get them to stop moving so you can bombard them with your Howitzer, your Off-Map Artillery Support power, or mortars. Bombardment will win this mission for you in the mid to late game.
To get them to stop, either plant a vehicle in front of them or, in the case of tanks, have something disposable for them to shoot at, such as a Machine Gun Emplacement or a Listening Post. Even an armour-skirted Greyhound can be a temporary shield if necessary. Once they stop to shoot, call in a strike as soon as possible. Mortars are also very useful here. AT guns are vulnerable but if you can put them behind a disposable shield, they also do very well against vehicles.
Infantry should not engage unless they really have to -- even the Rangers, which are really your emergency team against tanks.
Keep building Machine Gun Emplacements to help pin the increasing amounts of enemy infantry.
Reinforce infantry in the field when you can, using your MGMCs.

In the early game, bombard with your 105mm Howitzer and go back to building or repairing. In the mid-game when tanks start showing, save your bombardments for them and try not to use infantry Grenades too often as you want to save Munitions for Off-Map Artillery Support, especially when multiple tanks start coming from different approaches.
When you get the chance, mine the roads near the spawn points. If you are worried about infantry getting attacked suddenly, send a Greyhound to do it.

Alternative: Turtle

The video below (difficulty unknown) shows an interesting passive Mortain defense where infantry basically huddle on the hill and defend until the timer runs out. I haven't tried it on Expert, but if you find a wide perimeter hard to coordinate, you could try the mission this way.

reade more... Résuméabuiyad

Company of Heroes Walkthrough - Invasion of Normandy - Mission 11 - Hébécrevon (Expert)

Company of Heroes Walkthrough - Invasion of Normandy - Mission 11 - Hébécrevon

Click here for the index of our Company of Heroes Mission Walkthrough Index and our gameplay paradigm.

If you are patient, this can be a very easy, if long mission. Even if you don't want to take out the enemy base, this mission is not so bad as long as you are not hung up on holding Strategic Points.

Some tanks are hidden, usually inside a structure.
  • You can hear them even if you haven't located them.
  • If you pass close enough you will reveal them, in a similar way that Snipers are revealed when too close to enemy units.
  • They only become active when a visible unit (i.e., not a camouflaged sniper) is close enough for them to see, so you can try to skirt around them and engage only when you are ready.
  • Be wary of enemy Observation Posts near some of these hidden units, which can reveal camouflaged units.
  • Generally only Panthers are hidden on the map, but there is one Stug in the southwest (see picture below).
  • There is a Panther to the east, in the swampy area, is hidden in a large clump of undergrowth.
    • It can attack if an enemy is revealed outside of their visual distance and within line of sight for shooting; however, in such a case they typically do not move out once the enemy is lost to sight.
    • This can happen, for example, if you are shooting the Observation Post nearby.
  • When you lose sight of a Panther, your mini-map will indicate their last-known location.
Recommended troops: 1x Riflemen, 4x Engineer, 2x Sniper, 1x Mortar, 3x Sherman, 1x M-10 Tank Destroyer, 1x Pershing. This leaves you 2/75 points.
  • Theoretically you are to use M10 Tank Destroyers to flank Panthers.
    • But on Expert Difficulty even light German tanks can do serious damage to the M10s unless you face front armor against their attacks, so be cautious about how you deploy them.
    • They are useless against infantry as you cannot mount a machine-gun.
    • They cannot drop smoke (though this ability is not generally critical or useful if your units are properly supported).
    • For these reasons, you may want to lean toward having more Shermans, which are more all-rounded and have greater survivability.
  • What helps you win tank-versus-tank encounters are 2-3 Engineer teams constantly repairing the tank that is being attacked. In this way, even a Sherman can outlast a Panther, unless you start losing Engineers through them getting caught in the blast radius of each enemy shell.
    • Note that sometimes a Panther will have their own Pioneer teams repairing them, in which case you definitely want a Sherman with a machine-gunner to close the distance and kill the Pioneers.
    • If you are repairing your tanks, a Panther may charge in to machine-gun your Engineer squads.
    • Having 3-4 Engineer squads means if they come under fire while you are repairing the tank(s) taking point, you can Retreat some squads and leave others to continue repairing. You can also split the Engineers into two teams of two if you end up fighting on two fronts.
    • If you don't have enough Engineers or it is too dangerous to field them, remember you have the Field Repair power.
  • There is an enemy mortar team from which your riflemen could pick up a mortar.
    • But the area is crawling with tanks and there are two Panthers nearby. It is unlikely the Riflemen would survive trying to take it in the early game when you need it to shell the enemy base.
  • The M26 Pershing is nice to have, but not critical. If you are focussing on getting Veterancy for tanks, then you won't even use it much. It is nice, however, for its high endurance and makes a great vehicle for taking point or holding ground until more tank reinforcements arrive.
    Sometimes Panthers will receive constant off-map Pioneer teams beelining to repair it. Each time a team is lost, it takes a while before another team is created. In such a case, the Panther will retreat and park in the fog of war. You can either pursue or take the opportunity to repair your own tanks while intercepting their Pioneers.

    You can destroy wrecks for +1 XP.

    Part 1a - Destroy Enemy Base

    AVOID all Panthers if you can in the early game until you secure most of the map and destroy the enemy base. Also, once there are only 2 Panthers left, they receive significant off-map tank support and they all charge out toward your base, stopping to kill anything they see. If you are not ready, this can be a big mess.
    You can engage any other unit but don't let a Panther sight you. They are passive until engaged or until they sight an enemy. One near the watery ditch approximately in the middle of the map (see below) may come at you, but avoid all other static ones if you can.


    Explore the map and inch your mortar safely up the west wide, then toward the north where the enemy base is located. The enemy is quite densely packed in the northern part of the map, so you may have to get creative with how you can snipe safely. For example, in the picture below we have a sniper shooting at a German HQ and ducking behind a guard tower in between, before he can come under return fire.


    Initially you can hide your mortar team behind the bushes at the north edge of the map but to get at the last buildings you will have to inch up the nearby ramp to get closer. Once that route is made safe by sniping, mine it and set tank traps to limit enemy tank pursuit.
    • Initially, the enemy will clump their tanks around whichever building is being attacked, to defend it -- even against indirect mortar shelling. (see below)
    • Once the last building is destroyed, the tanks have no buildings left to defend, so they will charge toward the last known mortar location. See the picture below for what can happen if you have already secured the location with mines.

    Aside from production buildings at the very north end of the map, there are two German forward HQs. You can safely capture (in the manner of capturing a Strategic Point) once they are empty of troops. You can use the size of the building to keep out of line of sight of other units and capture it uncontested. In this way, even a Sniper can do this safely.

    While you are at the western end of the map, you may see some plane wrecks. Sometimes they will glitch on game reload and you will instead see a static plane (see picture below).


    Part 1b - Hold Ground and Mine Map Exits

    While you are locating and destroying the enemy base, carefully secure what you can of the map. Use Machine-gun Nests to defend Strategic Points against the Pioneers and infantry that will be sent to retake them. These counterattacks finally stop when you have destroyed the buildings that produce them.
    Meanwhile, don't be too hung up on holding all Strategic Points. Instead, keep some tanks at your HQ area to defend against light tanks that will periodically be sent to harrass it. When the enemy structures are finally destroyed, you can recall your snipers to scout for you and you can secure whatever Strategic Points you can without triggering the Panthers.

    There are two notable locations:
    • The watery ditch area around the middle of the map has tanks around it as well as two Snipers acting as artillery spotters. Until you find and kill the Snipers, they will call artillery on units trying to take that Strategic Point. This is probably meant to be a tank trap as the water slows down all units.
    • The large silos to the north of the map middle hide two Goliaths, so you may want to avoid that, but you can often destroy them with tanks retreating quickly and/or forcing them to turn (which they do slowly). There is a brief delay before they actually explode once they reach a target location.
      • Note that Snipers can stand right next to Goliaths and locate them, but not be themselves revealed.
    Note that sometimes enemy already placed on the map won't react to a Strategic Point being captured. Instead, they rely on creating infantry units to send out to recapture the point. In the picture below, we have a Sniper that is just out of Panther visual range capturing a point, and the Panther did not react.


    Also, you can use the size of a building to keep capturing units out of line of sight -- even when you are capturing an enemy HQ. In the picture below, our Sniper is capturing an enemy HQ that isn't garrisoning any troops. Nearby enemy units did not react.


    When you can safely do so, have Engineers mine the roads leading off map. These are locations where the Germans can call reinforcements when a Panther is engaged. These reinforcements often include tanks of as much as Veterancy level 3 (see picture below where two tanks, including a Veterancy level 3 Panzer, were instantly intercepted by mines and destroyed).


    Remember that building structures (e.g., mines) can get you XP toward Command Points. It is entirely viable to get enough points to field an M26 Pershing before you control the map.

    In the picture below, we have almost total map control -- Only those sectors with Panthers are not secured. Also, the enemy has no more base structures.


    Part 2 - Engage Panthers

    Once you have cleared as much of the map as possible, it is time to engage the Panthers. Through Sniper scouting you should have located them. Arrange your tanks then draw them out and destroy them. Sometimes when a Panther is engaged, especially if they are sitting in the open, reinforcements arrive immediately. You may wish to retreat your point units into the fog of war and wait for the enemy reinforcements to either settle down, then scout for them and take them out one by one before taking on the Panther.

    If you are engaged by a Panther unexpectedly, it is usually best to retreat and let them stop pursuing you once you are out of visual range.
    • Against Panthers, M10s should back away immediately until a Sherman can come to draw fire. Even then, make sure you have Engineers nearby to repair your tanks.
    • Single Shermans should do the same as well as drop smoke as added insurance.
    At 5/7 Panthers destroyed, the Germans rush their remaining two Panthers along with a LOT of reinforcements from west corner and especially from the north. This time you will face a mix of light tanks as well as Veterancy level 3 Panzers.
    • This also causes the Panther that is near the storage tanks / silos in the north-of-middle area to move out -- leaving the hidden Goliaths in that area behind and you won't have to deal with them at all.
    Interestingly, differences in map height can protect units from machine-gun fire. In the picture below, the Engineers are protected from tank machine-gun fire because they are below the raised part of the map. But all tanks can hit each other even though their shells are direct-fire and should be hitting the floor/walls.


    If you don't care about losses, you can basically blunder around this mission with tanks taking point, since there are no mines to contend with. See below video.

    Company of Heroes Walkthrough - Invasion of Normandy - Mission 11 - Hébécrevon

    Click here for the index of our Company of Heroes Mission Walkthrough Index and our gameplay paradigm.

    If you are patient, this can be a very easy, if long mission. Even if you don't want to take out the enemy base, this mission is not so bad as long as you are not hung up on holding Strategic Points.

    Some tanks are hidden, usually inside a structure.
    • You can hear them even if you haven't located them.
    • If you pass close enough you will reveal them, in a similar way that Snipers are revealed when too close to enemy units.
    • They only become active when a visible unit (i.e., not a camouflaged sniper) is close enough for them to see, so you can try to skirt around them and engage only when you are ready.
    • Be wary of enemy Observation Posts near some of these hidden units, which can reveal camouflaged units.
    • Generally only Panthers are hidden on the map, but there is one Stug in the southwest (see picture below).
    • There is a Panther to the east, in the swampy area, is hidden in a large clump of undergrowth.
      • It can attack if an enemy is revealed outside of their visual distance and within line of sight for shooting; however, in such a case they typically do not move out once the enemy is lost to sight.
      • This can happen, for example, if you are shooting the Observation Post nearby.
    • When you lose sight of a Panther, your mini-map will indicate their last-known location.
    Recommended troops: 1x Riflemen, 4x Engineer, 2x Sniper, 1x Mortar, 3x Sherman, 1x M-10 Tank Destroyer, 1x Pershing. This leaves you 2/75 points.
    • Theoretically you are to use M10 Tank Destroyers to flank Panthers.
      • But on Expert Difficulty even light German tanks can do serious damage to the M10s unless you face front armor against their attacks, so be cautious about how you deploy them.
      • They are useless against infantry as you cannot mount a machine-gun.
      • They cannot drop smoke (though this ability is not generally critical or useful if your units are properly supported).
      • For these reasons, you may want to lean toward having more Shermans, which are more all-rounded and have greater survivability.
    • What helps you win tank-versus-tank encounters are 2-3 Engineer teams constantly repairing the tank that is being attacked. In this way, even a Sherman can outlast a Panther, unless you start losing Engineers through them getting caught in the blast radius of each enemy shell.
      • Note that sometimes a Panther will have their own Pioneer teams repairing them, in which case you definitely want a Sherman with a machine-gunner to close the distance and kill the Pioneers.
      • If you are repairing your tanks, a Panther may charge in to machine-gun your Engineer squads.
      • Having 3-4 Engineer squads means if they come under fire while you are repairing the tank(s) taking point, you can Retreat some squads and leave others to continue repairing. You can also split the Engineers into two teams of two if you end up fighting on two fronts.
      • If you don't have enough Engineers or it is too dangerous to field them, remember you have the Field Repair power.
    • There is an enemy mortar team from which your riflemen could pick up a mortar.
      • But the area is crawling with tanks and there are two Panthers nearby. It is unlikely the Riflemen would survive trying to take it in the early game when you need it to shell the enemy base.
    • The M26 Pershing is nice to have, but not critical. If you are focussing on getting Veterancy for tanks, then you won't even use it much. It is nice, however, for its high endurance and makes a great vehicle for taking point or holding ground until more tank reinforcements arrive.
      Sometimes Panthers will receive constant off-map Pioneer teams beelining to repair it. Each time a team is lost, it takes a while before another team is created. In such a case, the Panther will retreat and park in the fog of war. You can either pursue or take the opportunity to repair your own tanks while intercepting their Pioneers.

      You can destroy wrecks for +1 XP.

      Part 1a - Destroy Enemy Base

      AVOID all Panthers if you can in the early game until you secure most of the map and destroy the enemy base. Also, once there are only 2 Panthers left, they receive significant off-map tank support and they all charge out toward your base, stopping to kill anything they see. If you are not ready, this can be a big mess.
      You can engage any other unit but don't let a Panther sight you. They are passive until engaged or until they sight an enemy. One near the watery ditch approximately in the middle of the map (see below) may come at you, but avoid all other static ones if you can.


      Explore the map and inch your mortar safely up the west wide, then toward the north where the enemy base is located. The enemy is quite densely packed in the northern part of the map, so you may have to get creative with how you can snipe safely. For example, in the picture below we have a sniper shooting at a German HQ and ducking behind a guard tower in between, before he can come under return fire.


      Initially you can hide your mortar team behind the bushes at the north edge of the map but to get at the last buildings you will have to inch up the nearby ramp to get closer. Once that route is made safe by sniping, mine it and set tank traps to limit enemy tank pursuit.
      • Initially, the enemy will clump their tanks around whichever building is being attacked, to defend it -- even against indirect mortar shelling. (see below)
      • Once the last building is destroyed, the tanks have no buildings left to defend, so they will charge toward the last known mortar location. See the picture below for what can happen if you have already secured the location with mines.

      Aside from production buildings at the very north end of the map, there are two German forward HQs. You can safely capture (in the manner of capturing a Strategic Point) once they are empty of troops. You can use the size of the building to keep out of line of sight of other units and capture it uncontested. In this way, even a Sniper can do this safely.

      While you are at the western end of the map, you may see some plane wrecks. Sometimes they will glitch on game reload and you will instead see a static plane (see picture below).


      Part 1b - Hold Ground and Mine Map Exits

      While you are locating and destroying the enemy base, carefully secure what you can of the map. Use Machine-gun Nests to defend Strategic Points against the Pioneers and infantry that will be sent to retake them. These counterattacks finally stop when you have destroyed the buildings that produce them.
      Meanwhile, don't be too hung up on holding all Strategic Points. Instead, keep some tanks at your HQ area to defend against light tanks that will periodically be sent to harrass it. When the enemy structures are finally destroyed, you can recall your snipers to scout for you and you can secure whatever Strategic Points you can without triggering the Panthers.

      There are two notable locations:
      • The watery ditch area around the middle of the map has tanks around it as well as two Snipers acting as artillery spotters. Until you find and kill the Snipers, they will call artillery on units trying to take that Strategic Point. This is probably meant to be a tank trap as the water slows down all units.
      • The large silos to the north of the map middle hide two Goliaths, so you may want to avoid that, but you can often destroy them with tanks retreating quickly and/or forcing them to turn (which they do slowly). There is a brief delay before they actually explode once they reach a target location.
        • Note that Snipers can stand right next to Goliaths and locate them, but not be themselves revealed.
      Note that sometimes enemy already placed on the map won't react to a Strategic Point being captured. Instead, they rely on creating infantry units to send out to recapture the point. In the picture below, we have a Sniper that is just out of Panther visual range capturing a point, and the Panther did not react.


      Also, you can use the size of a building to keep capturing units out of line of sight -- even when you are capturing an enemy HQ. In the picture below, our Sniper is capturing an enemy HQ that isn't garrisoning any troops. Nearby enemy units did not react.


      When you can safely do so, have Engineers mine the roads leading off map. These are locations where the Germans can call reinforcements when a Panther is engaged. These reinforcements often include tanks of as much as Veterancy level 3 (see picture below where two tanks, including a Veterancy level 3 Panzer, were instantly intercepted by mines and destroyed).


      Remember that building structures (e.g., mines) can get you XP toward Command Points. It is entirely viable to get enough points to field an M26 Pershing before you control the map.

      In the picture below, we have almost total map control -- Only those sectors with Panthers are not secured. Also, the enemy has no more base structures.


      Part 2 - Engage Panthers

      Once you have cleared as much of the map as possible, it is time to engage the Panthers. Through Sniper scouting you should have located them. Arrange your tanks then draw them out and destroy them. Sometimes when a Panther is engaged, especially if they are sitting in the open, reinforcements arrive immediately. You may wish to retreat your point units into the fog of war and wait for the enemy reinforcements to either settle down, then scout for them and take them out one by one before taking on the Panther.

      If you are engaged by a Panther unexpectedly, it is usually best to retreat and let them stop pursuing you once you are out of visual range.
      • Against Panthers, M10s should back away immediately until a Sherman can come to draw fire. Even then, make sure you have Engineers nearby to repair your tanks.
      • Single Shermans should do the same as well as drop smoke as added insurance.
      At 5/7 Panthers destroyed, the Germans rush their remaining two Panthers along with a LOT of reinforcements from west corner and especially from the north. This time you will face a mix of light tanks as well as Veterancy level 3 Panzers.
      • This also causes the Panther that is near the storage tanks / silos in the north-of-middle area to move out -- leaving the hidden Goliaths in that area behind and you won't have to deal with them at all.
      Interestingly, differences in map height can protect units from machine-gun fire. In the picture below, the Engineers are protected from tank machine-gun fire because they are below the raised part of the map. But all tanks can hit each other even though their shells are direct-fire and should be hitting the floor/walls.


      If you don't care about losses, you can basically blunder around this mission with tanks taking point, since there are no mines to contend with. See below video.

      reade more... Résuméabuiyad

      Company of Heroes Walkthrough - Invasion of Normandy - Mission 10 - St. Lô (Expert)

      Company of Heroes Walkthrough - Invasion of Normandy - Mission 10 - St. Lô

      Click here for the index of our Company of Heroes Mission Walkthrough Index and our gameplay paradigm.

      This is generally an easy mission as long as you properly handle the Nebelwerfers at the start. If you charge them right away, you will have a very hard time later. If you don't have enough Shermans, you may also have an annoying time.

      Enemy infantry can pick up weapon drops like Panzerschreks. They can also throw grenades, but apparently only at Observation Posts (see picture below).


      Part 1 - Barracks and Initial Troops

      Two buildings are indicated as potential field barracks. Choose the one furthest from the Nebelwerfers (i.e. to the southeast -- see picture below).
      • Although the Nebelwerfers can bombard near you, they can't really reach the building, though you need to be careful and pull your troops back.
      • The surrounding area is generally too hostile for infantry unless you are prepared to accept squad member losses, but your jeep can take out some enemy infantry if you are careful to keep it repaired.
      • Quickly get two Snipers and start clearing the immediate area.

      In the video below, you can see the mess that results if you pick the first building you see, and if you charge the Nebelwerfers right away (start at video time ~2:10).


      Shortly after establishing the Barracks, a Panzer will patrol the area.
      • Retreat and hide. If it doesn't detect enemies or if enemies quickly pull back out of its visual range, it will continue on and park further away and be temporarily no threat.
      • Based on its position, secure what Stategic Points you can without drawing its attention.

      Part 2 - Nebelwerfers

      Do NOT destroy all the Nebelwerfers yet.
      • Snipe the crew of two and keep reconnoitering and sniping while you finish building base structures, getting upgrades, and finalizing your forces.
        • Instead of destroying the Nebelwerfers, snipe them so you can use them yourself later in lieu of mortars.
      • If you penetrate too deeply into enemy territory, tanks become more active and you may not be ready, so either don't explore too deeply or build a couple of Shermans.

      After neutralizing all three Nebelwerfers, you get reinforcements.
      • You get 1x Sherman, 1x Crocodile, 1x Jeep, 2x Ranger squads (31 Population points)
      • You also get a new secondary objective to promote a Ranger squad.
      • Because these reinforcements may put you over the Population Cap, prior to taking out the Nebelwerfers, think carefully:
        • The Medal requires that at least one Ranger squad reaches Veterancy Rank 3.
        • If these reinforcements put you over the Population Cap, you will not be able to restore Ranger losses by Reinforcement, possibly making the Medal impossible unless you deliberately lose units to bring your forces under the Population Cap. Each Ranger model costs 2 Population Cap.
        • There are endless Panzer reinforcements from off-map to the north, and from the central compound / Town Hall area that the Germans have secured -- yes, tanks magically appear from nowhere, even if you have destroyed their production buildings (Krieg Barracks and Sturm Armory). for this reason, it is nice to have at least four Shermans (not Crocodiles) to double-team Panzers.
          • At Expert Difficulty, even a level 3 Veterancy Sherman can have trouble with the Panzers here, and because they sometimes appear with their machineguns manned (indicating they are Veterancy level 2 or 3), you can't always reliably have Engineers repairing your tanks in the middle of the fire exchange.
          • In order to ensure you have enough Shermans, you need to build them first before the reinforcements, or be willing to let infantry die to make room in your Population cap.

      If you want to maximize your Population Cap of 75 (prior to reinforcements arriving), I recommend 3x Shermans, 3x Engineer squads, and reinforcing one of the 4-man squads of Riflemen to 6, for a total of 75/75 if you haven't lost any Rifleman models so far. Then kill the crew of the last Nebelwerfer and use Riflemen to crew the Nebelwerfers.
      • Once you have the Nebelwerfers, you should not need mortar teams, and you will generally not need mortar teams in the early game as you should be able to get by with a pair of snipers.
      • Get the M1918 Browning Automatic Rifle (BAR) prior to picking up Nebelwerfers as this may cause a Rifle to be dropped by the Riflemen squad, and thus picked up by another unit.
        • The Rangers cannot pick it up if they already have the short-range .45 ACP M1 Thompson Sub-Machine Gun upgrade, which replaces all four squad guns (but not the M9 Bazookas).
      Part 3a - Ranger Veterancy

      For the medal (Army Ranger Badge), at least one Ranger squad must be promoted to level 3 Veterancy.
      • A fairly good way to do this is to have a tank distract the enemy and follow up with Rangers. This, however, will not guarantee all squad members survive or that the enemy won't change targets. On Expert Difficulty, even regular infantry can kill off at least 1 ranger, depending on how long a skirmish lasts. If you are unable to Reinforce the Rangers due to being over the Population Cap, try to instead:
        • Target smaller squads and overwhelm them with both the Ranger squads.
        • Attack weapon crews which are typically weaker when engaged up close (e.g., AT guns).
        • Throw grenades from behind obstructions such as hedges or buildings.
      (picture below) Trying to distract the Ostwind for Rangers to kill it for Veterancy, but with the SMG upgrade, Rangers tend to rush in close to allow their SMGs to hit the target, regardless of whether they can actually damage the target or not. The Ostwind could at any time switch targets to mow down the Rangers.

        (picture below) A much safer way to gain Veterancy: Throwing grenades over obstructions, such as this ruined building.


        Part 3b - Clear Map, Capture Strategic Points

        The rest of this map is easy, but slow if you want to avoid losses. Keep your tanks in front and reserve your infantry for capturing Strategic Points. Jeeps can sometimes spot for you but Snipers are better, especially if you have gotten them to Veterancy level 3 (when they can move at full speed while camouflaged).
        When you are very close to the central area (which is bounded by obstacles and impassable rubble), watch for mines. There are some on the east side where the lanes are tight and there are several AT guns. Any annoying areas such as these can be cleared with sustained Nebelwerfer barrages to protect your tanks.

        Do not bother trying to capture the Town Hall / centre of the map. You can bombard inside and take out the Kreig Barracks and Sturm Armory, but the enemy will continue to receive Panzer reinforcements, even from within the compound.
        Also, if you hit the Town Hall with anything, Panzerschrek-equipped Stormtroopers will appear from off-map and beeline to the Town Hall as reinforcements (see below).


        The Stormtroopers are not as dangerous as they seem because they stop for nothing. They will shoot along the way, but because they don't stop to engage you can chase them with tanks, or alternatively let them go to the Town Hall then bombard the lot of them from a distance.

        Once you capture all the necessary Strategic Points, the mission ends in success.

        Company of Heroes Walkthrough - Invasion of Normandy - Mission 10 - St. Lô

        Click here for the index of our Company of Heroes Mission Walkthrough Index and our gameplay paradigm.

        This is generally an easy mission as long as you properly handle the Nebelwerfers at the start. If you charge them right away, you will have a very hard time later. If you don't have enough Shermans, you may also have an annoying time.

        Enemy infantry can pick up weapon drops like Panzerschreks. They can also throw grenades, but apparently only at Observation Posts (see picture below).


        Part 1 - Barracks and Initial Troops

        Two buildings are indicated as potential field barracks. Choose the one furthest from the Nebelwerfers (i.e. to the southeast -- see picture below).
        • Although the Nebelwerfers can bombard near you, they can't really reach the building, though you need to be careful and pull your troops back.
        • The surrounding area is generally too hostile for infantry unless you are prepared to accept squad member losses, but your jeep can take out some enemy infantry if you are careful to keep it repaired.
        • Quickly get two Snipers and start clearing the immediate area.

        In the video below, you can see the mess that results if you pick the first building you see, and if you charge the Nebelwerfers right away (start at video time ~2:10).


        Shortly after establishing the Barracks, a Panzer will patrol the area.
        • Retreat and hide. If it doesn't detect enemies or if enemies quickly pull back out of its visual range, it will continue on and park further away and be temporarily no threat.
        • Based on its position, secure what Stategic Points you can without drawing its attention.

        Part 2 - Nebelwerfers

        Do NOT destroy all the Nebelwerfers yet.
        • Snipe the crew of two and keep reconnoitering and sniping while you finish building base structures, getting upgrades, and finalizing your forces.
          • Instead of destroying the Nebelwerfers, snipe them so you can use them yourself later in lieu of mortars.
        • If you penetrate too deeply into enemy territory, tanks become more active and you may not be ready, so either don't explore too deeply or build a couple of Shermans.

        After neutralizing all three Nebelwerfers, you get reinforcements.
        • You get 1x Sherman, 1x Crocodile, 1x Jeep, 2x Ranger squads (31 Population points)
        • You also get a new secondary objective to promote a Ranger squad.
        • Because these reinforcements may put you over the Population Cap, prior to taking out the Nebelwerfers, think carefully:
          • The Medal requires that at least one Ranger squad reaches Veterancy Rank 3.
          • If these reinforcements put you over the Population Cap, you will not be able to restore Ranger losses by Reinforcement, possibly making the Medal impossible unless you deliberately lose units to bring your forces under the Population Cap. Each Ranger model costs 2 Population Cap.
          • There are endless Panzer reinforcements from off-map to the north, and from the central compound / Town Hall area that the Germans have secured -- yes, tanks magically appear from nowhere, even if you have destroyed their production buildings (Krieg Barracks and Sturm Armory). for this reason, it is nice to have at least four Shermans (not Crocodiles) to double-team Panzers.
            • At Expert Difficulty, even a level 3 Veterancy Sherman can have trouble with the Panzers here, and because they sometimes appear with their machineguns manned (indicating they are Veterancy level 2 or 3), you can't always reliably have Engineers repairing your tanks in the middle of the fire exchange.
            • In order to ensure you have enough Shermans, you need to build them first before the reinforcements, or be willing to let infantry die to make room in your Population cap.

        If you want to maximize your Population Cap of 75 (prior to reinforcements arriving), I recommend 3x Shermans, 3x Engineer squads, and reinforcing one of the 4-man squads of Riflemen to 6, for a total of 75/75 if you haven't lost any Rifleman models so far. Then kill the crew of the last Nebelwerfer and use Riflemen to crew the Nebelwerfers.
        • Once you have the Nebelwerfers, you should not need mortar teams, and you will generally not need mortar teams in the early game as you should be able to get by with a pair of snipers.
        • Get the M1918 Browning Automatic Rifle (BAR) prior to picking up Nebelwerfers as this may cause a Rifle to be dropped by the Riflemen squad, and thus picked up by another unit.
          • The Rangers cannot pick it up if they already have the short-range .45 ACP M1 Thompson Sub-Machine Gun upgrade, which replaces all four squad guns (but not the M9 Bazookas).
        Part 3a - Ranger Veterancy

        For the medal (Army Ranger Badge), at least one Ranger squad must be promoted to level 3 Veterancy.
        • A fairly good way to do this is to have a tank distract the enemy and follow up with Rangers. This, however, will not guarantee all squad members survive or that the enemy won't change targets. On Expert Difficulty, even regular infantry can kill off at least 1 ranger, depending on how long a skirmish lasts. If you are unable to Reinforce the Rangers due to being over the Population Cap, try to instead:
          • Target smaller squads and overwhelm them with both the Ranger squads.
          • Attack weapon crews which are typically weaker when engaged up close (e.g., AT guns).
          • Throw grenades from behind obstructions such as hedges or buildings.
        (picture below) Trying to distract the Ostwind for Rangers to kill it for Veterancy, but with the SMG upgrade, Rangers tend to rush in close to allow their SMGs to hit the target, regardless of whether they can actually damage the target or not. The Ostwind could at any time switch targets to mow down the Rangers.

          (picture below) A much safer way to gain Veterancy: Throwing grenades over obstructions, such as this ruined building.


          Part 3b - Clear Map, Capture Strategic Points

          The rest of this map is easy, but slow if you want to avoid losses. Keep your tanks in front and reserve your infantry for capturing Strategic Points. Jeeps can sometimes spot for you but Snipers are better, especially if you have gotten them to Veterancy level 3 (when they can move at full speed while camouflaged).
          When you are very close to the central area (which is bounded by obstacles and impassable rubble), watch for mines. There are some on the east side where the lanes are tight and there are several AT guns. Any annoying areas such as these can be cleared with sustained Nebelwerfer barrages to protect your tanks.

          Do not bother trying to capture the Town Hall / centre of the map. You can bombard inside and take out the Kreig Barracks and Sturm Armory, but the enemy will continue to receive Panzer reinforcements, even from within the compound.
          Also, if you hit the Town Hall with anything, Panzerschrek-equipped Stormtroopers will appear from off-map and beeline to the Town Hall as reinforcements (see below).


          The Stormtroopers are not as dangerous as they seem because they stop for nothing. They will shoot along the way, but because they don't stop to engage you can chase them with tanks, or alternatively let them go to the Town Hall then bombard the lot of them from a distance.

          Once you capture all the necessary Strategic Points, the mission ends in success.

          reade more... Résuméabuiyad

          Company of Heroes Walkthrough - Invasion of Normandy - Mission 9 - Hill 192 (Expert)

          Company of Heroes Walkthrough - Invasion of Normandy - Mission 9 - Hill 192

          Click here for the index of our Company of Heroes Mission Walkthrough Index and our gameplay paradigm.

          Hill 192 is a really tough mission if you want the Medal on Expert Difficulty. Even if you allow unit losses -- which will cost you time to replace -- there is really very little room for setbacks because of the tight time limit.

          Because the left and middle of the map looked dense and had little room for maneuvering, we chose to advance up the right where we could use more tanks at the same time. Thicker hedges could not be bulldozed, and because of the tight time limits, we went straight up the main route.
          In the picture below, you can see how far we got (blue sectors) at just over half the time limit of 30 minutes.


          The clock starts ticking when your first tank reinforcements come. By that time you should have been able to get a Tank Depot ready. Going right gets you Fuel but no munitions. Going left gives you more opportunities to get both but it could take longer to charge up to the hill.
          Strangely, you can safely abandon your initial starting position.

          We made a number of mistakes in our playthrough but still managed to get the Soldier's Medal on Expert Difficulty:
          • Capturing an AT gun.
            • Too slow to move and most fighting was done with tanks anyway.
            • Ultimately we lost this unit anyway.
          • Not getting a mortar.
            • We destroyed an enemy mortar team but it did not drop a mortar and by that time we were too far from our base to build the required structure.
              • Whenever you get the message that the enemy is flanking, it means squads are moving. They don't always go for Strategic Points you have captured, but they do camp at various locations, so when you backtrack you could run into them. This in turn means that if you Retreat units, you can also expect that they will run into these units.
          • Not getting a Halftrack to reinforce infantry in the field.
          • Not shelling the AT gun positions.
            • We didn't know where they were and initial bombardment did not reveal them, but they are basically located southwest and southeast of the Victory Point you need to capture. See picture below.
            • Not destroying them meant advancing into the fortified hill position took a long time.
            • Calliope bombardment is very unreliable and they are likely to survive several bombardments, so the sooner you start the better.

          Part 1 - Get Tanks

          You can capture the strategic point to the east, but if you push too far you may not have any tanks to fight enemy Panzers, and end up using too much Munitions on basically useless Sticky Bombs. Calliope bombardment is useless against enemy tanks as the spread is generally too wide to kill any vehicle.
          Build as many Shermans as you can. Depending on your resources, you may subsequently build a Motor Pool and get yourself a Halftrack to reinforce units in field. If not, keep your tanks alive and engineers safe as Repairing means you can keep pressing forward with just tanks.

          Part 2 - Get Calliope into position, destroy Artillery Tower

          By the time you get the Calliope close enough, you will probably come under artillery fire and get a message to destroy the enemy Artillery Tower. There is one Sdkfz 251 Halftrack "Walking Stuka" rocket launcher on either side of the map and they will continually bombard you whenever they can somehow sight you, but not on the Hill itself. Also, if they lack a visible target, they appear to be scripted to bombard the entrance to the hill (see the picture below for approximate location). Destroy at least one then go for the tower.

          When the Tower is in sight, something you can do is rush it with a couple of tanks. The German Halftracks do not care where they bombard as long as they are attacking your units. If you rush the Tower location with your Crocodile (to burn out the numerous infantry there), keep moving. When a bombardment appears in the location, pull out quickly and let the bombardment destroy the Tower for you.

          After you destroy the Tower, except rocket bombardment to continue. You probably don't have time to destroy the other Halftrack but if you can, a lot of pressure can be lifted.


          Part 3 - Secure Hill 192

          The final push up the hill will be easier if you can destroy the two AT guns guarding the entrance. Otherwise, you may have to do the following, while dodging enemy bombardment:
          • Line up your tanks to cover the entrance (see picture above). You may have to pull them back if an enemy rush comes out and sights them for artillery.
          • Send in your Crocodile to destroy the tank traps so that your push forward with tanks will advance more quickly. This will probably draw a couple of Panzers, so pull back and destroy them before charging up. One Panzer will remain on the east side of the hill.
          • Rush your tanks up and because the Panzer is parked (and apparently won't move) from the east side of the hill, line them up to the west to flank (see picture below) and advance east.
          • As soon as one side is clear, you can rush your own infantry up to grab the Victory Point for the win.


          In the Youtube video below, you can see the interesting option of using a swarm of Rangers to destroy everything and take the Hill (NOT played on Expert Difficulty).

          Company of Heroes Walkthrough - Invasion of Normandy - Mission 9 - Hill 192

          Click here for the index of our Company of Heroes Mission Walkthrough Index and our gameplay paradigm.

          Hill 192 is a really tough mission if you want the Medal on Expert Difficulty. Even if you allow unit losses -- which will cost you time to replace -- there is really very little room for setbacks because of the tight time limit.

          Because the left and middle of the map looked dense and had little room for maneuvering, we chose to advance up the right where we could use more tanks at the same time. Thicker hedges could not be bulldozed, and because of the tight time limits, we went straight up the main route.
          In the picture below, you can see how far we got (blue sectors) at just over half the time limit of 30 minutes.


          The clock starts ticking when your first tank reinforcements come. By that time you should have been able to get a Tank Depot ready. Going right gets you Fuel but no munitions. Going left gives you more opportunities to get both but it could take longer to charge up to the hill.
          Strangely, you can safely abandon your initial starting position.

          We made a number of mistakes in our playthrough but still managed to get the Soldier's Medal on Expert Difficulty:
          • Capturing an AT gun.
            • Too slow to move and most fighting was done with tanks anyway.
            • Ultimately we lost this unit anyway.
          • Not getting a mortar.
            • We destroyed an enemy mortar team but it did not drop a mortar and by that time we were too far from our base to build the required structure.
              • Whenever you get the message that the enemy is flanking, it means squads are moving. They don't always go for Strategic Points you have captured, but they do camp at various locations, so when you backtrack you could run into them. This in turn means that if you Retreat units, you can also expect that they will run into these units.
          • Not getting a Halftrack to reinforce infantry in the field.
          • Not shelling the AT gun positions.
            • We didn't know where they were and initial bombardment did not reveal them, but they are basically located southwest and southeast of the Victory Point you need to capture. See picture below.
            • Not destroying them meant advancing into the fortified hill position took a long time.
            • Calliope bombardment is very unreliable and they are likely to survive several bombardments, so the sooner you start the better.

          Part 1 - Get Tanks

          You can capture the strategic point to the east, but if you push too far you may not have any tanks to fight enemy Panzers, and end up using too much Munitions on basically useless Sticky Bombs. Calliope bombardment is useless against enemy tanks as the spread is generally too wide to kill any vehicle.
          Build as many Shermans as you can. Depending on your resources, you may subsequently build a Motor Pool and get yourself a Halftrack to reinforce units in field. If not, keep your tanks alive and engineers safe as Repairing means you can keep pressing forward with just tanks.

          Part 2 - Get Calliope into position, destroy Artillery Tower

          By the time you get the Calliope close enough, you will probably come under artillery fire and get a message to destroy the enemy Artillery Tower. There is one Sdkfz 251 Halftrack "Walking Stuka" rocket launcher on either side of the map and they will continually bombard you whenever they can somehow sight you, but not on the Hill itself. Also, if they lack a visible target, they appear to be scripted to bombard the entrance to the hill (see the picture below for approximate location). Destroy at least one then go for the tower.

          When the Tower is in sight, something you can do is rush it with a couple of tanks. The German Halftracks do not care where they bombard as long as they are attacking your units. If you rush the Tower location with your Crocodile (to burn out the numerous infantry there), keep moving. When a bombardment appears in the location, pull out quickly and let the bombardment destroy the Tower for you.

          After you destroy the Tower, except rocket bombardment to continue. You probably don't have time to destroy the other Halftrack but if you can, a lot of pressure can be lifted.


          Part 3 - Secure Hill 192

          The final push up the hill will be easier if you can destroy the two AT guns guarding the entrance. Otherwise, you may have to do the following, while dodging enemy bombardment:
          • Line up your tanks to cover the entrance (see picture above). You may have to pull them back if an enemy rush comes out and sights them for artillery.
          • Send in your Crocodile to destroy the tank traps so that your push forward with tanks will advance more quickly. This will probably draw a couple of Panzers, so pull back and destroy them before charging up. One Panzer will remain on the east side of the hill.
          • Rush your tanks up and because the Panzer is parked (and apparently won't move) from the east side of the hill, line them up to the west to flank (see picture below) and advance east.
          • As soon as one side is clear, you can rush your own infantry up to grab the Victory Point for the win.


          In the Youtube video below, you can see the interesting option of using a swarm of Rangers to destroy everything and take the Hill (NOT played on Expert Difficulty).

          reade more... Résuméabuiyad

          Company of Heroes Walkthrough - Invasion of Normandy - Mission 8 - St. Fromond (Expert)

          Company of Heroes Walkthrough - Invasion of Normandy - Mission 8 - St. Fromond

          Click here for the index of our Company of Heroes Mission Walkthrough Index and our gameplay paradigm.

          St. Fromond is supposed to be a frantic artillery versus artillery battle (German Nebelwerfer 41's versus your Sherman Calliope) and it's frantic fun for 30 minutes, but if you want to do this mission the smart way -- and if you want the medal for destroying the enemy HQ -- instead of securing the town, go for the HQ first.
          And realistically, why would you take the town and alert the enemy if you can box them in, take out their anti-aircraft armament, and safely bomb them?

          The mission is won and over after a 30-minute defend-the-town-square win condition objective, which is triggered in the following ways:
          • Capturing the Strategic Point in the town square: This is the "normal" way and starts Nebelwerfer moving to points indicated during the objective briefing.
          • Capturing too many Strategic Points: If you capture all Strategic Points other than the three that are immediately adjacent to the SS HQ sector to the far north.
          • Getting too close to the SS HQ: If any unit enters any of the Strategic Points that are immediately adjacent to the SS HQ sector to the far north.
          • Destroying the SS Headquarters.
          Destroying the SS Headquarters can take a long time on Expert Difficulty, not the least because the enemy has a lot of Pioneer squads that can repair stuff -- so any assault needs to be sustained to make steady progress.

          It is possible to land paratroopers on the other side of the bridge without repairing it first, via the Air Drops side of the Airborne Company Command Tree, but without Triage facilities we would ultimately lose squads and that is not part of our playthrough paradigm -- we do not unnecessarily send units into suicidal conditions.

          There are a lot of hedges in this map, but the shorter ones can be walked through:


          Overall Strategy

          Remember that an army is about projection of firepower. In this case, your infantry are scouting and taking ground to protect your armour, which is keeping assaults away from your mortars and Sherman Calliope, who are shelling the enemy base to take out their anti-aircraft guns so that planes can swoop by and bomb the enemy HQ.
          In practice, the Calliope and it's free bombardments will be doing most of the work, but aerial reconnaissance has the most reach.
          Because we wanted the medal for destroying the enemy HQ, we had to delay formally capturing the town or otherwise triggering the 30-minute defense mission.

          Part 1 - Clear Waterfront, Prepare Units

          Before you fully repair the bridge, complete all your construction and decide on your units. At a minimum get two Snipers and 3-4 Shermans. One Sherman Crocodile may be occasionally useful for removing your own tank traps but because of the Population Cap required to field a Crocodile, you may want to instead use Engineers for that.
          For anti-infantry, because of the broad area and off-map reinforcements for the enemy, an M8 Greyhound is overall the best choice and you should have at least two to chase down infantry. If you can be careful, an M3 Halftrack with the Quad upgrade can work better but is less sturdy.

          After clearing the opposite waterfront of anything that will shoot your Engineers, assemble a strong defense at the bridge to make sure nothing ever crosses to hit your production facilities. You don't need to a strong push into enemy territory yet so your tanks can sit on your side of the bridge.
          In the picture below, you can see that in our playthrough we had a Sherman Crocodile. It was really not that useful and not recommended.


          Part 2 - Ready Attack on SS Headquarters

          When building and army composition are complete, repair the bridge. As with Cherbourg, send Snipers over first to reconnoitre first. The objectives in this phase are:
          • Capture Strategic Points to blind the enemy.
            • Some Strategic Points have mines, so be wary of securing them with your valuable snipers. Try Engineers with mine detectors, or Riflemen who grenade the area first.
          • Make a path for the Calliope to reach the graveyard.
          • Optional: Earn 6 Command Points to get the Bombing Run ability.
            • Although Bombing Runs are useful, they are also pricey in Munitions as planes cannot strafe or bomb into territory that is not fully revealed (e.g., by plane recon).
              • Enemy units briefly revealed by being hit by artillery or mortar fire do not count as revealing anything.
              • Also, getting too close to the HQ triggers the 30-minute objective, so you cannot really get units in to spot for you.
          There is a lot of infantry for them to get kills for level 3 Veterancy when they can move around at full speed. Thereafter, just two Snipers can almost take all of the Strategic Points, though with a bit of running around as the enemy will start trying to take them back. You can even sneak in Riflemen to assist if you can keep them out of sight (see below, where they are "hiding" behind a building to spot for two snipers clearing patrols from the town square.


          While you are doing reconnaissance, periodically, small teams of Panzerschreck-equipped infantry or Pioneers will try to make it across the bridge, so make sure that route is covered.

          The best location for the Calliope (and a mortar team) to bombard the enemy is at the graveyard or slightly north of it (be careful not to get too close; see picture below).


          This location is complicated by two Panzers on a patrol route that goes near it, and a Strategic Point that the enemy will try to retake (see below). It is also one of the Strategic Points that are mined and periodically a Pioneer may try to replace the mine, but not necessarily retake the Point.


          Another good location for bombarding the eastern side of the SS compound is at the fork in the middle road (see below). There is a sniper here that might not be camouflaged and that you can kill with your own (see second picture below).


          Part 3 - Attack SS Headquarters

          Once a path is secured, think about your defensive lines. On Expert Difficulty you really need at least 2 tanks near your Calliope to keep it safe and respond to enemy medium tanks (Panzers). Even then they will need Engineer repair support.
          Your bridge still needs to be defended but you may not have any Shermans to spare, so set up tank traps and have more Machine-Gun Emplacements. on your side of the bridge, but be careful not to block infantry retreat paths to the Triage Centre.
          You can lay a long line of tank traps, but I'm pretty sure some light vehicles come from off-map, so you still need to be careful of lighter vehicles.

          Your targets in the SS Headquarters, in order of priority are:
          • Anti-Aircraft Guns.
            • You can see these in the fog of war (but not whether they are crewed). While these are active, any of the planes called (even aerial reconnaissance) can instantly fail from the plane being shot down.
            • Two are on the south side and just within range of your mortars.
            • Another two are at the HQ itself (see below).
          • Panzer Command and Sturm Armory (they are very close together on the east side).
          • Krieg Barracks.
          • The three Panzer IV's in the garden in front of the HQ building IF you want to assault the compound later.
          • The SS HQ.
          During these assaults you will probably destroy the Nebelwerfers as well through incidental fire.
          Keep bombarding with the Calliope as often as possible to keep damage up. If you let up for too long, the numerous Pioneers will repair a building very quickly (see below). By keeping up the bombardment you will also be killing off Pioneers who are repairing the structure.


          The bombardment objectives will take up a long time, and in the meantime you just need to hold your ground. In the worst case, retreat all the way back to the bridge, rebuild your army, and try again. Time is on your side.

          Part 4 - Defend the Town Square

          Once the SS Headquarters are destroyed, the 30-minute defense mission starts. Just fall back to the Town Square and hold because you don't have to charge up to the HQ anymore. Pioneers may start rebuilding the HQ (you do not have to re-destroy it) and production facilities, but at this point it is basically too late for the Germans to recover.
          You will be automatically awarded capture of the Strategic Point at the town square, so your infantry can start running around putting Listening Posts on captured points and your Engineers can start placing Machine-Gun Nests.

          If you have destroyed the troop-production facilities, enemies will probably only come from off-map and there is really nothing you can do to stop that. These will include trucks carrying what appear to look like barrels. When destroyed, they drop a Goliath Tracked Mine. To make the Goliath your unit, simply click on it -- you do not have to send a unit to pick it up. Shortly after, the Goliath changes colours from inert grey to blue. When they are detonated, you have lost that unit, so you may get an announcement that your forces are "taking casualties".

          Company of Heroes Walkthrough - Invasion of Normandy - Mission 8 - St. Fromond

          Click here for the index of our Company of Heroes Mission Walkthrough Index and our gameplay paradigm.

          St. Fromond is supposed to be a frantic artillery versus artillery battle (German Nebelwerfer 41's versus your Sherman Calliope) and it's frantic fun for 30 minutes, but if you want to do this mission the smart way -- and if you want the medal for destroying the enemy HQ -- instead of securing the town, go for the HQ first.
          And realistically, why would you take the town and alert the enemy if you can box them in, take out their anti-aircraft armament, and safely bomb them?

          The mission is won and over after a 30-minute defend-the-town-square win condition objective, which is triggered in the following ways:
          • Capturing the Strategic Point in the town square: This is the "normal" way and starts Nebelwerfer moving to points indicated during the objective briefing.
          • Capturing too many Strategic Points: If you capture all Strategic Points other than the three that are immediately adjacent to the SS HQ sector to the far north.
          • Getting too close to the SS HQ: If any unit enters any of the Strategic Points that are immediately adjacent to the SS HQ sector to the far north.
          • Destroying the SS Headquarters.
          Destroying the SS Headquarters can take a long time on Expert Difficulty, not the least because the enemy has a lot of Pioneer squads that can repair stuff -- so any assault needs to be sustained to make steady progress.

          It is possible to land paratroopers on the other side of the bridge without repairing it first, via the Air Drops side of the Airborne Company Command Tree, but without Triage facilities we would ultimately lose squads and that is not part of our playthrough paradigm -- we do not unnecessarily send units into suicidal conditions.

          There are a lot of hedges in this map, but the shorter ones can be walked through:


          Overall Strategy

          Remember that an army is about projection of firepower. In this case, your infantry are scouting and taking ground to protect your armour, which is keeping assaults away from your mortars and Sherman Calliope, who are shelling the enemy base to take out their anti-aircraft guns so that planes can swoop by and bomb the enemy HQ.
          In practice, the Calliope and it's free bombardments will be doing most of the work, but aerial reconnaissance has the most reach.
          Because we wanted the medal for destroying the enemy HQ, we had to delay formally capturing the town or otherwise triggering the 30-minute defense mission.

          Part 1 - Clear Waterfront, Prepare Units

          Before you fully repair the bridge, complete all your construction and decide on your units. At a minimum get two Snipers and 3-4 Shermans. One Sherman Crocodile may be occasionally useful for removing your own tank traps but because of the Population Cap required to field a Crocodile, you may want to instead use Engineers for that.
          For anti-infantry, because of the broad area and off-map reinforcements for the enemy, an M8 Greyhound is overall the best choice and you should have at least two to chase down infantry. If you can be careful, an M3 Halftrack with the Quad upgrade can work better but is less sturdy.

          After clearing the opposite waterfront of anything that will shoot your Engineers, assemble a strong defense at the bridge to make sure nothing ever crosses to hit your production facilities. You don't need to a strong push into enemy territory yet so your tanks can sit on your side of the bridge.
          In the picture below, you can see that in our playthrough we had a Sherman Crocodile. It was really not that useful and not recommended.


          Part 2 - Ready Attack on SS Headquarters

          When building and army composition are complete, repair the bridge. As with Cherbourg, send Snipers over first to reconnoitre first. The objectives in this phase are:
          • Capture Strategic Points to blind the enemy.
            • Some Strategic Points have mines, so be wary of securing them with your valuable snipers. Try Engineers with mine detectors, or Riflemen who grenade the area first.
          • Make a path for the Calliope to reach the graveyard.
          • Optional: Earn 6 Command Points to get the Bombing Run ability.
            • Although Bombing Runs are useful, they are also pricey in Munitions as planes cannot strafe or bomb into territory that is not fully revealed (e.g., by plane recon).
              • Enemy units briefly revealed by being hit by artillery or mortar fire do not count as revealing anything.
              • Also, getting too close to the HQ triggers the 30-minute objective, so you cannot really get units in to spot for you.
          There is a lot of infantry for them to get kills for level 3 Veterancy when they can move around at full speed. Thereafter, just two Snipers can almost take all of the Strategic Points, though with a bit of running around as the enemy will start trying to take them back. You can even sneak in Riflemen to assist if you can keep them out of sight (see below, where they are "hiding" behind a building to spot for two snipers clearing patrols from the town square.


          While you are doing reconnaissance, periodically, small teams of Panzerschreck-equipped infantry or Pioneers will try to make it across the bridge, so make sure that route is covered.

          The best location for the Calliope (and a mortar team) to bombard the enemy is at the graveyard or slightly north of it (be careful not to get too close; see picture below).


          This location is complicated by two Panzers on a patrol route that goes near it, and a Strategic Point that the enemy will try to retake (see below). It is also one of the Strategic Points that are mined and periodically a Pioneer may try to replace the mine, but not necessarily retake the Point.


          Another good location for bombarding the eastern side of the SS compound is at the fork in the middle road (see below). There is a sniper here that might not be camouflaged and that you can kill with your own (see second picture below).


          Part 3 - Attack SS Headquarters

          Once a path is secured, think about your defensive lines. On Expert Difficulty you really need at least 2 tanks near your Calliope to keep it safe and respond to enemy medium tanks (Panzers). Even then they will need Engineer repair support.
          Your bridge still needs to be defended but you may not have any Shermans to spare, so set up tank traps and have more Machine-Gun Emplacements. on your side of the bridge, but be careful not to block infantry retreat paths to the Triage Centre.
          You can lay a long line of tank traps, but I'm pretty sure some light vehicles come from off-map, so you still need to be careful of lighter vehicles.

          Your targets in the SS Headquarters, in order of priority are:
          • Anti-Aircraft Guns.
            • You can see these in the fog of war (but not whether they are crewed). While these are active, any of the planes called (even aerial reconnaissance) can instantly fail from the plane being shot down.
            • Two are on the south side and just within range of your mortars.
            • Another two are at the HQ itself (see below).
          • Panzer Command and Sturm Armory (they are very close together on the east side).
          • Krieg Barracks.
          • The three Panzer IV's in the garden in front of the HQ building IF you want to assault the compound later.
          • The SS HQ.
          During these assaults you will probably destroy the Nebelwerfers as well through incidental fire.
          Keep bombarding with the Calliope as often as possible to keep damage up. If you let up for too long, the numerous Pioneers will repair a building very quickly (see below). By keeping up the bombardment you will also be killing off Pioneers who are repairing the structure.


          The bombardment objectives will take up a long time, and in the meantime you just need to hold your ground. In the worst case, retreat all the way back to the bridge, rebuild your army, and try again. Time is on your side.

          Part 4 - Defend the Town Square

          Once the SS Headquarters are destroyed, the 30-minute defense mission starts. Just fall back to the Town Square and hold because you don't have to charge up to the HQ anymore. Pioneers may start rebuilding the HQ (you do not have to re-destroy it) and production facilities, but at this point it is basically too late for the Germans to recover.
          You will be automatically awarded capture of the Strategic Point at the town square, so your infantry can start running around putting Listening Posts on captured points and your Engineers can start placing Machine-Gun Nests.

          If you have destroyed the troop-production facilities, enemies will probably only come from off-map and there is really nothing you can do to stop that. These will include trucks carrying what appear to look like barrels. When destroyed, they drop a Goliath Tracked Mine. To make the Goliath your unit, simply click on it -- you do not have to send a unit to pick it up. Shortly after, the Goliath changes colours from inert grey to blue. When they are detonated, you have lost that unit, so you may get an announcement that your forces are "taking casualties".

          reade more... Résuméabuiyad

          Company of Heroes Walkthrough - Invasion of Normandy - Mission 7 - Sottevast (Expert)

          Company of Heroes Walkthrough - Invasion of Normandy - Mission 7 - Sottevast

          Click here for the index of our Company of Heroes Mission Walkthrough Index and our gameplay paradigm.

          This mission makes zero sense. You break in the front door and are to hold ground for reinforcements, but the enemy does not redirect units -- especially anti-infantry armored vehicles -- to the scene even though they constantly fail to retake control of their front door. Anyway...

          Although you start with just Paratroopers, this mission suddenly becomes remarkably easy because you are given tanks against the base defenders who are mostly infantry.
          • The Flakvierling 38 20mm AA gun are very dangerous to infantry but on Expert Difficulty, an MGMC Halftrack (with the Quad .50 Cal Maxson Mount) can easily outlast one in front-to-front shooting contest -- and you will get two MGMCs and other tanks in this mission. Only two crewman need to be killed -- the third dismounts to defend on foot.
          • We finished this mission losing only a single Paratrooper squad member to surprise sniper fire at the Oxygen Tanks.
          Part 1 - Secure Entrance

          Don't go in the front way, or even the shattered gate section to the left -- your units will probably be detected on their way in. Instead, make your own entrance at the far left (see picture below). This way, you can bring everyone in and prepare before engaging any of the enemy, possibly by going into the moat for hard cover.
          Reinforce your teams to full 6/6 units -- you can do so safely here. And instead of using a Satchel Charge, get at least one team the M18 57mm Recoilless Rifle upgrade -- contrary to the mission briefing, you can get at least that heavy weapon without stealing it from the Germans.
          • You may want to consider only getting one team the Recoilless Rifle upgrade. Since anti-tank will be done by your own tanks, it may be more useful to have them pick up German light machine-guns dropped by enemy squads during this mission, allowing them to suppress enemy infantry.


          In the video below you can see how an assault on the front gate can go very badly (on Hard Difficulty) if you charge straight in, especially when the Germans man their machine-guns and Anti-Aircraft Gun against you.


          Part 2 - Hold Entrance

          The mission to hold the entrance doesn't start until you have captured the Strategic Point, which you can't really do without taking out the machine-gun towers. Until the towers are down, enemy reinforcements spawn from the left tower. You can therefore (very slowly) collect Command Points by killing these reinforcements until you get bored.

          The machine-gun towers CAN poke their guns out another window, so you don't have that much time to flank them, although coming in close to the walls seems to work. You can therefore stop your units there and have them attack the tower itself with a Recoilless Rifle to bring it down without using resources instead of using a Satchel Charge.


          Once you are ready to capture the Strategic Point at the main gate, you can wait to establish your defense lines first, although there is time to build them before enemy units actually arrive.
          If you wander too far forward (see below), you risk attracting the attention of placed units and once engaged you will end up alerting that entire sector to your presence and attract more enemy units to your location.


          Below is a picture of our defensive line.
          • We put up tank traps just in case a tank gets sent our way, but none ever came. Notice we put it to block the "moat" which tanks can't go through anyway, thus blocking pretty much the entire approach so we could just pull back if necessary. All other base structures are too light to stop a tank.
          • We put our machine-guns closer to the AA gun so that all three can help (although the machine-guns tend to pin enemies first and wipe out most). Two machine-guns comfortably held off the infantry assaults, but there is more than enough Population Cap to support more guns.
          • The Paratroopers behind the wall on the right side are merely forward spotters for our machine-guns and generally did not end up fighting. The holes we made in the walls from taking out the machine-gun towers were blocked against infantry with barbed wire, as shown.
          • We put our machine-gun teams BEHIND the Strategic Point. Enemies will usually want to shoot the first thing they see, which means they aren't shooting at our machine-gun teams and we can in turn pin them before taking significant enemy fire.
            • In between attack waves we repaired or replaced the Listening Post, of course. If you look at the Manpower accumulation rate, clearly it is cheap and disposable in this mission.
          • If we housed units in the square bunker to the left, they would be ahead of the Strategic Point AND some units would stand on the rooftop without cover. So overall that was a bad choice for defense even though units would be in a building.
          • If the enemy advanced closer than the remains of the machine-gun towers, our AA gun also got to shoot, so the whole stretch of road bordered by thin walls was one deadly suppression fire killzone.
          • Enemy infantry are dropped off by halftracks. If the halftracks take any hits at all, they retreated. If you absolutely want to kill them, try mines near the towers you took out.
             
          The first 10-minute defense saw only a couple waves of infantry, all almost instantly suppressed or pinned. The subsequent 10-minute defense stretches had NO attackers at all, possibly because we didn't alert any neighbouring sectors or because we were too far back from the Strategic Point. In any case, the final reinforcements were: 1x Engineer Squad, 2x MGMC Halftrack, 2x M4 Sherman, 1x M8 Greyhound.

          Since you cannot build a Triage Centre, the safest way to handle this mission is to take point with vehicles and pull them back for repair. Absolutely do not lose your Engineer Squad, even if you have to leave them far behind.

          Part 3 - Capture Sectors

          Each Sector has a Guard Tower. If you do not take out a Guard Tower on alert (sirens on), enemy infantry spawn from it. Since these are just infantry, if you are taking point with armored vehicles and tanks, it really doesn't matter so much. Have your tanks blow it up whenever you are ready.

          Each Sector has some sort of trigger (typically when an Anti-Aircraft Gun is destroyed) that causes the Axis commander to make a panicky announcement. When that happens, enemy infantry are spawned from two locations: Off-map from the northeast edge (see below) and from buildings on the roof of the large building to the west. The latter charge down some stairs (see below, lower picture).
          Until you are pretty close to the ramp down to the V2 launch platform, no matter what the announcement (some sound more serious than others) the results appear to be the same.
          Until the Base Komandant is killed, announcements and off-map reinforcements continue even after all Guard Towers are destroyed.


          As you go straight up the road from the entrance you will encounter at least one mortar team around the middle. That is your chance to get a first mortar. Two is nicer for getting first-strike-kills against enemy mortar positions -- that is, when you know where they are and launch your salvo before they can shell you back.

          To the southwest are Oxygen Tanks watched by a Sniper in a sandbag nest. The Sniper starts camouflaged but whenever you see such a nest, an exploratory mortar bombardment should reveal units there even if the location is in the fog of war.


          The Oxygen Tanks can apparently only be destroyed by demolitions, and an order to plant demolitions causes the ordered unit to plant three. You can abort and move the unit away prior to planting three but you cannot detonate any until all three are planted (see below).
          There is no time limit to this so you might as well clear the area first before planting demolition charges.


          Near the Oxygen Tanks is also the first Command Bunker of the base Komandant. When the bunker is severely damaged, he and his Knight's Cross escort will run to another Bunker near the Flak88, and when that position has to be abandoned, he will run down the ramp to the launch pad (see below) and flee no further. Remarkably hard to kill, though. I recommend not chasing him, and instead attack him whenever your advance into the base reaches his location.


          The broad roof has another Sniper (see below) as well as a 88mm Flak 36 AT/AA gun.


          Same as with the AA guns, the Flak88 is not considered destroyed until all three crewmen are dead, but you only have to kill two crewmen to neutralize it as a single soldier cannot operate it on their own and they will hop out to defend (see below).


          Until the Flak88 is destroyed, keep an eye on it whenever you are close (you can always see it once spotted) because it can occasionally surprise you with where it can hit. Such as in the picture below where it shouldn't really be able to direct-fire on the Sherman. It can do fairly significant damage to even Veterancy level 3 M4 Shermans.


          The route to the Flak88 is not so dangerous that you cannot rush with Shermans, but trying to gun down the crew with a Sherman tank's machine-gun is very tedious. The safer and not that much slower way is to mortar the position. However, be careful to draw out and kill nearby infantry first. A fairly safe position for your mortar team is in the stairwell east of the gun, leading down from the roof to the train station.

          You can capture the Flak88, but this is not recommended:
          • It can take you over your Population Cap and hamper your ability to reinforce: It requires 3 crew but costs 11 Population.
          • It cannot hit anything useful by the time you have captured it.
          • It cannot be abandoned to recover crew or save them from enemy attack.
          • Enemy reinforcements can spawn from the square command bunkers on the roof, forcing you to either lose the Flak88 crew or defend them.


          Part 4 - Final Approach

          When the guard tower closest to the ramp down to the V2 Rocket Launch Platform is destroyed, the Base Komandant will call for the biggest push of reinforcements.

          • The usual reinforcements arrive from off-map and the roof.
          • A special mix of Knight's Cross Holders and infantry with Panzerschrecks will also arrive (see picture below for starting location). They appear even if the Komandant is dead -- there just won't be a special announcement (see below).


          Once these units are clear and the Base Komandant is killed, the map is finally secure. Wire the Launch Platform and detonate it for the ending cutscene. See below for our final unit complement.

          Company of Heroes Walkthrough - Invasion of Normandy - Mission 7 - Sottevast

          Click here for the index of our Company of Heroes Mission Walkthrough Index and our gameplay paradigm.

          This mission makes zero sense. You break in the front door and are to hold ground for reinforcements, but the enemy does not redirect units -- especially anti-infantry armored vehicles -- to the scene even though they constantly fail to retake control of their front door. Anyway...

          Although you start with just Paratroopers, this mission suddenly becomes remarkably easy because you are given tanks against the base defenders who are mostly infantry.
          • The Flakvierling 38 20mm AA gun are very dangerous to infantry but on Expert Difficulty, an MGMC Halftrack (with the Quad .50 Cal Maxson Mount) can easily outlast one in front-to-front shooting contest -- and you will get two MGMCs and other tanks in this mission. Only two crewman need to be killed -- the third dismounts to defend on foot.
          • We finished this mission losing only a single Paratrooper squad member to surprise sniper fire at the Oxygen Tanks.
          Part 1 - Secure Entrance

          Don't go in the front way, or even the shattered gate section to the left -- your units will probably be detected on their way in. Instead, make your own entrance at the far left (see picture below). This way, you can bring everyone in and prepare before engaging any of the enemy, possibly by going into the moat for hard cover.
          Reinforce your teams to full 6/6 units -- you can do so safely here. And instead of using a Satchel Charge, get at least one team the M18 57mm Recoilless Rifle upgrade -- contrary to the mission briefing, you can get at least that heavy weapon without stealing it from the Germans.
          • You may want to consider only getting one team the Recoilless Rifle upgrade. Since anti-tank will be done by your own tanks, it may be more useful to have them pick up German light machine-guns dropped by enemy squads during this mission, allowing them to suppress enemy infantry.


          In the video below you can see how an assault on the front gate can go very badly (on Hard Difficulty) if you charge straight in, especially when the Germans man their machine-guns and Anti-Aircraft Gun against you.


          Part 2 - Hold Entrance

          The mission to hold the entrance doesn't start until you have captured the Strategic Point, which you can't really do without taking out the machine-gun towers. Until the towers are down, enemy reinforcements spawn from the left tower. You can therefore (very slowly) collect Command Points by killing these reinforcements until you get bored.

          The machine-gun towers CAN poke their guns out another window, so you don't have that much time to flank them, although coming in close to the walls seems to work. You can therefore stop your units there and have them attack the tower itself with a Recoilless Rifle to bring it down without using resources instead of using a Satchel Charge.


          Once you are ready to capture the Strategic Point at the main gate, you can wait to establish your defense lines first, although there is time to build them before enemy units actually arrive.
          If you wander too far forward (see below), you risk attracting the attention of placed units and once engaged you will end up alerting that entire sector to your presence and attract more enemy units to your location.


          Below is a picture of our defensive line.
          • We put up tank traps just in case a tank gets sent our way, but none ever came. Notice we put it to block the "moat" which tanks can't go through anyway, thus blocking pretty much the entire approach so we could just pull back if necessary. All other base structures are too light to stop a tank.
          • We put our machine-guns closer to the AA gun so that all three can help (although the machine-guns tend to pin enemies first and wipe out most). Two machine-guns comfortably held off the infantry assaults, but there is more than enough Population Cap to support more guns.
          • The Paratroopers behind the wall on the right side are merely forward spotters for our machine-guns and generally did not end up fighting. The holes we made in the walls from taking out the machine-gun towers were blocked against infantry with barbed wire, as shown.
          • We put our machine-gun teams BEHIND the Strategic Point. Enemies will usually want to shoot the first thing they see, which means they aren't shooting at our machine-gun teams and we can in turn pin them before taking significant enemy fire.
            • In between attack waves we repaired or replaced the Listening Post, of course. If you look at the Manpower accumulation rate, clearly it is cheap and disposable in this mission.
          • If we housed units in the square bunker to the left, they would be ahead of the Strategic Point AND some units would stand on the rooftop without cover. So overall that was a bad choice for defense even though units would be in a building.
          • If the enemy advanced closer than the remains of the machine-gun towers, our AA gun also got to shoot, so the whole stretch of road bordered by thin walls was one deadly suppression fire killzone.
          • Enemy infantry are dropped off by halftracks. If the halftracks take any hits at all, they retreated. If you absolutely want to kill them, try mines near the towers you took out.
             
          The first 10-minute defense saw only a couple waves of infantry, all almost instantly suppressed or pinned. The subsequent 10-minute defense stretches had NO attackers at all, possibly because we didn't alert any neighbouring sectors or because we were too far back from the Strategic Point. In any case, the final reinforcements were: 1x Engineer Squad, 2x MGMC Halftrack, 2x M4 Sherman, 1x M8 Greyhound.

          Since you cannot build a Triage Centre, the safest way to handle this mission is to take point with vehicles and pull them back for repair. Absolutely do not lose your Engineer Squad, even if you have to leave them far behind.

          Part 3 - Capture Sectors

          Each Sector has a Guard Tower. If you do not take out a Guard Tower on alert (sirens on), enemy infantry spawn from it. Since these are just infantry, if you are taking point with armored vehicles and tanks, it really doesn't matter so much. Have your tanks blow it up whenever you are ready.

          Each Sector has some sort of trigger (typically when an Anti-Aircraft Gun is destroyed) that causes the Axis commander to make a panicky announcement. When that happens, enemy infantry are spawned from two locations: Off-map from the northeast edge (see below) and from buildings on the roof of the large building to the west. The latter charge down some stairs (see below, lower picture).
          Until you are pretty close to the ramp down to the V2 launch platform, no matter what the announcement (some sound more serious than others) the results appear to be the same.
          Until the Base Komandant is killed, announcements and off-map reinforcements continue even after all Guard Towers are destroyed.


          As you go straight up the road from the entrance you will encounter at least one mortar team around the middle. That is your chance to get a first mortar. Two is nicer for getting first-strike-kills against enemy mortar positions -- that is, when you know where they are and launch your salvo before they can shell you back.

          To the southwest are Oxygen Tanks watched by a Sniper in a sandbag nest. The Sniper starts camouflaged but whenever you see such a nest, an exploratory mortar bombardment should reveal units there even if the location is in the fog of war.


          The Oxygen Tanks can apparently only be destroyed by demolitions, and an order to plant demolitions causes the ordered unit to plant three. You can abort and move the unit away prior to planting three but you cannot detonate any until all three are planted (see below).
          There is no time limit to this so you might as well clear the area first before planting demolition charges.


          Near the Oxygen Tanks is also the first Command Bunker of the base Komandant. When the bunker is severely damaged, he and his Knight's Cross escort will run to another Bunker near the Flak88, and when that position has to be abandoned, he will run down the ramp to the launch pad (see below) and flee no further. Remarkably hard to kill, though. I recommend not chasing him, and instead attack him whenever your advance into the base reaches his location.


          The broad roof has another Sniper (see below) as well as a 88mm Flak 36 AT/AA gun.


          Same as with the AA guns, the Flak88 is not considered destroyed until all three crewmen are dead, but you only have to kill two crewmen to neutralize it as a single soldier cannot operate it on their own and they will hop out to defend (see below).


          Until the Flak88 is destroyed, keep an eye on it whenever you are close (you can always see it once spotted) because it can occasionally surprise you with where it can hit. Such as in the picture below where it shouldn't really be able to direct-fire on the Sherman. It can do fairly significant damage to even Veterancy level 3 M4 Shermans.


          The route to the Flak88 is not so dangerous that you cannot rush with Shermans, but trying to gun down the crew with a Sherman tank's machine-gun is very tedious. The safer and not that much slower way is to mortar the position. However, be careful to draw out and kill nearby infantry first. A fairly safe position for your mortar team is in the stairwell east of the gun, leading down from the roof to the train station.

          You can capture the Flak88, but this is not recommended:
          • It can take you over your Population Cap and hamper your ability to reinforce: It requires 3 crew but costs 11 Population.
          • It cannot hit anything useful by the time you have captured it.
          • It cannot be abandoned to recover crew or save them from enemy attack.
          • Enemy reinforcements can spawn from the square command bunkers on the roof, forcing you to either lose the Flak88 crew or defend them.


          Part 4 - Final Approach

          When the guard tower closest to the ramp down to the V2 Rocket Launch Platform is destroyed, the Base Komandant will call for the biggest push of reinforcements.

          • The usual reinforcements arrive from off-map and the roof.
          • A special mix of Knight's Cross Holders and infantry with Panzerschrecks will also arrive (see picture below for starting location). They appear even if the Komandant is dead -- there just won't be a special announcement (see below).


          Once these units are clear and the Base Komandant is killed, the map is finally secure. Wire the Launch Platform and detonate it for the ending cutscene. See below for our final unit complement.

          reade more... Résuméabuiyad

          Company of Heroes Walkthrough - Invasion of Normandy - Mission 6 - Cherbourg (Expert)

          Company of Heroes Walkthrough - Invasion of Normandy - Mission 6 - Cherbourg

          Click here for the index of our Company of Heroes Mission Walkthrough Index and our gameplay paradigm.

          This is a much easier mission than Mission 5 - Montebourg because of the natural chokepoints on the map.
          • Between the western pier where you start, there is a long bridge which limits how far enemy mortar can shell you from beyond the bridge. Between the middle pier and the eastern pier, there is a thin section of land and that can serve as a narrow chokepoint.
          • Block a chokepoint and you can stall the enemy while you do other things.
          Because of the building density, you are liable to be surprised by anti-tank troops and not have enough time to move your valuable tanks to cover. Therefore, scouting is important. Taking out anti-tank units, or at least spotting them to plan for them early, is important. For this reason, two Snipers are recommended.
          Because of your population cap, I recommend NOT reinforcing your initial Riflemen squads. Instead, use them to pick up Mortars. Leave them at squad size 2-4 and limit their exposure to seizing Strategic Points. This lets you maximize your choice of units. In doing this, we squeezed out three more Sherman tanks for a total of four plus the Sherman Crocodile initially provided.

          Part 1 - Arrival

          Turn the building into a Forward Barracks, then WAIT for the tanks. The area is really too hostile to explore without armor. There are a couple of things you can do, however.

          First, the nearest Sniper can be taken out safely by going around to the north side and approaching with units pressed against the buildings and staying out of the Sniper's fire arc. You don't have much time since enemy infantry is approaching, but you can lob a Grenade (see picture below). On Expert Difficulty you'll have to do this twice (or with two squads).
          To quickly evade enemy infantry, garrison a nearby building and if you don't want to engage them, exit out the other side.


          Another Strategic Point you could capture is northwest of the building mission-marked for Forward Barracks (see picture below). The fence would normally cause you to run out onto the street and be exposed to Sniper fire from the building at the end of the street, but you can use a Panzerschreck to  blow a hole in the fence and enter the little courtyard. However, your unit will be subject to mortar fire from the town square, so it's very chancy whether you can actually capture this location without losses or not.


          Part 2 - Secure the Town Hall

          Once the tanks arrive you can let them take point and clear out the square in front of the Town Hall. Keep your troops out of the firefight as the enemy can't really do anything to the tanks anyway.
          You will also receive a Machine-Gun Team so you can block the end of the road against infantry drifting in and secure the Strategic Point (see picture above for the area).

          Part 3 - Secure the pier and Coastal Gun Battery

          Now that you have a HQ, start planning your force composition, build a Tank Depot, and have your infantry scurry around grabbing resources and Strategic Points.
          • Just north of your Town Hall are resources on the other side of some buildings. You can go right through the buildings to quickly grab them:

          After killing the officer spotting for artillery that will shell the waterfront south of the bridge, the lower south Strategic Point at the waterfront is still not safe to capture because a StuG across the water somehow has enough cannon range to shoot at you but your Shermans do not have the range on their own cannons to shoot back.
          • If you want to capture this location prior to seizing the middle pier across the bridge (which will also blind the AI to the location so they cannot attack it from long range anymore), you can sit a Sherman at the Strategic Point with Engineers behind to repair it. While the StuG is busy with your Sherman, capture the Strategic Point (see picture below).
          • The slower way is to use mortars and keep shelling until the StuG is destroyed or loses its main gun in a lucky hit.

          Scout ahead with infantry behind buildings or with Snipers -- try not to let your tanks be surprised by enemy tanks or anti-tank weapons. A sudden rush of them can wipe a tank on Expert Difficulty -- even a level 3 Veterancy tank. If certain areas are too busy, consider using a mortar on them first. If targeted, try to use the buildings to get your tank out of line of sight.

          There are unlimited reinforcements of infantry from the Coastal Gun Battery until the Strategic Point there is captured. They always head toward a specific location at the water's edge not too far north from the bridge. If you like, you can let them continually spawn and kill them off for Veterancy levels. However, there is an easier way to get XP at the Bridge.

          Secure the area around the Gun Battery, but do NOT destroy the Gun Battery yet.
          • The Gun Battery doors and the Gun Battery itself can be blown up in various ways, including a Sherman tank (probably the easiest and costs no resources as you will likely have a tank there).
          • But delay doing so because until the Coastal Guns are destroyed, the enemies across the bridge have unlimited reinforcements, including StuGs from the south that move to sit in the middle of the bridge. However, if you don't cross the bridge, they won't come to you either. The StuG at the bridge won't react if it can't see any of your units.
          Part 4 - Optional - Get unit Veterancy

          Because a StuG periodically spawns from the south exit of the middle pier (until the Coastal Gun Battery is destroyed), you can camp the bridge to keep killing it for Veterancy.
          • In the unlikely case that your tanks haven't yet achieved Veterancy level 3 from killing lots of infantry, you can park two or three at the bridge. Watch for mortar action which can't kill your tanks but which can hurt infantry support.
            • Two tanks are recommended as a single Sherman, even at Veterancy level 3, is not guaranteed to win one-on-one against a StuG IV on Expert Difficulty.
          • Riflemen squads can also get Veterancy from tank kills, but they should hang back until the StuG engages one of your tanks. Then rush down and blow up the StuG (see picture below).

          Part 5 - Optional Sightseeing, NORMAL DIFFICULTY

          There is something interesting to see on this map if you HAVE NOT destroyed the Coastal Gun Battery, and if you can hold ground across the bridge at the middle pier. The fighting is so brutal that I really don't recommend this on Expert Difficulty. See picture below for the location.


          At this location, basically straight east from the bridge, enemy infantry spawn immediately after each wave is destroyed. They are so numerous and spawn so quickly that it's like popcorn popping. I camped the location with a Crocodile and supporting troops for a long time but it looked like the infantry never stopped spawning.
          Just to the north of this location is where SdKfz 251 Half-Tracks steadily arrive, also in apparently unlimited numbers.

          Part 6 - Cross Bridge

          When you are tired of killing StuGs, destroy the Coastal Gun Battery. You will then get the Off-Map Artillery Support power for free, which means you have basically won the mission if you want to just spam that power.
          Fighting your way across the bridge is not that bad, but infantry losses can be significant because of mortar fire you can't get to fast enough. Instead, send your Snipers first. We will discuss this mission without using the Artillery Power unless necessary.

          If you do want to charge across:
          • Remember that your tanks can use the buildings near the German end of the bridge for cover so that you can avoid being engaged by more than one tank at a time (see picture below).
          • Watch out for Pak38 AT Guns and Panzerschreck infantry coming down the main road.
          • If you need help against the tanks, clear the big building (see picture below) and put in your own AT-equipped infantry. Suddenly the enemy tanks will be exposed to flank AT hits.
          • Get the mortar teams early to protect infantry.


          The much safer way is to reconnaissance first.

          First, start with some "exploratory mortar shelling". For example, you know that sandbags usually mean enemy heavy weapons teams (see below). Shell it in the fog of war to see if anything is there and to stir up the Germans and see what they send over the bridge. The bridge is a chokepoint where your massed troops should be able to crush whatever they send over.


          Next, send a couple of Snipers over and carefully look around.
          • You want Veterancy level 3 Snipers if you can because there are patrols and scripted reinforcements, so occasionally they will have to run and you really don't want them ever out of Camouflage unless out of line of sight of anything.
          • Sending Snipers over, even if they are never discovered, will trigger enemy activity. Infantry (possibly all the way from their far HQ to the northwest) will periodically head for your HQ (but always stop to engage whatever they spot), so be prepared with a tank or two to intercept them. They follow the same route all the time, so it's easy to just park a tank where you know they will come.
          • Try to snipe Pak38 50mm Anti-Tank Guns and Mortar Teams. Once those are out of the way, you can start moving your tanks over slowly. Remember that Shermans cannot reliably go one-on-one against StuGs on Expert Difficulty, so what you may have to do is send two tanks over, kill a StuG, then withdraw back. Keep doing this until the area across the bridge is mostly clear.
          • After the enemy tanks are clear, scout with your Snipers again and take out mortar teams (see below) and whatever else you can.

          Finally once the mortar teams are killed, you can send tanks over to hold ground AND send infantry to support them. Until the mortar teams are gone, infantry are very vulnerable.
          • There is a German Tank Depot (Panzer Command) to the south of the middle pier and it will periodically create a tank, so send a couple of your own to find and destroy it, as well as other tanks positioned at various points south. Scout with your Sniper so you can plan to approach tanks from the flank and get first strike.
          • Secure the south side before proceeding north to make sure your rear is covered.
          Part 7 - Destroy the Demolition Station

          The rest of the map is basically just inching forward and seizing ground -- except for the time-limited mission to Destroy the Demolition Station.
          As soon as you are very close to the middle Strategic Point on the middle pier, you will trigger a time-limited mission to destroy a Demolition Station. On Expert Difficulty, you have 90 seconds from the time they start talking about the mission. In the picture below (from a Normal Difficulty gameplay, where you get an extra 30 seconds to complete the mission), you can see approximately where the mission begins.


          Listen to the briefing and they will reveal the area briefly. That is your opportunity to get in a first Off-Map Artillery Strike. Before the cooldown ends, you can have Snipers in range to spot for artillery and get in a second Artillery Strike right away. Remember to artillery strike the Demolition Station again as soon as you can.
          On Expert Difficulty, you can probably get in three full strikes before there are 2 seconds left, but because of the random spread to the strikes, there is no guarantee that the building will be destroyed by artillery strikes alone. Therefore, the potentially easy way to do this mission -- sneak up a Sniper to spot for artillery -- is not reliable. You still want Snipers scouting the way, but you will probably need tanks to finish the job.

          On Expert Difficulty, have the first strike hit the INFANTRY first. On Expert, the two Panzerschrek suicide squads are very dangerous to your tanks if you want your tank assault to survive at all. If you look at the pictures below, you will see that there are two Panzerschreck teams, and BOTH SURVIVE the artillery strike that was roughly centered on the infantry mass.


          For your advance, you need all the tanks you can get. You probably need 1 tank to hold the line at the chokepoint to the third pier, where enemies stream endlessly from the HQ, including one mortar team. You also want your Crocodile to deal with any infantry in cover and to quickly kill them. We were able to field two Shermans and one Crocodile, and leave two Shermans to hold ground at the chokepoint (which was more than enough since the infantry reinforcements sent against them never included anti-tank weapons).

          Also, you want to get advance notice of what's ahead so you can coordinate which unit strikes what on your way to the Demolition Station. To do that, we sent two Snipers all the way up to garrison one of the buildings nearest the Demolition Station that had sightline on the infantry.
          • On the way they spotted an AT Gun, which we flanked and took out with the Crocodile before continuing that tank up the west side.
          • Once in the building, the Snipers' main task was to take out any anti-tank infantry, which meant infantry bearing Panzerschreks that survived the artillery bombardment.
            • Pause and click on the exact unit carrying the Panzerschrek to kill that model specifically. This should at least delay them using their anti-tank weapon on your tanks.
            • Remember that when a squad loses a special-weapon-carrying member, another squad member automatically gets the weapon unless no one is available to do so. This is another reason why we hit Infantry with the initial artillery bombardment -- to thin out the squads as early as possible.
            • The AI typically does not pick up heavy weapons.
          • On the east side is a Panzer. It will charge down past your tanks to hit them from the side or rear. Block it with your tanks if you can and double-team it. Rush infantry to blow it up with infantry anti-tank weapons if you want extra insurance -- basically, use whatever you've got to take it down quickly and continue on.
          If you fail to destroy the Station, not too much happens. The Station still gets destroyed by script and there are some explosions here and there, but no actual change to the map.

          Part 8 - Clear the Map, Destroy HQ Buildings

          As mentioned before, there really isn't anything too special to the rest of the map. If you watch enemy reinforcements carefully, you will notice that mortar teams are typically sent to specific locations so you can camp those locations and kill them as they come; or kill them on the way to those locations.

          Below you can see our final troops for this map at the end of the Mission.

          Company of Heroes Walkthrough - Invasion of Normandy - Mission 6 - Cherbourg

          Click here for the index of our Company of Heroes Mission Walkthrough Index and our gameplay paradigm.

          This is a much easier mission than Mission 5 - Montebourg because of the natural chokepoints on the map.
          • Between the western pier where you start, there is a long bridge which limits how far enemy mortar can shell you from beyond the bridge. Between the middle pier and the eastern pier, there is a thin section of land and that can serve as a narrow chokepoint.
          • Block a chokepoint and you can stall the enemy while you do other things.
          Because of the building density, you are liable to be surprised by anti-tank troops and not have enough time to move your valuable tanks to cover. Therefore, scouting is important. Taking out anti-tank units, or at least spotting them to plan for them early, is important. For this reason, two Snipers are recommended.
          Because of your population cap, I recommend NOT reinforcing your initial Riflemen squads. Instead, use them to pick up Mortars. Leave them at squad size 2-4 and limit their exposure to seizing Strategic Points. This lets you maximize your choice of units. In doing this, we squeezed out three more Sherman tanks for a total of four plus the Sherman Crocodile initially provided.

          Part 1 - Arrival

          Turn the building into a Forward Barracks, then WAIT for the tanks. The area is really too hostile to explore without armor. There are a couple of things you can do, however.

          First, the nearest Sniper can be taken out safely by going around to the north side and approaching with units pressed against the buildings and staying out of the Sniper's fire arc. You don't have much time since enemy infantry is approaching, but you can lob a Grenade (see picture below). On Expert Difficulty you'll have to do this twice (or with two squads).
          To quickly evade enemy infantry, garrison a nearby building and if you don't want to engage them, exit out the other side.


          Another Strategic Point you could capture is northwest of the building mission-marked for Forward Barracks (see picture below). The fence would normally cause you to run out onto the street and be exposed to Sniper fire from the building at the end of the street, but you can use a Panzerschreck to  blow a hole in the fence and enter the little courtyard. However, your unit will be subject to mortar fire from the town square, so it's very chancy whether you can actually capture this location without losses or not.


          Part 2 - Secure the Town Hall

          Once the tanks arrive you can let them take point and clear out the square in front of the Town Hall. Keep your troops out of the firefight as the enemy can't really do anything to the tanks anyway.
          You will also receive a Machine-Gun Team so you can block the end of the road against infantry drifting in and secure the Strategic Point (see picture above for the area).

          Part 3 - Secure the pier and Coastal Gun Battery

          Now that you have a HQ, start planning your force composition, build a Tank Depot, and have your infantry scurry around grabbing resources and Strategic Points.
          • Just north of your Town Hall are resources on the other side of some buildings. You can go right through the buildings to quickly grab them:

          After killing the officer spotting for artillery that will shell the waterfront south of the bridge, the lower south Strategic Point at the waterfront is still not safe to capture because a StuG across the water somehow has enough cannon range to shoot at you but your Shermans do not have the range on their own cannons to shoot back.
          • If you want to capture this location prior to seizing the middle pier across the bridge (which will also blind the AI to the location so they cannot attack it from long range anymore), you can sit a Sherman at the Strategic Point with Engineers behind to repair it. While the StuG is busy with your Sherman, capture the Strategic Point (see picture below).
          • The slower way is to use mortars and keep shelling until the StuG is destroyed or loses its main gun in a lucky hit.

          Scout ahead with infantry behind buildings or with Snipers -- try not to let your tanks be surprised by enemy tanks or anti-tank weapons. A sudden rush of them can wipe a tank on Expert Difficulty -- even a level 3 Veterancy tank. If certain areas are too busy, consider using a mortar on them first. If targeted, try to use the buildings to get your tank out of line of sight.

          There are unlimited reinforcements of infantry from the Coastal Gun Battery until the Strategic Point there is captured. They always head toward a specific location at the water's edge not too far north from the bridge. If you like, you can let them continually spawn and kill them off for Veterancy levels. However, there is an easier way to get XP at the Bridge.

          Secure the area around the Gun Battery, but do NOT destroy the Gun Battery yet.
          • The Gun Battery doors and the Gun Battery itself can be blown up in various ways, including a Sherman tank (probably the easiest and costs no resources as you will likely have a tank there).
          • But delay doing so because until the Coastal Guns are destroyed, the enemies across the bridge have unlimited reinforcements, including StuGs from the south that move to sit in the middle of the bridge. However, if you don't cross the bridge, they won't come to you either. The StuG at the bridge won't react if it can't see any of your units.
          Part 4 - Optional - Get unit Veterancy

          Because a StuG periodically spawns from the south exit of the middle pier (until the Coastal Gun Battery is destroyed), you can camp the bridge to keep killing it for Veterancy.
          • In the unlikely case that your tanks haven't yet achieved Veterancy level 3 from killing lots of infantry, you can park two or three at the bridge. Watch for mortar action which can't kill your tanks but which can hurt infantry support.
            • Two tanks are recommended as a single Sherman, even at Veterancy level 3, is not guaranteed to win one-on-one against a StuG IV on Expert Difficulty.
          • Riflemen squads can also get Veterancy from tank kills, but they should hang back until the StuG engages one of your tanks. Then rush down and blow up the StuG (see picture below).

          Part 5 - Optional Sightseeing, NORMAL DIFFICULTY

          There is something interesting to see on this map if you HAVE NOT destroyed the Coastal Gun Battery, and if you can hold ground across the bridge at the middle pier. The fighting is so brutal that I really don't recommend this on Expert Difficulty. See picture below for the location.


          At this location, basically straight east from the bridge, enemy infantry spawn immediately after each wave is destroyed. They are so numerous and spawn so quickly that it's like popcorn popping. I camped the location with a Crocodile and supporting troops for a long time but it looked like the infantry never stopped spawning.
          Just to the north of this location is where SdKfz 251 Half-Tracks steadily arrive, also in apparently unlimited numbers.

          Part 6 - Cross Bridge

          When you are tired of killing StuGs, destroy the Coastal Gun Battery. You will then get the Off-Map Artillery Support power for free, which means you have basically won the mission if you want to just spam that power.
          Fighting your way across the bridge is not that bad, but infantry losses can be significant because of mortar fire you can't get to fast enough. Instead, send your Snipers first. We will discuss this mission without using the Artillery Power unless necessary.

          If you do want to charge across:
          • Remember that your tanks can use the buildings near the German end of the bridge for cover so that you can avoid being engaged by more than one tank at a time (see picture below).
          • Watch out for Pak38 AT Guns and Panzerschreck infantry coming down the main road.
          • If you need help against the tanks, clear the big building (see picture below) and put in your own AT-equipped infantry. Suddenly the enemy tanks will be exposed to flank AT hits.
          • Get the mortar teams early to protect infantry.


          The much safer way is to reconnaissance first.

          First, start with some "exploratory mortar shelling". For example, you know that sandbags usually mean enemy heavy weapons teams (see below). Shell it in the fog of war to see if anything is there and to stir up the Germans and see what they send over the bridge. The bridge is a chokepoint where your massed troops should be able to crush whatever they send over.


          Next, send a couple of Snipers over and carefully look around.
          • You want Veterancy level 3 Snipers if you can because there are patrols and scripted reinforcements, so occasionally they will have to run and you really don't want them ever out of Camouflage unless out of line of sight of anything.
          • Sending Snipers over, even if they are never discovered, will trigger enemy activity. Infantry (possibly all the way from their far HQ to the northwest) will periodically head for your HQ (but always stop to engage whatever they spot), so be prepared with a tank or two to intercept them. They follow the same route all the time, so it's easy to just park a tank where you know they will come.
          • Try to snipe Pak38 50mm Anti-Tank Guns and Mortar Teams. Once those are out of the way, you can start moving your tanks over slowly. Remember that Shermans cannot reliably go one-on-one against StuGs on Expert Difficulty, so what you may have to do is send two tanks over, kill a StuG, then withdraw back. Keep doing this until the area across the bridge is mostly clear.
          • After the enemy tanks are clear, scout with your Snipers again and take out mortar teams (see below) and whatever else you can.

          Finally once the mortar teams are killed, you can send tanks over to hold ground AND send infantry to support them. Until the mortar teams are gone, infantry are very vulnerable.
          • There is a German Tank Depot (Panzer Command) to the south of the middle pier and it will periodically create a tank, so send a couple of your own to find and destroy it, as well as other tanks positioned at various points south. Scout with your Sniper so you can plan to approach tanks from the flank and get first strike.
          • Secure the south side before proceeding north to make sure your rear is covered.
          Part 7 - Destroy the Demolition Station

          The rest of the map is basically just inching forward and seizing ground -- except for the time-limited mission to Destroy the Demolition Station.
          As soon as you are very close to the middle Strategic Point on the middle pier, you will trigger a time-limited mission to destroy a Demolition Station. On Expert Difficulty, you have 90 seconds from the time they start talking about the mission. In the picture below (from a Normal Difficulty gameplay, where you get an extra 30 seconds to complete the mission), you can see approximately where the mission begins.


          Listen to the briefing and they will reveal the area briefly. That is your opportunity to get in a first Off-Map Artillery Strike. Before the cooldown ends, you can have Snipers in range to spot for artillery and get in a second Artillery Strike right away. Remember to artillery strike the Demolition Station again as soon as you can.
          On Expert Difficulty, you can probably get in three full strikes before there are 2 seconds left, but because of the random spread to the strikes, there is no guarantee that the building will be destroyed by artillery strikes alone. Therefore, the potentially easy way to do this mission -- sneak up a Sniper to spot for artillery -- is not reliable. You still want Snipers scouting the way, but you will probably need tanks to finish the job.

          On Expert Difficulty, have the first strike hit the INFANTRY first. On Expert, the two Panzerschrek suicide squads are very dangerous to your tanks if you want your tank assault to survive at all. If you look at the pictures below, you will see that there are two Panzerschreck teams, and BOTH SURVIVE the artillery strike that was roughly centered on the infantry mass.


          For your advance, you need all the tanks you can get. You probably need 1 tank to hold the line at the chokepoint to the third pier, where enemies stream endlessly from the HQ, including one mortar team. You also want your Crocodile to deal with any infantry in cover and to quickly kill them. We were able to field two Shermans and one Crocodile, and leave two Shermans to hold ground at the chokepoint (which was more than enough since the infantry reinforcements sent against them never included anti-tank weapons).

          Also, you want to get advance notice of what's ahead so you can coordinate which unit strikes what on your way to the Demolition Station. To do that, we sent two Snipers all the way up to garrison one of the buildings nearest the Demolition Station that had sightline on the infantry.
          • On the way they spotted an AT Gun, which we flanked and took out with the Crocodile before continuing that tank up the west side.
          • Once in the building, the Snipers' main task was to take out any anti-tank infantry, which meant infantry bearing Panzerschreks that survived the artillery bombardment.
            • Pause and click on the exact unit carrying the Panzerschrek to kill that model specifically. This should at least delay them using their anti-tank weapon on your tanks.
            • Remember that when a squad loses a special-weapon-carrying member, another squad member automatically gets the weapon unless no one is available to do so. This is another reason why we hit Infantry with the initial artillery bombardment -- to thin out the squads as early as possible.
            • The AI typically does not pick up heavy weapons.
          • On the east side is a Panzer. It will charge down past your tanks to hit them from the side or rear. Block it with your tanks if you can and double-team it. Rush infantry to blow it up with infantry anti-tank weapons if you want extra insurance -- basically, use whatever you've got to take it down quickly and continue on.
          If you fail to destroy the Station, not too much happens. The Station still gets destroyed by script and there are some explosions here and there, but no actual change to the map.

          Part 8 - Clear the Map, Destroy HQ Buildings

          As mentioned before, there really isn't anything too special to the rest of the map. If you watch enemy reinforcements carefully, you will notice that mortar teams are typically sent to specific locations so you can camp those locations and kill them as they come; or kill them on the way to those locations.

          Below you can see our final troops for this map at the end of the Mission.

          reade more... Résuméabuiyad