Pages

Arx Fatalis - Walkthrough Index and General Tips

Arx Fatalis is available DRM-free and with Risk Free Guarantee from Good Old Games. We are playing version Arx Libertatis 1.1.2.

Walkthrough Index
Arx Fatalis has a basically linear main quest and each stage is easy to follow, unless you deliberately deviate from it. Therefore, our walkthrough will only touch on things you may not have considered doing. For more mundane information, try Aldernon NL's 3-part Arx Fatalis guide on Steam, including level maps and a list of spell rune locations.
  • Level 1 - Yellow Tulip Tavern, Human Outpost, City of Arx, Human Palace
  • Level 2 - Goblin Prison, Troll Sculptor, Crystal Caves, Ice Dragon Cave, Temple of Akbaa
  • Level 3 - Tutorial Area, Goblin City, Troll Mines
  • Level 4 - Great Sea, Crypt level 1, Serpent Pillar, Rebel Camp, Access to Ylside Bunker and Akbaa
  • Level 5 - Twin Traders, Hostile Trolls, Crypt level 2, Ylside Bunker and Akbaa
  • Level 6 - Crypt level 3 (Shield of the Ancients), Sisters of Edurneum
  • Level 7 - Ratmen, Labyrinth of Lost Souls
  • Level 8 - Dwarven Forge, Helm of King Poxellis

General Tips and Notes
Character Build / Attributes / Skills
  • Strength, Intelligence, Dexterity, and Constitution can all go over 23, and Skills can exceed 100 (although they may not necessarily benefit you more at a score of over 100).
  • Plan to reach only character level 9.
  • Do not raise utility skills to 100. Instead, raise them and then use Bless to bring them up the rest of the way.
    • You can equip gear with requirement you do not meet by casting Bless to meet those requirements. You will not automatically un-equip them when the Bless expires.
    • Your (Magic Skill/10, rounded) is basically your effective magic level, not your character level.
    • Bless has a maximum bonus of +10, which you will get at Magic Skill 90+. A +10 bonus provides +20 to most skills and +25 to Object Knowledge (out of 70-75 needed for the game).
    • You can Bless yourself and then store an Autocast Bless that is based on your currently improved stats. Cancel the current Bless and use the Autocast one to access the improved Bless.
      • Because you can do this, you really only need your Magic skill to 90+ AFTER Bless. It is fairly easy to acquire two Rings of Casting for +20% Magic, so your final Magic Skill only needs to be 64 (+20% from rings = 76, +16 from resulting Bless = 92).
    • To cast Bless you require Mega Stregum Vitae. The hardest to get is Stregum. To get it early, lockpick into the Crypt in Arx and use the secret passages to get to the caves where you can buy it from the Twin Traders.
    • You will only really have trouble in the Dwarf mines on floor 8 where magic is not allowed, but a Technical Skill of around 70+ should allow you to lockpick anything that can be lockpicked.
  • Technical Skill
    • You get XP for picking locks and disarming traps with A Set of Tools instead of using a key or spell. Some doors re-lock every time you enter the area, such as Tafiok's shop while he is at home, and the kitchen in the human castle at Arx when the cook is not in.
    • You will know if a key is necessary if the feedback from the character is that it is impossible; in almost all cases your lockpicks will not lose Durability.
      • [Level 3 Area 1] is an exception -- despite the audio message, you must use the key. Even at a Technical skill of 110 you cannot lockpick it.
    • You need about a skill of 90 to easily handle most locks, even in some early game areas like the city of Arx. 95+ for the human castle -- so ultimately you will want to aim for 100 to get maximum XP.
  • Object Knowledge - Repairing
    • You always lose Durability on items you repair unless your Object Knowledge is 100+ AND you are wielding a Blacksmith Hammer.
Magic
  • When you pre-cast a spell, your current magic skill is recorded. So, if you cast a Bless before pre-casting a spell, that recorded spell will be cast as if you had the Bless effect even when the Bless effect is no longer on you.
  • The fastest way to get early overwhelming firepower is Magic and Aam Yok Taar. If you focus on the Magic skill, you can basically one-shot almost anything with the Fireball spell.
  • Invisibility (Nhi Vista)
    • You can cast spells, including attack spells, while invisible (Nhi Vista) and remain invisible. It is not foolproof against being detected, however, as you still make noise walking.
    • You can use it to trespass areas and even open/close doors while invisible. In this way you can easily avoid detection by guards and resulting hostility, even if you just use it briefly to enter/exit the restricted area. Opening/closing a door to a restricted area will not trigger hostility, so you can lockpick open a door, then use Nhi Vista to enter and shut the door (thereby blocking the line of sight of guards).
  • Lightning Strike Aam Folgora Taar hits everything it contacts. While the spell is active, you can turn and "spray" the attack like a water hose.
  • Runes of Guardian (purple glowing traps on the floor) can be triggered by creatures other than yourself.
    • Use a Summon (e.g., Raise Dead) near it and walk away before the summon actually appears and triggers the trap, making it explode. Then because typically your summon is hostile to you unless you have a control spell, cancel the summon spell to banish your creature.
Miscellaneous Notes
  • Any blade weapon (and, strangely enough, a Blacksmith Hammer that can be wielded as a weapon) can unmake a Fishing Rod or cut A Piece of Wood into Stakes (which stack in inventory, unlike sticks).
    • Note that you need at least 2 Piece of Wood to repair floor levers in the Crypt (and typically a Piece of Wood will be nearby), so don't immediately convert all of them.
    • If you click on the Piece of Wood while it is in inventory, you get two Stakes instead of just one.
  • A Fishing Rod sells for as much as a Rope, so you might as well sell the deconstructed Pole and Rope separately.
  • Many areas eventually respawn some vermin like Rats and Spiders. Other areas may spawn enemies based on your quest / sidequest progress for tasks in that area. Quantity is typically very little, maybe 1-2 scattered over the area. 
  • Containers and Stacking
    • You can stack more than 10 units of an item in a container. First, put in a stack of 9 or less. Then, put in a stack of any size and let the interface automatically place it (e.g., by dragging the stack over an item of another type in the container). The interface will select a stack of the same type of item that is not yet at maximum (10) and add to it, even if the new total will be over 10.
    • You can sometimes get a stack of more than 10 units of an item by getting it from a container that already has such a stack. Use the "get all" button at the lower left of the container inventory window.
  • Oliver’s Treasure Hunt locations:
    • note #1 - level 1 room 42 Tavern upstairs, to the left of Enoill
    • note #2 - level 4 room 8, one of two chests
    • note #3 - level 3 room 42
    • note #4 - level 3 room 4, need Reveal spell
    • note #5 - level 6 room 30, need shovel
    • note #6 - level 8 room 11, need Levitate (Mega Spacium Movis)
    • note #7 - level 3 room 50, south-eastern most point, need shovel; attempt to equip your shovel as a weapon to "use it" and the key will appear
    • treasure - level 4 room 8, other chest
  • An interesting alternate "walkthrough" is this Arx Fatalis speed-run video where the player basically shortcuts most of the game and ignores most of the quests, and therefore has to do a lot of things in an alternate way.
      Arx Fatalis is available DRM-free and with Risk Free Guarantee from Good Old Games. We are playing version Arx Libertatis 1.1.2.

      Walkthrough Index
      Arx Fatalis has a basically linear main quest and each stage is easy to follow, unless you deliberately deviate from it. Therefore, our walkthrough will only touch on things you may not have considered doing. For more mundane information, try Aldernon NL's 3-part Arx Fatalis guide on Steam, including level maps and a list of spell rune locations.
      • Level 1 - Yellow Tulip Tavern, Human Outpost, City of Arx, Human Palace
      • Level 2 - Goblin Prison, Troll Sculptor, Crystal Caves, Ice Dragon Cave, Temple of Akbaa
      • Level 3 - Tutorial Area, Goblin City, Troll Mines
      • Level 4 - Great Sea, Crypt level 1, Serpent Pillar, Rebel Camp, Access to Ylside Bunker and Akbaa
      • Level 5 - Twin Traders, Hostile Trolls, Crypt level 2, Ylside Bunker and Akbaa
      • Level 6 - Crypt level 3 (Shield of the Ancients), Sisters of Edurneum
      • Level 7 - Ratmen, Labyrinth of Lost Souls
      • Level 8 - Dwarven Forge, Helm of King Poxellis

      General Tips and Notes
      Character Build / Attributes / Skills
      • Strength, Intelligence, Dexterity, and Constitution can all go over 23, and Skills can exceed 100 (although they may not necessarily benefit you more at a score of over 100).
      • Plan to reach only character level 9.
      • Do not raise utility skills to 100. Instead, raise them and then use Bless to bring them up the rest of the way.
        • You can equip gear with requirement you do not meet by casting Bless to meet those requirements. You will not automatically un-equip them when the Bless expires.
        • Your (Magic Skill/10, rounded) is basically your effective magic level, not your character level.
        • Bless has a maximum bonus of +10, which you will get at Magic Skill 90+. A +10 bonus provides +20 to most skills and +25 to Object Knowledge (out of 70-75 needed for the game).
        • You can Bless yourself and then store an Autocast Bless that is based on your currently improved stats. Cancel the current Bless and use the Autocast one to access the improved Bless.
          • Because you can do this, you really only need your Magic skill to 90+ AFTER Bless. It is fairly easy to acquire two Rings of Casting for +20% Magic, so your final Magic Skill only needs to be 64 (+20% from rings = 76, +16 from resulting Bless = 92).
        • To cast Bless you require Mega Stregum Vitae. The hardest to get is Stregum. To get it early, lockpick into the Crypt in Arx and use the secret passages to get to the caves where you can buy it from the Twin Traders.
        • You will only really have trouble in the Dwarf mines on floor 8 where magic is not allowed, but a Technical Skill of around 70+ should allow you to lockpick anything that can be lockpicked.
      • Technical Skill
        • You get XP for picking locks and disarming traps with A Set of Tools instead of using a key or spell. Some doors re-lock every time you enter the area, such as Tafiok's shop while he is at home, and the kitchen in the human castle at Arx when the cook is not in.
        • You will know if a key is necessary if the feedback from the character is that it is impossible; in almost all cases your lockpicks will not lose Durability.
          • [Level 3 Area 1] is an exception -- despite the audio message, you must use the key. Even at a Technical skill of 110 you cannot lockpick it.
        • You need about a skill of 90 to easily handle most locks, even in some early game areas like the city of Arx. 95+ for the human castle -- so ultimately you will want to aim for 100 to get maximum XP.
      • Object Knowledge - Repairing
        • You always lose Durability on items you repair unless your Object Knowledge is 100+ AND you are wielding a Blacksmith Hammer.
      Magic
      • When you pre-cast a spell, your current magic skill is recorded. So, if you cast a Bless before pre-casting a spell, that recorded spell will be cast as if you had the Bless effect even when the Bless effect is no longer on you.
      • The fastest way to get early overwhelming firepower is Magic and Aam Yok Taar. If you focus on the Magic skill, you can basically one-shot almost anything with the Fireball spell.
      • Invisibility (Nhi Vista)
        • You can cast spells, including attack spells, while invisible (Nhi Vista) and remain invisible. It is not foolproof against being detected, however, as you still make noise walking.
        • You can use it to trespass areas and even open/close doors while invisible. In this way you can easily avoid detection by guards and resulting hostility, even if you just use it briefly to enter/exit the restricted area. Opening/closing a door to a restricted area will not trigger hostility, so you can lockpick open a door, then use Nhi Vista to enter and shut the door (thereby blocking the line of sight of guards).
      • Lightning Strike Aam Folgora Taar hits everything it contacts. While the spell is active, you can turn and "spray" the attack like a water hose.
      • Runes of Guardian (purple glowing traps on the floor) can be triggered by creatures other than yourself.
        • Use a Summon (e.g., Raise Dead) near it and walk away before the summon actually appears and triggers the trap, making it explode. Then because typically your summon is hostile to you unless you have a control spell, cancel the summon spell to banish your creature.
      Miscellaneous Notes
      • Any blade weapon (and, strangely enough, a Blacksmith Hammer that can be wielded as a weapon) can unmake a Fishing Rod or cut A Piece of Wood into Stakes (which stack in inventory, unlike sticks).
        • Note that you need at least 2 Piece of Wood to repair floor levers in the Crypt (and typically a Piece of Wood will be nearby), so don't immediately convert all of them.
        • If you click on the Piece of Wood while it is in inventory, you get two Stakes instead of just one.
      • A Fishing Rod sells for as much as a Rope, so you might as well sell the deconstructed Pole and Rope separately.
      • Many areas eventually respawn some vermin like Rats and Spiders. Other areas may spawn enemies based on your quest / sidequest progress for tasks in that area. Quantity is typically very little, maybe 1-2 scattered over the area. 
      • Containers and Stacking
        • You can stack more than 10 units of an item in a container. First, put in a stack of 9 or less. Then, put in a stack of any size and let the interface automatically place it (e.g., by dragging the stack over an item of another type in the container). The interface will select a stack of the same type of item that is not yet at maximum (10) and add to it, even if the new total will be over 10.
        • You can sometimes get a stack of more than 10 units of an item by getting it from a container that already has such a stack. Use the "get all" button at the lower left of the container inventory window.
      • Oliver’s Treasure Hunt locations:
        • note #1 - level 1 room 42 Tavern upstairs, to the left of Enoill
        • note #2 - level 4 room 8, one of two chests
        • note #3 - level 3 room 42
        • note #4 - level 3 room 4, need Reveal spell
        • note #5 - level 6 room 30, need shovel
        • note #6 - level 8 room 11, need Levitate (Mega Spacium Movis)
        • note #7 - level 3 room 50, south-eastern most point, need shovel; attempt to equip your shovel as a weapon to "use it" and the key will appear
        • treasure - level 4 room 8, other chest
      • An interesting alternate "walkthrough" is this Arx Fatalis speed-run video where the player basically shortcuts most of the game and ignores most of the quests, and therefore has to do a lot of things in an alternate way.
          reade more... Résuméabuiyad

          Walkthrough - Deus Ex Human Revolution Director's Cut - Singapore, Panchaea

          This is a minimal walkthrough for Deus Ex: Human Revolution (Director's Cut), The Missing Link (between Hengsha part 2 and Singapore). We only go over things you may not have considered; a detailed walkthrough is already available from the Deus Ex Wiki.

          General
          Start collecting a Laser Rifle and Cyberboost Bars. They will be handy in Panchaea when you just want to ignore the numerous enemies that give no XP and usually drop no useful loot.

          Singapore
          M1 - Rescuing Megan and Her Team
          • Although uploading the virus will also disable the GPL jamming, you will lose some XP compared to disabling the GPL jamming prior to uploading the virus. You get only inconsequentially different dialogue.
          • Jaron Namir
            • To defeat Namir, you can do what you did to the other two Spec Op bosses -- activate automated enemies. The safest way to the computer is through the ventilation in the room near the door to the computer room.
            • Once inside, if Namir is nearby he will see you and hits from him can knock you off the computer, forcing you to start all over. If this happens, you can either use an AUD (but you lose any rewards from hacking) or your Cloaking augmentation (and a lot of batteries).
            • Prior to hacking you can try putting boxes on either side of the computer to block his line of sight. To speed up your hack and ensure success, use Nukes to capture nodes so you get maximum XP.
            • It is possible that Namir's grenades will destroy the bots but this is rare. If he does destroy a bot, you still get Hunk of Junk XP for that bot.
            • If you have to kill Namir manually, notice his tactic and use it against him -- he leaps over walls when hurt or to pursue, so you can just duck back and forth around walls, especially to avoid his grenades. You can also try looking for the ventilation shaft to the roof and using your hits-through-walls laser on him. If you are feeling brave, rush to use a kill-Takedown while he is getting up after a jump over a wall.
          • You cannot highlight the Gramaphone in Megan's room as an interactable object but you can interact with it.
          • If you saved Malik earlier, your reward is that she will take out all enemies in the helicopter bay for you, thereby presumably preventing you from getting XP for defeating them yourself. Thanks Malik. NOT.
          Panchaea
          M1 - Shutting Down Darrow's Signal 
          • The crazed humans here give no XP but can still cost you Ghost bonuses if they see you so you might want to handle them with stealth and take them all down.
          • When you first go outside to the Ring portion, there are a lot of workers and it can be hard to separate them for takedowns without being detected. There are also basically no throwables to use as noise distractions. You can instead go to the platform above or below and make some noise there by running or jumping. This lures one at a time to your location where you can use a Takedowns on them.
            • A good location to use is the green portable toilet on the east side near the entrance back into the facility. Once an enemy is Alarmed, hide behind the black tarped crates and let them walk by before doing a Takedown on them from behind. Drag their bodies to hide in the corridor nearby.
          • Hyron Project
            • Just get a bit closer to Zhao and shoot her with your laser. If you remembered to bring one. This ending will disable all the terminals you could otherwise have hacked, as well as turrets and bots in storage, but it is the end game already, and in any case you would have long ago gotten all the augmentations you need.
          • Finish watching the credits to get one final cutscene / dialogue.
              This is a minimal walkthrough for Deus Ex: Human Revolution (Director's Cut), The Missing Link (between Hengsha part 2 and Singapore). We only go over things you may not have considered; a detailed walkthrough is already available from the Deus Ex Wiki.

              General
              Start collecting a Laser Rifle and Cyberboost Bars. They will be handy in Panchaea when you just want to ignore the numerous enemies that give no XP and usually drop no useful loot.

              Singapore
              M1 - Rescuing Megan and Her Team
              • Although uploading the virus will also disable the GPL jamming, you will lose some XP compared to disabling the GPL jamming prior to uploading the virus. You get only inconsequentially different dialogue.
              • Jaron Namir
                • To defeat Namir, you can do what you did to the other two Spec Op bosses -- activate automated enemies. The safest way to the computer is through the ventilation in the room near the door to the computer room.
                • Once inside, if Namir is nearby he will see you and hits from him can knock you off the computer, forcing you to start all over. If this happens, you can either use an AUD (but you lose any rewards from hacking) or your Cloaking augmentation (and a lot of batteries).
                • Prior to hacking you can try putting boxes on either side of the computer to block his line of sight. To speed up your hack and ensure success, use Nukes to capture nodes so you get maximum XP.
                • It is possible that Namir's grenades will destroy the bots but this is rare. If he does destroy a bot, you still get Hunk of Junk XP for that bot.
                • If you have to kill Namir manually, notice his tactic and use it against him -- he leaps over walls when hurt or to pursue, so you can just duck back and forth around walls, especially to avoid his grenades. You can also try looking for the ventilation shaft to the roof and using your hits-through-walls laser on him. If you are feeling brave, rush to use a kill-Takedown while he is getting up after a jump over a wall.
              • You cannot highlight the Gramaphone in Megan's room as an interactable object but you can interact with it.
              • If you saved Malik earlier, your reward is that she will take out all enemies in the helicopter bay for you, thereby presumably preventing you from getting XP for defeating them yourself. Thanks Malik. NOT.
              Panchaea
              M1 - Shutting Down Darrow's Signal 
              • The crazed humans here give no XP but can still cost you Ghost bonuses if they see you so you might want to handle them with stealth and take them all down.
              • When you first go outside to the Ring portion, there are a lot of workers and it can be hard to separate them for takedowns without being detected. There are also basically no throwables to use as noise distractions. You can instead go to the platform above or below and make some noise there by running or jumping. This lures one at a time to your location where you can use a Takedowns on them.
                • A good location to use is the green portable toilet on the east side near the entrance back into the facility. Once an enemy is Alarmed, hide behind the black tarped crates and let them walk by before doing a Takedown on them from behind. Drag their bodies to hide in the corridor nearby.
              • Hyron Project
                • Just get a bit closer to Zhao and shoot her with your laser. If you remembered to bring one. This ending will disable all the terminals you could otherwise have hacked, as well as turrets and bots in storage, but it is the end game already, and in any case you would have long ago gotten all the augmentations you need.
              • Finish watching the credits to get one final cutscene / dialogue.
                  reade more... Résuméabuiyad

                  Walkthrough - Deus Ex Human Revolution Director's Cut - The Missing Link

                  This is a minimal walkthrough for Deus Ex: Human Revolution (Director's Cut), The Missing Link (between Hengsha part 2 and Singapore). We only go over things you may not have considered; a detailed walkthrough is already available from the Deus Ex Wiki.

                  General
                  Prior to leaving Hengsha, sell everything except your favourite weapons because you're going to lose not only your gear but your augments, including inventory space. You can get your weapons back (but without ammunition) and all your credits, if you have the Director's Cut.
                  Or, don't bother because you get all your credits back at some point, and you probably have more than you will ever need.

                  Praxis feels very tight in the early part of this mission if you want to try to grab all XP along the way.
                  • There are a lot of Double Takedown opportunities so the Reflexes augment early is nice, but some require that you approach from the correct direction or have Cloaking to get into range without being spotted (or setting them up manually, which can be tedious).
                  • You need Hacking level 3 on the ship and level 5 for a few locations after. You can delay getting level 4 and level 5 and instead first get Hacking Stealth 3 to have a less stressful time.
                  • The Jumping augment is very useful. Get it while on the ship.
                  • You can use a firearm on weak walls (preferably a Silenced one) instead of the augment to break through walls. Just keep your eyes open for cracks on walls.
                  • Once you reach Quinn you can get up to 3 Praxis Kits (if you have the CASIE augment) and at that point you can pick up the augment for carrying heavy objects.
                  Hei Zhen Zhu

                  M1 Getting out of the frying pan
                  • There is a very long drop in the Aft Cargo Hold (after the CIC). If you do not have the Icarus augment to always land safely, you can drop and try to grab the ladder on the way down; you still get the XP bonus for exploring this route.

                  Acceptable Losses

                  Rifleman Bank Station


                  M2 In the belly of the beast

                  Getting Inside Help

                  Quinn's Scavenger Hunt

                  M3  Choices, choices

                  • Before you open the door in the morgue, do your final buy/sell with Quinn. Preferably also get maximum inventory space so you won't have to backtrack to pick up more stuff. This way you will end this mission with whatever final set of gear you want to take with you.
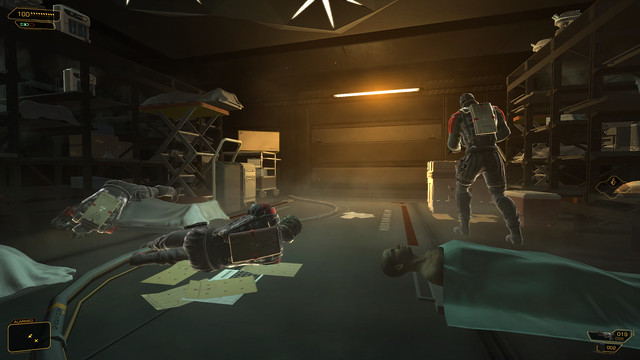
                  • As you escape from the underwater base, you will emerge in the Morgue and behind three soldiers. It is possible to use a Double Takedown on the two on the left WITHOUT alerting the one on the right. Some experimentation may be required though. See picture below.
                  DXHRDC Missing Link DTD without alerting third guard

                  M4 The long way home


                    This is a minimal walkthrough for Deus Ex: Human Revolution (Director's Cut), The Missing Link (between Hengsha part 2 and Singapore). We only go over things you may not have considered; a detailed walkthrough is already available from the Deus Ex Wiki.

                    General
                    Prior to leaving Hengsha, sell everything except your favourite weapons because you're going to lose not only your gear but your augments, including inventory space. You can get your weapons back (but without ammunition) and all your credits, if you have the Director's Cut.
                    Or, don't bother because you get all your credits back at some point, and you probably have more than you will ever need.

                    Praxis feels very tight in the early part of this mission if you want to try to grab all XP along the way.
                    • There are a lot of Double Takedown opportunities so the Reflexes augment early is nice, but some require that you approach from the correct direction or have Cloaking to get into range without being spotted (or setting them up manually, which can be tedious).
                    • You need Hacking level 3 on the ship and level 5 for a few locations after. You can delay getting level 4 and level 5 and instead first get Hacking Stealth 3 to have a less stressful time.
                    • The Jumping augment is very useful. Get it while on the ship.
                    • You can use a firearm on weak walls (preferably a Silenced one) instead of the augment to break through walls. Just keep your eyes open for cracks on walls.
                    • Once you reach Quinn you can get up to 3 Praxis Kits (if you have the CASIE augment) and at that point you can pick up the augment for carrying heavy objects.
                    Hei Zhen Zhu

                    M1 Getting out of the frying pan
                    • There is a very long drop in the Aft Cargo Hold (after the CIC). If you do not have the Icarus augment to always land safely, you can drop and try to grab the ladder on the way down; you still get the XP bonus for exploring this route.

                    Acceptable Losses

                    Rifleman Bank Station


                    M2 In the belly of the beast

                    Getting Inside Help

                    Quinn's Scavenger Hunt

                    M3  Choices, choices

                    • Before you open the door in the morgue, do your final buy/sell with Quinn. Preferably also get maximum inventory space so you won't have to backtrack to pick up more stuff. This way you will end this mission with whatever final set of gear you want to take with you.
                    • As you escape from the underwater base, you will emerge in the Morgue and behind three soldiers. It is possible to use a Double Takedown on the two on the left WITHOUT alerting the one on the right. Some experimentation may be required though. See picture below.
                    DXHRDC Missing Link DTD without alerting third guard

                    M4 The long way home


                      reade more... Résuméabuiyad

                      Walkthrough - Deus Ex Human Revolution Director's Cut - Detroit 2, Hengsha 2

                      This is a minimal walkthrough for Deus Ex: Human Revolution (Director's Cut), Detriot part 2 and Hengsha part 2, after Adam Jensen leaves Montreal and the PICUS station there. We only go over things you may not have considered; a detailed walkthrough is already available from the Deus Ex Wiki.

                      General
                      Some safes and computers will be locked again, so you can hack or re-hack them.

                      Detroit 2

                      M1 - Confronting Sarif

                      Acquaintances Forgotten
                       

                      M2 - Finding Isaias Sandoval
                      Taggart must be confronted with the evidence of Sandoval's involvement in the kidnappings, or have the evidence planted on his computer, in order for Sandoval to not attack Jensen and be suicidal instead.
                      If you fail to convince Taggart, you can no longer plant the evidence on his computer since you have already tried to expose his connection to it live on PICUS. As the Wiki walkthrough explains, there is slightly more XP to be had by hacking instead of confronting Taggart. However, by now you will probably have all the augments you need so XP no longer becomes critical.

                      Smash the State
                      To get four locations to search (each gives you 100 XP) you must have the Social Enhancer.

                      M3/M1 - Cashing in Old Favors


                      Hengsha 2

                      A Matter of Discretion, Corporate Warfare
                       

                      Talion A.D.
                      The quest does not properly update after reading the pocket secretary but Zelazny is in the sewers accessed outside the Alice Garden Pods. They probably want you to look around for him instead of getting an automatic map marker for his location.
                      Fastest way of taking down Zelazny is with Takedowns. You can handle him and one other almost immediately with a Double Takedown. Eat Cyberboost bars if you have to in order to have energy to execute the additional Takedowns.

                      M1/M2 - Find Vasili Sevchenko's GPL Device

                      M2/M3 - You Scratch My Back, I'll Scratch Yours
                       

                      M3/M4 - Stowing Away

                        This is a minimal walkthrough for Deus Ex: Human Revolution (Director's Cut), Detriot part 2 and Hengsha part 2, after Adam Jensen leaves Montreal and the PICUS station there. We only go over things you may not have considered; a detailed walkthrough is already available from the Deus Ex Wiki.

                        General
                        Some safes and computers will be locked again, so you can hack or re-hack them.

                        Detroit 2

                        M1 - Confronting Sarif

                        Acquaintances Forgotten
                         

                        M2 - Finding Isaias Sandoval
                        Taggart must be confronted with the evidence of Sandoval's involvement in the kidnappings, or have the evidence planted on his computer, in order for Sandoval to not attack Jensen and be suicidal instead.
                        If you fail to convince Taggart, you can no longer plant the evidence on his computer since you have already tried to expose his connection to it live on PICUS. As the Wiki walkthrough explains, there is slightly more XP to be had by hacking instead of confronting Taggart. However, by now you will probably have all the augments you need so XP no longer becomes critical.

                        Smash the State
                        To get four locations to search (each gives you 100 XP) you must have the Social Enhancer.

                        M3/M1 - Cashing in Old Favors


                        Hengsha 2

                        A Matter of Discretion, Corporate Warfare
                         

                        Talion A.D.
                        The quest does not properly update after reading the pocket secretary but Zelazny is in the sewers accessed outside the Alice Garden Pods. They probably want you to look around for him instead of getting an automatic map marker for his location.
                        Fastest way of taking down Zelazny is with Takedowns. You can handle him and one other almost immediately with a Double Takedown. Eat Cyberboost bars if you have to in order to have energy to execute the additional Takedowns.

                        M1/M2 - Find Vasili Sevchenko's GPL Device

                        M2/M3 - You Scratch My Back, I'll Scratch Yours
                         

                        M3/M4 - Stowing Away

                          reade more... Résuméabuiyad

                          Walkthrough - Deus Ex Human Revolution Director's Cut - Montreal

                          This is a minimal walkthrough for Deus Ex: Human Revolution (Director's Cut), Montreal -- the investigation of the PICUS building and meeting Eliza Cassan. We only go over things you may not have considered; a detailed walkthrough is already available from the Deus Ex Wiki.

                          M1 - Confronting Eliza Cassan
                          • Keeping your Ghost bonus while doing Takedowns on all enemies becomes harder now, but still not impossible.
                            • It would be very good to have a Silenced Armour Piercing pistol but not absolutely necessary. They are useful for taking out disabled robots quietly.
                            • Keeping a Stun Gun on you with some ammo also starts being a very good idea, for handling cameras.
                            • Even so, there are generally options to bypass security in a safe and less-stressful way and get to the Security computer to disable cameras and robots first. When doing so, be mindful of going through doors that may be locked from the other direction; doing so automatically unlocks the door, and you miss the XP you would have gotten from hacking.
                          • Before riding down the finucular, have a Stun Gun and at least 2 rounds of ammo.
                            • At the bottom of the Finicular is a storage area and two guards will walk to the center and stay there a while. There is generally no time to handle the camera without setting off some kind of alarm.
                            • You can Double Takedown the guards before they disperse on a patrol routine, but in order to do so safely you need to wait till the camera is facing away, and afterwards Stun Gun the camera before it turns and sees the bodies. You will probably need to stun the camera again to give you time to hide both bodies.
                          • Yelena Fedorova 
                            • They give you lots of ammo (in lockers around the perimeter) to shoot her with, so run-and-gun is theoretically viable as you can heal while she is cloaked and waiting for her special bomb attack to recharge. Or, you can use turrets, just like on Barret.
                            • Before entering this mission, have some way to break down walls (augmentation or guns), and lots of hacking help since you are under a lot of time pressure to hack at least two items. Also helps to have the Icarus augmentation for long falls.
                            • Eliza will give ongoing commentary and hints as to when Yelena is coming for you or when she is waiting to recharge while cloaked. You can use that as hints for how much time you have to hack.
                            • Hack the door. This opens two doors with ramps up. At the top of one ramp is a weak wall. Bust that if you have time as it's a quick escape from Yelena if you need it.
                            • Once upstairs, there is a terminal protected by lasers. Do not simply use your Cloak to get past the lasers as Yelena will come for you anyway and her attacks will probably trigger the lasers. If you haven't reprogrammed the ceiling bots, they will kill you.
                            • Go to the panel on the side of the room. It can take a long time to hack so instead bust the wall and turn off the power to the lasers.
                            • If Yelena is coming, run. Or if you can do it fast enough (you may have close to 90 Nukes and Stop Worms by now), hack the computer and reprogram the turrets. If you really have trouble with time, use Automatic Unlocking Devices, which do not require you to stand around--Use the device, run, and come back later to use the computer.
                            • If Yelena is chasing you and you need time, run toward one of the poison gas pillars and either turn the valve or shoot the glass (or let her shoot the glass). Yelena likes to come close so she will end up in the gas. This will either buy you time to escape (especially if you have the Rebreather augmentation) or hold her in the room while the turrets shoot her some more.
                            • Stay in the room and hide behind the pillars until Yelena is killed by the turrets.
                            • Collect all loot. Turn the power back on for the lasers and hack the terminal. Plant EMP mines on the turrets then turn them back to "Default", making them hostile and triggering the mines to destroy them for a total of 90 XP. Destroying one any other way makes the other one hostile to you and shoot you.

                            This is a minimal walkthrough for Deus Ex: Human Revolution (Director's Cut), Montreal -- the investigation of the PICUS building and meeting Eliza Cassan. We only go over things you may not have considered; a detailed walkthrough is already available from the Deus Ex Wiki.

                            M1 - Confronting Eliza Cassan
                            • Keeping your Ghost bonus while doing Takedowns on all enemies becomes harder now, but still not impossible.
                              • It would be very good to have a Silenced Armour Piercing pistol but not absolutely necessary. They are useful for taking out disabled robots quietly.
                              • Keeping a Stun Gun on you with some ammo also starts being a very good idea, for handling cameras.
                              • Even so, there are generally options to bypass security in a safe and less-stressful way and get to the Security computer to disable cameras and robots first. When doing so, be mindful of going through doors that may be locked from the other direction; doing so automatically unlocks the door, and you miss the XP you would have gotten from hacking.
                            • Before riding down the finucular, have a Stun Gun and at least 2 rounds of ammo.
                              • At the bottom of the Finicular is a storage area and two guards will walk to the center and stay there a while. There is generally no time to handle the camera without setting off some kind of alarm.
                              • You can Double Takedown the guards before they disperse on a patrol routine, but in order to do so safely you need to wait till the camera is facing away, and afterwards Stun Gun the camera before it turns and sees the bodies. You will probably need to stun the camera again to give you time to hide both bodies.
                            • Yelena Fedorova 
                              • They give you lots of ammo (in lockers around the perimeter) to shoot her with, so run-and-gun is theoretically viable as you can heal while she is cloaked and waiting for her special bomb attack to recharge. Or, you can use turrets, just like on Barret.
                              • Before entering this mission, have some way to break down walls (augmentation or guns), and lots of hacking help since you are under a lot of time pressure to hack at least two items. Also helps to have the Icarus augmentation for long falls.
                              • Eliza will give ongoing commentary and hints as to when Yelena is coming for you or when she is waiting to recharge while cloaked. You can use that as hints for how much time you have to hack.
                              • Hack the door. This opens two doors with ramps up. At the top of one ramp is a weak wall. Bust that if you have time as it's a quick escape from Yelena if you need it.
                              • Once upstairs, there is a terminal protected by lasers. Do not simply use your Cloak to get past the lasers as Yelena will come for you anyway and her attacks will probably trigger the lasers. If you haven't reprogrammed the ceiling bots, they will kill you.
                              • Go to the panel on the side of the room. It can take a long time to hack so instead bust the wall and turn off the power to the lasers.
                              • If Yelena is coming, run. Or if you can do it fast enough (you may have close to 90 Nukes and Stop Worms by now), hack the computer and reprogram the turrets. If you really have trouble with time, use Automatic Unlocking Devices, which do not require you to stand around--Use the device, run, and come back later to use the computer.
                              • If Yelena is chasing you and you need time, run toward one of the poison gas pillars and either turn the valve or shoot the glass (or let her shoot the glass). Yelena likes to come close so she will end up in the gas. This will either buy you time to escape (especially if you have the Rebreather augmentation) or hold her in the room while the turrets shoot her some more.
                              • Stay in the room and hide behind the pillars until Yelena is killed by the turrets.
                              • Collect all loot. Turn the power back on for the lasers and hack the terminal. Plant EMP mines on the turrets then turn them back to "Default", making them hostile and triggering the mines to destroy them for a total of 90 XP. Destroying one any other way makes the other one hostile to you and shoot you.

                              reade more... Résuméabuiyad

                              Walkthrough - Deus Ex Human Revolution Director's Cut - Hengsha 1

                              This is a minimal walkthrough for Deus Ex: Human Revolution (Director's Cut), Adam Jensen's first visit to Hengsha. We only go over things you may not have considered; a detailed walkthrough is already available from the Deus Ex Wiki.

                              M1 - Hunting the Hacker
                              • The Hive:
                                • If you can get legitimate access to the basement, you can hack the Bobby Bao's computer in the security room without alarming the guards outside, who can clearly look in. Even if you do not gain legitimate access, you can hack the safe and the security computer without alerting guards.
                                • You can hack and quickly run inside the door to the basement before guards turn hostile. If you then hide, they will de-escalate and return to normal. Some retries may be required here, or use of Cloaking.
                                  • You can then throw the garbage can out of the room to systematically draw guards to be disposed of, but Bobby Bao will not speak with you and give you the Bar Tab quest.
                                    • To Alarm guards and have them send one to investigate, you must throw the garbage can from the restricted area (guards will be hostile grey on your radar) and not from club area (guards will be friendly green).
                              Rotten Business
                              • Mei has 3000 credits on her in total which you can rob from her if you knock her out. Less if you are paid by her upon completion of her missions.
                              M3/M1 - Searching For Proof
                              • Before giving Van Bruggen the employee tram card, carry a spare weapon. If you give Van Bruggen a weapon he later gives you 2000 credits; which you don't need as you will probably have in excess of 100,000 credits by then.
                              • If you already have the tram card on you, that quest completes immediately, which means you must also get the evidence for the Shanghai Justice quest from Alice Gardens before leaving.
                              Bar Tab
                              • There are three possible outcomes:
                                • Collect the money (400 credits) - Bobby gives you one Praxis Kit.
                                  • When you knock out Jaya for the money owed, if you also take her Augmentation, you cannot have this outcome.
                                • Return the Augmentation - Bobby gives you nothing.
                                • Pay Bobby 5000 credits to leave Jaya alone - Bobby gives you one Praxis Kit. 
                                  • You can still do this if you knock her out and take her credits and/or augmentation.
                              Shanghai Justice

                              M2 - Gaining Access to Tai Yong Medical
                              • Do not pick up Access Cards (there are two) before hacking the door to Lee Geng Memorial Labs. You can still grab one afterwards to make everyone in that lab area friendly to you.
                              • If any civilians are alerted (they cower or flee from you) you lose the Ghost bonus. So reach the checkpoint first before coming back to deal with any leftover issues such as bots that need to be destroyed.
                              • Definitely get the Cloaking Augment in order to get past the maze of lasers in the Data Core area. You just need to get to the ventilation behind the laser screen to access the Security Room and shut down the lasers from inside that room.
                              M4/M2 - Entering the Dragon's Lair
                              • After meeting Zhao, do NOT immediately race for the ventilation shaft if you want to take out any Belltower soldiers because that makes it harder for you to stealth around any that are in the upper area (upstairs from the art area / lobby). Instead, hide from them and take them out once their patrol routes stabilize.
                                This is a minimal walkthrough for Deus Ex: Human Revolution (Director's Cut), Adam Jensen's first visit to Hengsha. We only go over things you may not have considered; a detailed walkthrough is already available from the Deus Ex Wiki.

                                M1 - Hunting the Hacker
                                • The Hive:
                                  • If you can get legitimate access to the basement, you can hack the Bobby Bao's computer in the security room without alarming the guards outside, who can clearly look in. Even if you do not gain legitimate access, you can hack the safe and the security computer without alerting guards.
                                  • You can hack and quickly run inside the door to the basement before guards turn hostile. If you then hide, they will de-escalate and return to normal. Some retries may be required here, or use of Cloaking.
                                    • You can then throw the garbage can out of the room to systematically draw guards to be disposed of, but Bobby Bao will not speak with you and give you the Bar Tab quest.
                                      • To Alarm guards and have them send one to investigate, you must throw the garbage can from the restricted area (guards will be hostile grey on your radar) and not from club area (guards will be friendly green).
                                Rotten Business
                                • Mei has 3000 credits on her in total which you can rob from her if you knock her out. Less if you are paid by her upon completion of her missions.
                                M3/M1 - Searching For Proof
                                • Before giving Van Bruggen the employee tram card, carry a spare weapon. If you give Van Bruggen a weapon he later gives you 2000 credits; which you don't need as you will probably have in excess of 100,000 credits by then.
                                • If you already have the tram card on you, that quest completes immediately, which means you must also get the evidence for the Shanghai Justice quest from Alice Gardens before leaving.
                                Bar Tab
                                • There are three possible outcomes:
                                  • Collect the money (400 credits) - Bobby gives you one Praxis Kit.
                                    • When you knock out Jaya for the money owed, if you also take her Augmentation, you cannot have this outcome.
                                  • Return the Augmentation - Bobby gives you nothing.
                                  • Pay Bobby 5000 credits to leave Jaya alone - Bobby gives you one Praxis Kit. 
                                    • You can still do this if you knock her out and take her credits and/or augmentation.
                                Shanghai Justice

                                M2 - Gaining Access to Tai Yong Medical
                                • Do not pick up Access Cards (there are two) before hacking the door to Lee Geng Memorial Labs. You can still grab one afterwards to make everyone in that lab area friendly to you.
                                • If any civilians are alerted (they cower or flee from you) you lose the Ghost bonus. So reach the checkpoint first before coming back to deal with any leftover issues such as bots that need to be destroyed.
                                • Definitely get the Cloaking Augment in order to get past the maze of lasers in the Data Core area. You just need to get to the ventilation behind the laser screen to access the Security Room and shut down the lasers from inside that room.
                                M4/M2 - Entering the Dragon's Lair
                                • After meeting Zhao, do NOT immediately race for the ventilation shaft if you want to take out any Belltower soldiers because that makes it harder for you to stealth around any that are in the upper area (upstairs from the art area / lobby). Instead, hide from them and take them out once their patrol routes stabilize.
                                  reade more... Résuméabuiyad

                                  Walkthrough - Deus Ex Human Revolution Director's Cut - Highland Park

                                  This is a minimal walkthrough for Deus Ex: Human Revolution (Director's Cut), from investigating the Abandoned Factory till Adam Jensen leaves for Hengsha. We only go over things you may not have considered; a detailed walkthrough is already available from the Deus Ex Wiki.

                                  M9 - The Transmission

                                  M10 - Following the Clues in Highland Park

                                  • Although there is a rocket launcher, the Boxguard (robot) is most easily destroyed with a single EMP Grenade but alert everyone nearby even if no one saw you throw the grenade. If there is no one around to be alerted and the alarm system if off, you will keep your XP bonuses for Smooth Operator and Ghost.
                                  • Turrets made friendly always kill with head shots (Marksman +10 XP) but this is still inferior to Jensen personally doing Takedowns so disable them and handle the guards personally for more XP.
                                  • Barrett
                                    • Barrett is actually pretty easy since he moves slowly and always toward where he last saw you. He eventually loses sight of you if you hide long enough.
                                    • You are basically safe inside the vents or on the second level (Director's Cut) so you can outlast him by hiding and healing.
                                    • Or, you can activate the turrets and let them kill him:
                                      • Immediately run to the right till you reach the wall then follow the wall forward to get to the ladder.
                                      • Go upstairs and hack the computer there to open the doors downstairs.
                                      • Go back downstairs and run to the newly unlocked area. Find a vent behind some boxes (there are two vents in the corridor there) and get inside. Hide in the vent till Barrett loses sight of you (radar is yellow and not showing "Alarmed" or "Hostile").
                                      • Using the vent, go into the computer room and hack the computer there to activate the two turrets in storage.
                                      • Move the turrets out and lure Barrett to them. Just one turret will eventually kill him but two will be faster.
                                    • After the battle, remember to deactivate the two turrets again and destroy them for XP.
                                    M11 - Whispers of Conspiracy
                                    • Once you are back at Sarif Industries, people again for new dialogue and check all offices again for a couple of new items and new persons in some offices. Pritchard leaves his terminal so it can now be hacked.
                                      This is a minimal walkthrough for Deus Ex: Human Revolution (Director's Cut), from investigating the Abandoned Factory till Adam Jensen leaves for Hengsha. We only go over things you may not have considered; a detailed walkthrough is already available from the Deus Ex Wiki.

                                      M9 - The Transmission

                                      M10 - Following the Clues in Highland Park

                                      • Although there is a rocket launcher, the Boxguard (robot) is most easily destroyed with a single EMP Grenade but alert everyone nearby even if no one saw you throw the grenade. If there is no one around to be alerted and the alarm system if off, you will keep your XP bonuses for Smooth Operator and Ghost.
                                      • Turrets made friendly always kill with head shots (Marksman +10 XP) but this is still inferior to Jensen personally doing Takedowns so disable them and handle the guards personally for more XP.
                                      • Barrett
                                        • Barrett is actually pretty easy since he moves slowly and always toward where he last saw you. He eventually loses sight of you if you hide long enough.
                                        • You are basically safe inside the vents or on the second level (Director's Cut) so you can outlast him by hiding and healing.
                                        • Or, you can activate the turrets and let them kill him:
                                          • Immediately run to the right till you reach the wall then follow the wall forward to get to the ladder.
                                          • Go upstairs and hack the computer there to open the doors downstairs.
                                          • Go back downstairs and run to the newly unlocked area. Find a vent behind some boxes (there are two vents in the corridor there) and get inside. Hide in the vent till Barrett loses sight of you (radar is yellow and not showing "Alarmed" or "Hostile").
                                          • Using the vent, go into the computer room and hack the computer there to activate the two turrets in storage.
                                          • Move the turrets out and lure Barrett to them. Just one turret will eventually kill him but two will be faster.
                                        • After the battle, remember to deactivate the two turrets again and destroy them for XP.
                                        M11 - Whispers of Conspiracy
                                        • Once you are back at Sarif Industries, people again for new dialogue and check all offices again for a couple of new items and new persons in some offices. Pritchard leaves his terminal so it can now be hacked.
                                          reade more... Résuméabuiyad