Pages

Darkest Dungeon Modding - Mission Maximum Level Restriction

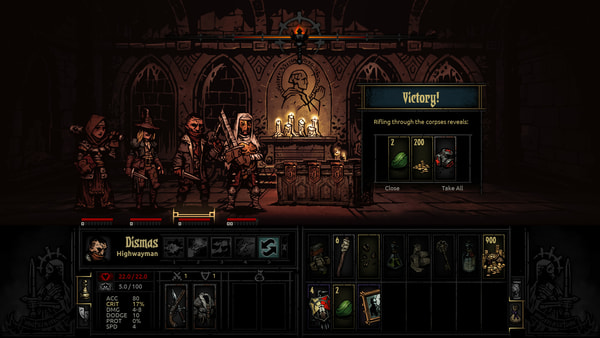
Turns out it is very easy to mod the frustration-grind game Darkest Dungeon: The various .JSON and .DARKEST files are simply text files and are easy to read.

You can buy Darkest Dungeon with no-hassle setup and risk-free money-back guarantee from Good Old Games.

If you ever get a character up to level 3, you will discover that they are now locked out of the easier green missions. This is very irritating because you may well have a less-than-full four-team at that level, meaning that character will either have to bring a bunch of lower-level characters and possibly fail, or sit on the sidelines until you can gather a higher level crew.


Fortunately, you can simply edit C:\GOG Games\Darkest Dungeon\campaign\quest\quest.json as a text file and change this. Go to the end of the file and change the entries there into:

    "restriction": {
        "difficulty": {
            "comment": "This table restricts what level heroes can go on what level quest. ROWS are DIFFICULTY, COLs are QUEST LENGTH",
            "resolve_level_threshold_table": [
                99,
                99,
                99,
                99,
                99,
                99,
                99
            ]
        }
    }

This changes the level cutoff to level 99.

Turns out it is very easy to mod the frustration-grind game Darkest Dungeon: The various .JSON and .DARKEST files are simply text files and are easy to read.

You can buy Darkest Dungeon with no-hassle setup and risk-free money-back guarantee from Good Old Games.

If you ever get a character up to level 3, you will discover that they are now locked out of the easier green missions. This is very irritating because you may well have a less-than-full four-team at that level, meaning that character will either have to bring a bunch of lower-level characters and possibly fail, or sit on the sidelines until you can gather a higher level crew.


Fortunately, you can simply edit C:\GOG Games\Darkest Dungeon\campaign\quest\quest.json as a text file and change this. Go to the end of the file and change the entries there into:

    "restriction": {
        "difficulty": {
            "comment": "This table restricts what level heroes can go on what level quest. ROWS are DIFFICULTY, COLs are QUEST LENGTH",
            "resolve_level_threshold_table": [
                99,
                99,
                99,
                99,
                99,
                99,
                99
            ]
        }
    }

This changes the level cutoff to level 99.

reade more... Résuméabuiyad

Darkest Dungeon - Interacting with Curios

According to C:\GOG Games\Darkest Dungeon\localization\curios.string_table.xml, here are the iteractions and required items (if any) for curios in Darkest Dungeon. Note that in some cases not using and item will not necessarily result in a bad effect -- for example, if you use Holy Water on the Holy Fountain the result replaces the chance of getting loot from it. In some cases, interacting with the item locks in a negative result (e.g., if you use Holy Water on Occult Scrawlings).

You can buy Darkest Dungeon with no-hassle setup and risk-free money-back guarantee from Good Old Games.

party found a curio

Alchemy Table - no effect, loot, negative effect, loot (Medicinal Herbs) or light to 100 (Torch)
Altar of Light - none, buff, or buff (Holy Water)
Ancestor's Knapsack - none
Ancient Coffin - empty, loot, or quirk
Animalistic Shrine - loot (Pickaxe)
Bandit's Trapped Chest - trap or loot (skeleton key)
Brigand's Tent - loot
Barnacle Crusted Chest - empty, loot, bleed, or loot (Shovel)
Bas-Relief - quirk, or stress (Shovel)
Beast Carcass - empty, provisions, quirk, disease, or provisions (Medicinal Herbs)
Bone Altar - buff
Bookshelf - empty, quirk, stress, map, or old journal entry
Brackish Tide Pool - buff, disease, or heal (Antivenom)
Chirurgeon's Satchel - quest item
Confession Booth - loot, stress, purge negative trait, or stress heal (Holy Water)
Corrupted Altar - loot (Holy Water)
Crate - empty, or heirlooms
Decorative Urn - empty, loot, quirk, disease, loot (Holy Water) or negative trait (Guilty Conscience; Shovel)
Dinner Cart - empty, provisions, blight, disease, or provisions (Medicinal Herbs)
Discarded Pack - empty, loot, or map
Eerie Coral - empty, stress, stress heal, or purge negative effect (Medicinal Herbs)
Eerie Spiderweb - nothing, loot, quirk, or loot (Bandage)
Eldritch Altar - no effect, stress, purge illness, or remove one negative trait (Holy Water)
Fish Carcass - empty, provisions, trap, disease, or provisions (Medicinal Herbs)
Fish Idol - stress, or buff (Holy Water)
Foodstuff Crate - quest item
Giant Oyster - empty, loot, damage, effect (Dog Treat), or loot (Shovel)
Goal Strongbox - Holy Water
Heirloom Chest - empty, trap, or loot (Antivenom or Skeleton Key)
Holy Fountain - loot, heal, or buff (Holy Water)
Infected Corpse - loot (Antivenom)
Iron Maiden - empty, loot, quirk, disease, or loot (Medicinal Herbs)
Large Strongbox - loot
Left Luggage - trap, loot, or loot (Skeleton Key or Antivenom)
Locked Display Cabinet - trap, or loot (Skeleton Key or Shovel)
Locked Sarcophagus - trap, damaged loot (Shovel), or loot (Skeleton Key)
Locked Strongbox - empty, trap, damaged loot (Shovel) or loot (Skeleton Key)
Makeshift Dining Table - empty, provisions, blight, disease, or provisions (Medicinal Herbs)
Moonshine Barrel - empty, loot, quirk, blight, or buff (Medicinal Herbs)
Mummified Remains - empty, loot, disease, or loot (Bandage)
Occult Scrawlings - no effect, quirk, stress, or stress (Holy Water)
Old Tree - empty, loot, blight, or loot (Antivenom)
Pile of Bones - empty, loot, quirk, disease, or loot (Holy Water)
Pile of Scrolls - no effect, quirk, stress, map, or purge negative quirk (Torch)
Pristine Fountain - no effect, stress heal, or stress heal (Holy Water)
Protective Ward - use Lantern
Rack of Blades - empty, loot, bleed, or loot (Bandage)
Reliquary - quest item
Sack - empty, loot, or map
Sacrificial Stone - quirk, stress, purge negative quirk, purge negative quirk (Provisions) Food, or bleed (Torch)
Sarcophagus - empty, loot, or quirk
Sconce - nothing, or torch
Secret Stash - Skeleton Key
Shallow Grave - stress, disease, or loot (Shovel)
Shambler's Altar - summon Mash Shambler (Torch)
Shipment Crates - quest item
Ship's Figurehead - buff
Stack of Books - no effect, quirk, stress, old journal entry, or stress (Torch)
Suit of Armor - no effect, buff, or quirk
Traveller's Tent - no effect, loot, stress, or map
Troubling Effigy - no effect, quirk, stress, or buff (Holy Water)
Unlocked Strongbox - empty, trap, or loot

Interacting with curios is a basically a lottery of what curios you will encounter and therefore what supplies you will waste -- When you buy supplies, at the end of the mission any leftovers are sold back at approximately 10% of the buying price.
This sell-back doesn't make sense because you could simply hold supplies till your next expedition. To adjust sell-back prices, you can look at the .sell_gold_value entries in C:\GOG Games\Darkest Dungeon\inventory\inventory.darkest and adjust them.

If you adjust the buy and sell values to full AND you are also using our recommended values for more Camping in Darkest Dungeon, we recommend you adjust only the starting firewood values and leave everything else alone.

According to C:\GOG Games\Darkest Dungeon\localization\curios.string_table.xml, here are the iteractions and required items (if any) for curios in Darkest Dungeon. Note that in some cases not using and item will not necessarily result in a bad effect -- for example, if you use Holy Water on the Holy Fountain the result replaces the chance of getting loot from it. In some cases, interacting with the item locks in a negative result (e.g., if you use Holy Water on Occult Scrawlings).

You can buy Darkest Dungeon with no-hassle setup and risk-free money-back guarantee from Good Old Games.

party found a curio

Alchemy Table - no effect, loot, negative effect, loot (Medicinal Herbs) or light to 100 (Torch)
Altar of Light - none, buff, or buff (Holy Water)
Ancestor's Knapsack - none
Ancient Coffin - empty, loot, or quirk
Animalistic Shrine - loot (Pickaxe)
Bandit's Trapped Chest - trap or loot (skeleton key)
Brigand's Tent - loot
Barnacle Crusted Chest - empty, loot, bleed, or loot (Shovel)
Bas-Relief - quirk, or stress (Shovel)
Beast Carcass - empty, provisions, quirk, disease, or provisions (Medicinal Herbs)
Bone Altar - buff
Bookshelf - empty, quirk, stress, map, or old journal entry
Brackish Tide Pool - buff, disease, or heal (Antivenom)
Chirurgeon's Satchel - quest item
Confession Booth - loot, stress, purge negative trait, or stress heal (Holy Water)
Corrupted Altar - loot (Holy Water)
Crate - empty, or heirlooms
Decorative Urn - empty, loot, quirk, disease, loot (Holy Water) or negative trait (Guilty Conscience; Shovel)
Dinner Cart - empty, provisions, blight, disease, or provisions (Medicinal Herbs)
Discarded Pack - empty, loot, or map
Eerie Coral - empty, stress, stress heal, or purge negative effect (Medicinal Herbs)
Eerie Spiderweb - nothing, loot, quirk, or loot (Bandage)
Eldritch Altar - no effect, stress, purge illness, or remove one negative trait (Holy Water)
Fish Carcass - empty, provisions, trap, disease, or provisions (Medicinal Herbs)
Fish Idol - stress, or buff (Holy Water)
Foodstuff Crate - quest item
Giant Oyster - empty, loot, damage, effect (Dog Treat), or loot (Shovel)
Goal Strongbox - Holy Water
Heirloom Chest - empty, trap, or loot (Antivenom or Skeleton Key)
Holy Fountain - loot, heal, or buff (Holy Water)
Infected Corpse - loot (Antivenom)
Iron Maiden - empty, loot, quirk, disease, or loot (Medicinal Herbs)
Large Strongbox - loot
Left Luggage - trap, loot, or loot (Skeleton Key or Antivenom)
Locked Display Cabinet - trap, or loot (Skeleton Key or Shovel)
Locked Sarcophagus - trap, damaged loot (Shovel), or loot (Skeleton Key)
Locked Strongbox - empty, trap, damaged loot (Shovel) or loot (Skeleton Key)
Makeshift Dining Table - empty, provisions, blight, disease, or provisions (Medicinal Herbs)
Moonshine Barrel - empty, loot, quirk, blight, or buff (Medicinal Herbs)
Mummified Remains - empty, loot, disease, or loot (Bandage)
Occult Scrawlings - no effect, quirk, stress, or stress (Holy Water)
Old Tree - empty, loot, blight, or loot (Antivenom)
Pile of Bones - empty, loot, quirk, disease, or loot (Holy Water)
Pile of Scrolls - no effect, quirk, stress, map, or purge negative quirk (Torch)
Pristine Fountain - no effect, stress heal, or stress heal (Holy Water)
Protective Ward - use Lantern
Rack of Blades - empty, loot, bleed, or loot (Bandage)
Reliquary - quest item
Sack - empty, loot, or map
Sacrificial Stone - quirk, stress, purge negative quirk, purge negative quirk (Provisions) Food, or bleed (Torch)
Sarcophagus - empty, loot, or quirk
Sconce - nothing, or torch
Secret Stash - Skeleton Key
Shallow Grave - stress, disease, or loot (Shovel)
Shambler's Altar - summon Mash Shambler (Torch)
Shipment Crates - quest item
Ship's Figurehead - buff
Stack of Books - no effect, quirk, stress, old journal entry, or stress (Torch)
Suit of Armor - no effect, buff, or quirk
Traveller's Tent - no effect, loot, stress, or map
Troubling Effigy - no effect, quirk, stress, or buff (Holy Water)
Unlocked Strongbox - empty, trap, or loot

Interacting with curios is a basically a lottery of what curios you will encounter and therefore what supplies you will waste -- When you buy supplies, at the end of the mission any leftovers are sold back at approximately 10% of the buying price.
This sell-back doesn't make sense because you could simply hold supplies till your next expedition. To adjust sell-back prices, you can look at the .sell_gold_value entries in C:\GOG Games\Darkest Dungeon\inventory\inventory.darkest and adjust them.

If you adjust the buy and sell values to full AND you are also using our recommended values for more Camping in Darkest Dungeon, we recommend you adjust only the starting firewood values and leave everything else alone.

reade more... Résuméabuiyad
Darkest Dungeon modding - More Camping!

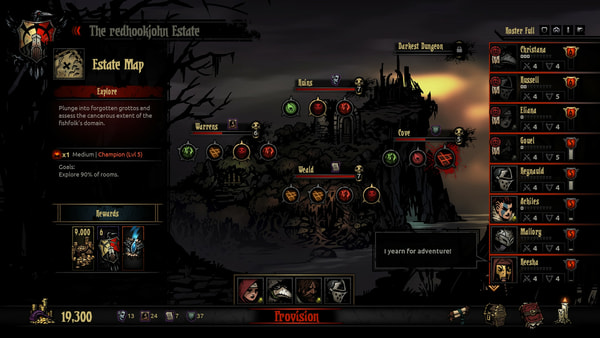
Turns out it is very easy to mod the frustration-grind game Darkest Dungeon: The various .JSON and .DARKEST files are simply text files and are easy to read.

You can buy Darkest Dungeon with no-hassle setup and risk-free money-back guarantee from Good Old Games.

One very simple adjustments you can make:


Camping - Option 1
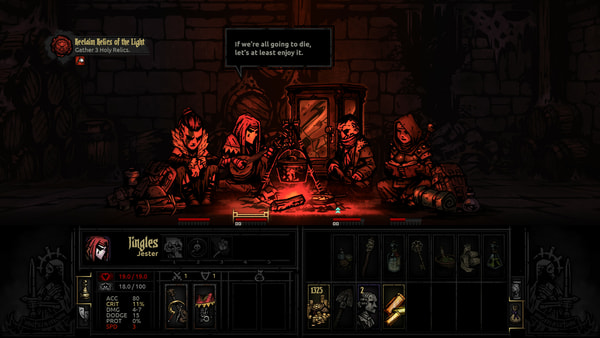
The dungeon size determines the amount of firewood you get, and therefore how many times you can camp. The basic amount of resources you start with for each dungeon raid is in C:\GOG Games\Darkest Dungeon\campaign\provision\provision.json, right at the start of the file.
We recommend the following changes allow more rest during missions. Additional resources torches are also given to reflect that parties don't go out under-equipped on the basics of food and light.

    "raid_starting_length_inventory_item_lists":
    [
        [ ],
        [
            { "type": "supply", "id": "firewood", "amount": 2 },
            { "type": "provision", "id": "", "amount": 12 },
            { "type": "supply", "id": "shovel", "amount": 0 },
            { "type": "supply", "id": "antivenom", "amount": 0 },
            { "type": "supply", "id": "bandage", "amount": 0 },
            { "type": "supply", "id": "medicinal_herbs", "amount": 0 },
            { "type": "supply", "id": "skeleton_key", "amount": 0 },
            { "type": "supply", "id": "holy_water", "amount": 0 },
            { "type": "supply", "id": "torch", "amount": 8 }
        ],
        [
            { "type": "supply", "id": "firewood", "amount": 4 },
            { "type": "provision", "id": "", "amount": 24 },
            { "type": "supply", "id": "shovel", "amount": 0 },
            { "type": "supply", "id": "antivenom", "amount": 0 },
            { "type": "supply", "id": "bandage", "amount": 0 },
            { "type": "supply", "id": "medicinal_herbs", "amount": 0 },
            { "type": "supply", "id": "skeleton_key", "amount": 0 },
            { "type": "supply", "id": "holy_water", "amount": 0 },
            { "type": "supply", "id": "torch", "amount": 16 }
        ],
        [
            { "type": "supply", "id": "firewood", "amount": 6 },
            { "type": "provision", "id": "", "amount": 36 },
            { "type": "supply", "id": "shovel", "amount": 0 },
            { "type": "supply", "id": "antivenom", "amount": 0 },
            { "type": "supply", "id": "bandage", "amount": 0 },
            { "type": "supply", "id": "medicinal_herbs", "amount": 0 },
            { "type": "supply", "id": "skeleton_key", "amount": 0 },
            { "type": "supply", "id": "holy_water", "amount": 0 },
            { "type": "supply", "id": "torch", "amount": 24 }
        ],
        [
            { "type": "supply", "id": "firewood", "amount": 8 },
            { "type": "provision", "id": "", "amount": 48 },
            { "type": "supply", "id": "shovel", "amount": 0 },
            { "type": "supply", "id": "antivenom", "amount": 0 },
            { "type": "supply", "id": "bandage", "amount": 0 },
            { "type": "supply", "id": "medicinal_herbs", "amount": 0 },
            { "type": "supply", "id": "skeleton_key", "amount": 0 },
            { "type": "supply", "id": "holy_water", "amount": 0 },
            { "type": "supply", "id": "torch", "amount": 32 }
        ]
    ],

To actually make these changes useful, you also need to adjust your inventory limits. Edit C:\GOG Games\Darkest Dungeon\inventory\inventory.darkest and change .use_stack_limits true to .use_stack_limits false, except for Trinkets. You may also want to give yourself 8 additional inventory slots by changing .type "raid" .max_slots 16 to .type "raid" .max_slots 24. A third row of slots will be just barely accessible under the second row.

By giving out more opportunities to camp, you also let parties recover more often and reduce Stress through their camping skills. The drawback is in the opportunity to be ambushed after camping, which could very well undo all the gains.

Camping - Option 2
Another option is to make firewood available for puchase. This way you can adjust how much firewood you want to take. To do this, you need to edit provision.json to have firewood available. Find the lines in the section default_store_inventory_item_lists and duplicate the lines for shovels. Then edit your duplicate lines to change the word shovel into firewood. For example:

    "default_store_inventory_item_lists":
    [
        [ ],
        [
            { "type": "provision", "id": "", "amount": 18 },
            { "type": "supply", "id": "shovel", "amount": 4 },
            { "type": "supply", "id": "firewood", "amount": 4 },
            { "type": "supply", "id": "antivenom", "amount": 6 },
            { "type": "supply", "id": "bandage", "amount": 6 },
            { "type": "supply", "id": "medicinal_herbs", "amount": 6 },
            { "type": "supply", "id": "skeleton_key", "amount": 6 },
            { "type": "supply", "id": "holy_water", "amount": 6 },
            { "type": "supply", "id": "torch", "amount": 18 }
        ],

If you want, you can leave the price of firewood at 0, or you can edit C:\GOG Games\Darkest Dungeon\inventory\inventory.darkest where you can find the buy and sell value of firewood in the bottom section. We recommend setting it to be the same as the prices for shovels.

Turns out it is very easy to mod the frustration-grind game Darkest Dungeon: The various .JSON and .DARKEST files are simply text files and are easy to read.

You can buy Darkest Dungeon with no-hassle setup and risk-free money-back guarantee from Good Old Games.

One very simple adjustments you can make:


Camping - Option 1
The dungeon size determines the amount of firewood you get, and therefore how many times you can camp. The basic amount of resources you start with for each dungeon raid is in C:\GOG Games\Darkest Dungeon\campaign\provision\provision.json, right at the start of the file.
We recommend the following changes allow more rest during missions. Additional resources torches are also given to reflect that parties don't go out under-equipped on the basics of food and light.

    "raid_starting_length_inventory_item_lists":
    [
        [ ],
        [
            { "type": "supply", "id": "firewood", "amount": 2 },
            { "type": "provision", "id": "", "amount": 12 },
            { "type": "supply", "id": "shovel", "amount": 0 },
            { "type": "supply", "id": "antivenom", "amount": 0 },
            { "type": "supply", "id": "bandage", "amount": 0 },
            { "type": "supply", "id": "medicinal_herbs", "amount": 0 },
            { "type": "supply", "id": "skeleton_key", "amount": 0 },
            { "type": "supply", "id": "holy_water", "amount": 0 },
            { "type": "supply", "id": "torch", "amount": 8 }
        ],
        [
            { "type": "supply", "id": "firewood", "amount": 4 },
            { "type": "provision", "id": "", "amount": 24 },
            { "type": "supply", "id": "shovel", "amount": 0 },
            { "type": "supply", "id": "antivenom", "amount": 0 },
            { "type": "supply", "id": "bandage", "amount": 0 },
            { "type": "supply", "id": "medicinal_herbs", "amount": 0 },
            { "type": "supply", "id": "skeleton_key", "amount": 0 },
            { "type": "supply", "id": "holy_water", "amount": 0 },
            { "type": "supply", "id": "torch", "amount": 16 }
        ],
        [
            { "type": "supply", "id": "firewood", "amount": 6 },
            { "type": "provision", "id": "", "amount": 36 },
            { "type": "supply", "id": "shovel", "amount": 0 },
            { "type": "supply", "id": "antivenom", "amount": 0 },
            { "type": "supply", "id": "bandage", "amount": 0 },
            { "type": "supply", "id": "medicinal_herbs", "amount": 0 },
            { "type": "supply", "id": "skeleton_key", "amount": 0 },
            { "type": "supply", "id": "holy_water", "amount": 0 },
            { "type": "supply", "id": "torch", "amount": 24 }
        ],
        [
            { "type": "supply", "id": "firewood", "amount": 8 },
            { "type": "provision", "id": "", "amount": 48 },
            { "type": "supply", "id": "shovel", "amount": 0 },
            { "type": "supply", "id": "antivenom", "amount": 0 },
            { "type": "supply", "id": "bandage", "amount": 0 },
            { "type": "supply", "id": "medicinal_herbs", "amount": 0 },
            { "type": "supply", "id": "skeleton_key", "amount": 0 },
            { "type": "supply", "id": "holy_water", "amount": 0 },
            { "type": "supply", "id": "torch", "amount": 32 }
        ]
    ],

To actually make these changes useful, you also need to adjust your inventory limits. Edit C:\GOG Games\Darkest Dungeon\inventory\inventory.darkest and change .use_stack_limits true to .use_stack_limits false, except for Trinkets. You may also want to give yourself 8 additional inventory slots by changing .type "raid" .max_slots 16 to .type "raid" .max_slots 24. A third row of slots will be just barely accessible under the second row.

By giving out more opportunities to camp, you also let parties recover more often and reduce Stress through their camping skills. The drawback is in the opportunity to be ambushed after camping, which could very well undo all the gains.

Camping - Option 2
Another option is to make firewood available for puchase. This way you can adjust how much firewood you want to take. To do this, you need to edit provision.json to have firewood available. Find the lines in the section default_store_inventory_item_lists and duplicate the lines for shovels. Then edit your duplicate lines to change the word shovel into firewood. For example:

    "default_store_inventory_item_lists":
    [
        [ ],
        [
            { "type": "provision", "id": "", "amount": 18 },
            { "type": "supply", "id": "shovel", "amount": 4 },
            { "type": "supply", "id": "firewood", "amount": 4 },
            { "type": "supply", "id": "antivenom", "amount": 6 },
            { "type": "supply", "id": "bandage", "amount": 6 },
            { "type": "supply", "id": "medicinal_herbs", "amount": 6 },
            { "type": "supply", "id": "skeleton_key", "amount": 6 },
            { "type": "supply", "id": "holy_water", "amount": 6 },
            { "type": "supply", "id": "torch", "amount": 18 }
        ],

If you want, you can leave the price of firewood at 0, or you can edit C:\GOG Games\Darkest Dungeon\inventory\inventory.darkest where you can find the buy and sell value of firewood in the bottom section. We recommend setting it to be the same as the prices for shovels.

reade more... Résuméabuiyad

The Best HOGs - Dark Parables series


Currently I'm enjoying the latest game in the Dark Parables series, Goldilocks and the Fallen Star.
If you don't already know this hidden object game series, it features storylines inspired by fairytales. Early games more strongly followed the classic stories but later games were more interested in plot and mystery and exciting events.

There are two key traits that set this series apart to make it one of the BEST hidden object games out there today.

Gameplay is not sloppy
Yes, this is important! If you've ever been frustrated and stuck only to discover the solution really doesn't make sense, then you've experienced it. For example, one solution in Rite of Passage: The Perfect Show involves using a carpenter's saw to cut metal screws off. Really? They couldn't even give you a proper saw for cutting metal.

Other more common signs of sloppy production involve items in hidden object scenes that are named incorrectly; and having more than one type of item in a scene that is valid but only one that is clickable -- and then they penalize you for clicking the "wrong" one.

So far I haven't experience such in this series, and that's a great sign of quality control. Plus it won't jar you out of your gameplay while immersed in the plot.

Continuity
A very interesting concept for standalone casual games is a strong sense of continuity. Characters from previous games do make appearances, and when it happens in a story-relevant way, it is very fulfilling and doesn't feel like a deus ex machina -- it provides a strong feeling of reward for having played through the previous games.
Here is an example from Dark Parables 4, where someone you helped three episodes back comes to save your ass.


Combat
The game doesn't shy away from there being exciting crises and actual combat. As the protagonist you are really a non-combatant, so they've woven it into the storylines in a very good way that doesn't require you to be actually on the front lines so much, or in such a way that it involves solving a puzzle.
Hidden Object Games are not combat games and games of this genre often handicap themselves by not being able to have it in the story -- resulting in often very passive stories. The Dark Parables series has a workaround and they get better with this aspect in later games, resulting in an uncover-the-mystery gameplay experience that feels more exciting.

Of course the Collector's Edition has all sorts of extra that many hidden object games have nowadays to provide value and replayability, such as the ability to replay hidden object scenes, awarding trophies for excellent gameplay, and bonus stories to uncover more of the background or give you a prequel or sequel to the main quest.
However, the qualities I mentioned really set this series apart and make it very worthwhile to play them from the very beginning. If you are unsure where to start with hidden object games, you can't go wrong with this series.
And fortunately, even the first game has excellent artwork, so you won't feel like you have to suffer through a primitive hidden object game compared to what's contemporary.

Obviously ten games is a lot to commit to, so there are a couple of things you can do:
  • Don't buy the regular version! Instead, play the trial version available on Big Fish Games.
  • Always get the Collector's Edition. You'll regret missing the extra stories later and probably end up spending more to access them.
  • Don't buy any Strategy Guides to help you when you are stuck. They are in the Collector's Edition and in any case you can find them online and even on the Big Fish Games website.
  • Watch for special offers. Big Fish Games just had a fantastic 4th of July special which we announced on our website. If you are tight on cash, wait for these and in the meantime play the trial versions.
Now click one of the pictures on the right to access the free trial of one of these excellent hidden object games now! We've linked to the PC games, but they are available also for handhelds (such as android, iPad, and iPhones) so you can take the game with you wherever you go and savour at your leisure.


Currently I'm enjoying the latest game in the Dark Parables series, Goldilocks and the Fallen Star.
If you don't already know this hidden object game series, it features storylines inspired by fairytales. Early games more strongly followed the classic stories but later games were more interested in plot and mystery and exciting events.

There are two key traits that set this series apart to make it one of the BEST hidden object games out there today.

Gameplay is not sloppy
Yes, this is important! If you've ever been frustrated and stuck only to discover the solution really doesn't make sense, then you've experienced it. For example, one solution in Rite of Passage: The Perfect Show involves using a carpenter's saw to cut metal screws off. Really? They couldn't even give you a proper saw for cutting metal.

Other more common signs of sloppy production involve items in hidden object scenes that are named incorrectly; and having more than one type of item in a scene that is valid but only one that is clickable -- and then they penalize you for clicking the "wrong" one.

So far I haven't experience such in this series, and that's a great sign of quality control. Plus it won't jar you out of your gameplay while immersed in the plot.

Continuity
A very interesting concept for standalone casual games is a strong sense of continuity. Characters from previous games do make appearances, and when it happens in a story-relevant way, it is very fulfilling and doesn't feel like a deus ex machina -- it provides a strong feeling of reward for having played through the previous games.
Here is an example from Dark Parables 4, where someone you helped three episodes back comes to save your ass.


Combat
The game doesn't shy away from there being exciting crises and actual combat. As the protagonist you are really a non-combatant, so they've woven it into the storylines in a very good way that doesn't require you to be actually on the front lines so much, or in such a way that it involves solving a puzzle.
Hidden Object Games are not combat games and games of this genre often handicap themselves by not being able to have it in the story -- resulting in often very passive stories. The Dark Parables series has a workaround and they get better with this aspect in later games, resulting in an uncover-the-mystery gameplay experience that feels more exciting.

Of course the Collector's Edition has all sorts of extra that many hidden object games have nowadays to provide value and replayability, such as the ability to replay hidden object scenes, awarding trophies for excellent gameplay, and bonus stories to uncover more of the background or give you a prequel or sequel to the main quest.
However, the qualities I mentioned really set this series apart and make it very worthwhile to play them from the very beginning. If you are unsure where to start with hidden object games, you can't go wrong with this series.
And fortunately, even the first game has excellent artwork, so you won't feel like you have to suffer through a primitive hidden object game compared to what's contemporary.

Obviously ten games is a lot to commit to, so there are a couple of things you can do:
  • Don't buy the regular version! Instead, play the trial version available on Big Fish Games.
  • Always get the Collector's Edition. You'll regret missing the extra stories later and probably end up spending more to access them.
  • Don't buy any Strategy Guides to help you when you are stuck. They are in the Collector's Edition and in any case you can find them online and even on the Big Fish Games website.
  • Watch for special offers. Big Fish Games just had a fantastic 4th of July special which we announced on our website. If you are tight on cash, wait for these and in the meantime play the trial versions.
Now click one of the pictures on the right to access the free trial of one of these excellent hidden object games now! We've linked to the PC games, but they are available also for handhelds (such as android, iPad, and iPhones) so you can take the game with you wherever you go and savour at your leisure.

reade more... Résuméabuiyad

Wasteland 2 Director's Cut Walkthrough Index

 Wasteland 2 Director's Cut Walkthrough Index

Play Wasteland 2 risk-free with money-back guarantee from Good Old Games.

This post indexes all our walkthroughs, tips, and cheats for Wasteland 2 Director's Cut.

General Information Articles
Location Notes
Whenever you come across a Shrine, remember that you can get the bonus only once -- not once per character. That is, if you have new NPCs in your party, you cannot revisit a shrine and get the bonus just for those new NPCs. Therefore, you may want to consider just when to visit a Shrine, possibly saving it for permanent NPCs.
General Tips
  • If you have the Akita Figurine (+1 Animal Whisperer) you can pass it around and let different characters pick up an animal with a low-level Animal Whisperer challenge, such as the goat at Ranger Citadel or the chickens at Highpool. They do not need any levels of Animal Whisperer to keep the animal and the associated bonus.
  • Sometimes a gate can both be Lockpicked open and Brute Forced. Once you lockpick it, you can sometimes click the gate to close it,whereupon you can Brute Force it open for more skill XP.
 Wasteland 2 Director's Cut Walkthrough Index

Play Wasteland 2 risk-free with money-back guarantee from Good Old Games.

This post indexes all our walkthroughs, tips, and cheats for Wasteland 2 Director's Cut.

General Information Articles
Location Notes
Whenever you come across a Shrine, remember that you can get the bonus only once -- not once per character. That is, if you have new NPCs in your party, you cannot revisit a shrine and get the bonus just for those new NPCs. Therefore, you may want to consider just when to visit a Shrine, possibly saving it for permanent NPCs.
General Tips
  • If you have the Akita Figurine (+1 Animal Whisperer) you can pass it around and let different characters pick up an animal with a low-level Animal Whisperer challenge, such as the goat at Ranger Citadel or the chickens at Highpool. They do not need any levels of Animal Whisperer to keep the animal and the associated bonus.
  • Sometimes a gate can both be Lockpicked open and Brute Forced. Once you lockpick it, you can sometimes click the gate to close it,whereupon you can Brute Force it open for more skill XP.
reade more... Résuméabuiyad
Wasteland 2 Director's Cut - Ranger Citadel (exterior)

Wasteland 2 Director's Cut - Ranger Citadel (exterior)

Play Wasteland 2 risk-free with money-back guarantee from Good Old Games.

A great place for maps and general information for Arizona is game-maps.com. Here, we provide additional information about the various locations, and/or specific to the Director's Cut.

Opening Cutscene
  • You do not need any dialogue skills here although you are given the options. The skill requirement is set to 0, so even if you have no dialogue skills you can get XP from speaking with Vargas.
Aberforth
  • Use Animal Whisperer 1 to tame Aberforth and not be attacked when you pick up the can. Dialogue will not reflect this, however.
  • Aberforth gives DEVIL EYES for +1 Awareness.
  • Aberforth is passive in combat and typically dies only if hit by stray fire or if it is caught in a blast. And like other animal followers, it is immune to most environmental effects.
Angela Deth
  • If you speak with Vargas while she is in your party and prior to bringing back evidence from investigating Ace's death, you can betray her intention to Vargas, causing her to leave your party and leave the map. The topic "Snake" comes up but you have to manually type it into the dialogue box to pursue the topic.
Ranger Brass Knucks
  • The fenced area near him is accessible.
Spkye Alpha, Slick, and Mumbles
    • When you return to the Ranger Citadel after recruiting them, if Vargas is addressing the new recruits they will be with them. You cannot really interact with any of the recruits and after Vargas dismisses them they leave the map.
    • Spyke's two dogs will also be there, and will stay there once the recruits disperse.
      • You can therefore Animal Whisper one or both for the PUPPIES (+1 Charisma) perk. Two dogs will not give you the perk twice.
      • They do run into melee combat and can die easily or be a drain on Field Medic kits trying to keep them alive. Therefore it is probably better to leave them be, and use Animal Whisperer only if you need the Charisma boost.

    Wasteland 2 Director's Cut - Ranger Citadel (exterior)

    Play Wasteland 2 risk-free with money-back guarantee from Good Old Games.

    A great place for maps and general information for Arizona is game-maps.com. Here, we provide additional information about the various locations, and/or specific to the Director's Cut.

    Opening Cutscene
    • You do not need any dialogue skills here although you are given the options. The skill requirement is set to 0, so even if you have no dialogue skills you can get XP from speaking with Vargas.
    Aberforth
    • Use Animal Whisperer 1 to tame Aberforth and not be attacked when you pick up the can. Dialogue will not reflect this, however.
    • Aberforth gives DEVIL EYES for +1 Awareness.
    • Aberforth is passive in combat and typically dies only if hit by stray fire or if it is caught in a blast. And like other animal followers, it is immune to most environmental effects.
    Angela Deth
    • If you speak with Vargas while she is in your party and prior to bringing back evidence from investigating Ace's death, you can betray her intention to Vargas, causing her to leave your party and leave the map. The topic "Snake" comes up but you have to manually type it into the dialogue box to pursue the topic.
    Ranger Brass Knucks
    • The fenced area near him is accessible.
    Spkye Alpha, Slick, and Mumbles
      • When you return to the Ranger Citadel after recruiting them, if Vargas is addressing the new recruits they will be with them. You cannot really interact with any of the recruits and after Vargas dismisses them they leave the map.
      • Spyke's two dogs will also be there, and will stay there once the recruits disperse.
        • You can therefore Animal Whisper one or both for the PUPPIES (+1 Charisma) perk. Two dogs will not give you the perk twice.
        • They do run into melee combat and can die easily or be a drain on Field Medic kits trying to keep them alive. Therefore it is probably better to leave them be, and use Animal Whisperer only if you need the Charisma boost.

      reade more... Résuméabuiyad

      Wasteland 2 Director's Cut - Radio Tower

      Wasteland 2 Director's Cut - Radio Tower

      Play Wasteland 2 risk-free with money-back guarantee from Good Old Games.

      A great place for maps and general information for Arizona is guides.gamepressure.com. Here, we provide additional information about the various locations, and/or specific to the Director's Cut.

      Spyke Alpha, Slick, and Mumbles
      • Best solution is to recruit them using Kiss Ass 1: You will receive the most dialogue XP plus more later on in the Ranger Citadel for having recruited them.
      • Killing the raiders south-east of their compound does not make them hostile. It also lets you circle around Spyke to talk to Mumbles or Slick.
        • Whoever you  talk to determines the outcome for the gang and the dialogue of the other two members is locked out.
        • You get different dialogue with all three gang members. Mumbles and Slick also gives you fewer dialogue alternatives.
      • If you speak with Slick or Mumbles and the gang remains in place, you can Animal Whisper the dogs but they will not follow the party nor leave. To get them to follow you must recruit the gang and then find them with their dogs later at the Ranger Citadel courtyard.
      Raiders south-east of Spyke Alpha
      • If for whatever reason you are having trouble with them, there are two things you can do:
        • Make peace with Spyke and they will be neutral. That lets you attack first.
        • Go further south-east where there is a narrow passage (barred with a gate) leading up to an overlook. From that height advantage you get a bonus to hit and they get a penalty to hit.
      Mutant Frog in Cave
      • The Mutant Frog here hits hard and is pretty much guaranteed to incapacitate a character on higher difficulties with a single attack. To give yourself the best chance, spread out first (its sight range is apparently pretty low) and have everyone use a gun and shoot it. Retreat from it to shoot some more -- the further it is forced to move, the fewer attacks it will have per turn.
      • If you are still having trouble, to the northeast there is a cave with a shrine. Before entering the cave, there is a hidden cache revealed by Perception 1 at the dead end, near the cactus. That cache always contains a pipe bomb.


        Wasteland 2 Director's Cut - Radio Tower

        Play Wasteland 2 risk-free with money-back guarantee from Good Old Games.

        A great place for maps and general information for Arizona is guides.gamepressure.com. Here, we provide additional information about the various locations, and/or specific to the Director's Cut.

        Spyke Alpha, Slick, and Mumbles
        • Best solution is to recruit them using Kiss Ass 1: You will receive the most dialogue XP plus more later on in the Ranger Citadel for having recruited them.
        • Killing the raiders south-east of their compound does not make them hostile. It also lets you circle around Spyke to talk to Mumbles or Slick.
          • Whoever you  talk to determines the outcome for the gang and the dialogue of the other two members is locked out.
          • You get different dialogue with all three gang members. Mumbles and Slick also gives you fewer dialogue alternatives.
        • If you speak with Slick or Mumbles and the gang remains in place, you can Animal Whisper the dogs but they will not follow the party nor leave. To get them to follow you must recruit the gang and then find them with their dogs later at the Ranger Citadel courtyard.
        Raiders south-east of Spyke Alpha
        • If for whatever reason you are having trouble with them, there are two things you can do:
          • Make peace with Spyke and they will be neutral. That lets you attack first.
          • Go further south-east where there is a narrow passage (barred with a gate) leading up to an overlook. From that height advantage you get a bonus to hit and they get a penalty to hit.
        Mutant Frog in Cave
        • The Mutant Frog here hits hard and is pretty much guaranteed to incapacitate a character on higher difficulties with a single attack. To give yourself the best chance, spread out first (its sight range is apparently pretty low) and have everyone use a gun and shoot it. Retreat from it to shoot some more -- the further it is forced to move, the fewer attacks it will have per turn.
        • If you are still having trouble, to the northeast there is a cave with a shrine. Before entering the cave, there is a hidden cache revealed by Perception 1 at the dead end, near the cactus. That cache always contains a pipe bomb.


          reade more... Résuméabuiyad