Click here for a list of our Beyond Divinity Elite Hardcore Strategy Guide posts.
We recommend you buy Beyond Divinity from Good Old Games (GOG) as you can get more prompt support. Also, it is an older game, and GOG offers a risk-free money-back guarantee.
Act 3
Blood Knights
The easiest way to kill these tough opponents is with the Polymorph spell. Pretty much whatever you transform them into -- even a Level 29 Shadow Creature -- will be easier to kill and may give you much more XP. If you transform them into something weak, like a Level 1 Rat, you will get no XP for the kill.
Crystal Gargoyles
Not too hard to kill, but their Spikes spell when they are weak can be annoying. Don't bunch up you characters -- have them on opposites sides of the Gargoyle, and the Spikes spell should hit only one character at a time.
Rapid Shot - Marksman's Friend (Guide page 150)
If you are not hardy enough to survive the trap on the container housing this item, use our grab-and-go strategy for Flamestinger in Act 2 as the same trap is there.
Brother Raze and the Holy Relic (Guide page 151)
If you have already found the Holy Relic prior to speaking with him, you need to drop it then pick it up again for him to recognize that you have it. Do this after accepting his quest.
Serrick's Tower and Teleporter (Guide page 177)
The density of enemies here can be very high, so Sneak around. If you are swarmed by the elementals, especially the Earth Elementals and their Earthquake attacks, just run until you are teleported away.
Probably the easiest way to handle this area is to first fix the teleporter. You only need to talk to the Earth Elemental King to get the required component. Then run to the teleporter nearby and fix it, then use the teleporter to get away from the mess and come back later.
Salt Mine (Guide page 188)
Once the miners become hostile, you must kill them. When you have killed all of them, a cutscene takes over and you end up leaving the location. Therefore, kill one at a time and pause the game to collect their extensive loot (because they are all merchants) before killing another one. You will miss loot from one of them, so before picking up the crystal, look at their inventories (or better, clean out their merchant inventories with the Pickpocket skill -- see our Character Generation guide on the best way to do this) to decide whose loot to leave behind.
Catacombs (Guide page 181+)
Level 2 - "Never hit an unarmed creature"
We found that if a Shadow Creature killed one of the unarmed persons, you will both fail and succeed the Goddess's test, and you will not be able to save your game -- it will crash at the 2/3rds point when saving.
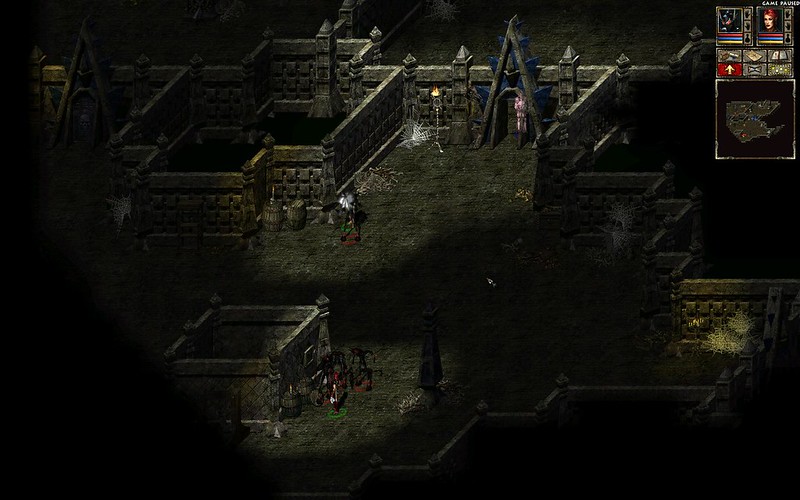
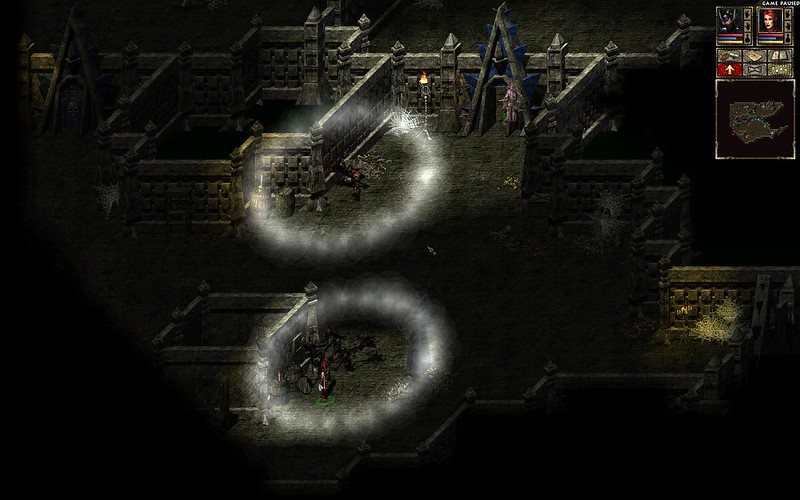
To keep the unarmed persons alive if you can't kill the Shadow Creatures fast enough: (see pictures below)
.
Level 5 - Raanaar Summoning Doll
Once you have all 3 Symbols, strip the Raanaar Summoning Doll of all gear or it will be lost when the Doll is removed from you.
Although the door to the Crystal Fragment is open, do not go there or the wrong dialogue will trigger. It appears harmless, but glitches can have uncertain effects.
We recommend you buy Beyond Divinity from Good Old Games (GOG) as you can get more prompt support. Also, it is an older game, and GOG offers a risk-free money-back guarantee.
Act 3
Levelling: We used Polymorph against the Blood Knights and occasionally elsewhere, but we did not use it all the time to get XP out of very low-level opponents. If you diligently use it, you can end up with a much higher level, even without exploiting the Battlefields.
- If you haven't already, get your Agility to 65+. For the Hero developing Strength to use some armour, it is even more important to get Agility higher, as high as 81+ to use some of the enchanted spears that show up with a base Required Agility of 56+ and can have base damage in the 200+ range after Sharpening, and pushing 300 after factoring in Agility.
- Hammer is a good spell to have if you need immediate respite to cast a healing spell, so make sure you have enough Mana to do that plus a Healing spell once or twice.
- Melee will still get you through most of your encounters, but in addition to boosts from equipment, you should have enough points to spread around more than just Agility. However, I recommend still focussing on Agility and Intelligence, and for the Hero, Strength as well.
- If you have Skill Points to spare, develop some Warrior Skills with Piercing Weapons. One-Handed Piercing with Shield is recommended, as two-handed weapons means you lose out on enchantments on a Shield. At this time, just 1 level with Accuracy, Damage, Critical Hits, and Deathblow is fine as there are significantly reduced returns on your skill point investment.
Blood Knights
The easiest way to kill these tough opponents is with the Polymorph spell. Pretty much whatever you transform them into -- even a Level 29 Shadow Creature -- will be easier to kill and may give you much more XP. If you transform them into something weak, like a Level 1 Rat, you will get no XP for the kill.
Crystal Gargoyles
Not too hard to kill, but their Spikes spell when they are weak can be annoying. Don't bunch up you characters -- have them on opposites sides of the Gargoyle, and the Spikes spell should hit only one character at a time.
Rapid Shot - Marksman's Friend (Guide page 150)
If you are not hardy enough to survive the trap on the container housing this item, use our grab-and-go strategy for Flamestinger in Act 2 as the same trap is there.
Brother Raze and the Holy Relic (Guide page 151)
If you have already found the Holy Relic prior to speaking with him, you need to drop it then pick it up again for him to recognize that you have it. Do this after accepting his quest.
Serrick's Tower and Teleporter (Guide page 177)
The density of enemies here can be very high, so Sneak around. If you are swarmed by the elementals, especially the Earth Elementals and their Earthquake attacks, just run until you are teleported away.
Probably the easiest way to handle this area is to first fix the teleporter. You only need to talk to the Earth Elemental King to get the required component. Then run to the teleporter nearby and fix it, then use the teleporter to get away from the mess and come back later.
Salt Mine (Guide page 188)
Once the miners become hostile, you must kill them. When you have killed all of them, a cutscene takes over and you end up leaving the location. Therefore, kill one at a time and pause the game to collect their extensive loot (because they are all merchants) before killing another one. You will miss loot from one of them, so before picking up the crystal, look at their inventories (or better, clean out their merchant inventories with the Pickpocket skill -- see our Character Generation guide on the best way to do this) to decide whose loot to leave behind.
Catacombs (Guide page 181+)
Level 2 - "Never hit an unarmed creature"
We found that if a Shadow Creature killed one of the unarmed persons, you will both fail and succeed the Goddess's test, and you will not be able to save your game -- it will crash at the 2/3rds point when saving.
To keep the unarmed persons alive if you can't kill the Shadow Creatures fast enough: (see pictures below)
- Stay near the door but do not pass through. Use spells like Hammer to kill as many Shadow Creatures as possible.
- Until you go through the doorway, the soldiers are all green/neutral and will not be harmed by your spells.
- The soldiers and Shadow Creatures on the west side of the room are too far to yet be activated and will not yet be fighting.
- Once the Shadow Creatures are dead, go back up the stairs and save your game progress before coming back down to continue.
- Rush over to the west side and kill all the Shadow Creatures in the room (but not the side rooms) as quickly as possible.
- Kill the armed soldiers. When the room is clear of all Shadow Creatures and armed Soldiers, you will receive a message "You understood the lesson."

.

Level 4 - Treasure Chests
You can exploit pausing the game to get all four treasures by positioning the Hero and Deathknight so that they can pick up all four keys while the game is paused. However, the treasure isn't really worthwhile to exploit in this way.
Level 5 - Black Bishop
If you are having trouble with his Paralysis Cloud, move your characters apart first so that only one of them will be in the cloud initially.
Catacombs Wisdom Level (Guide page 184)
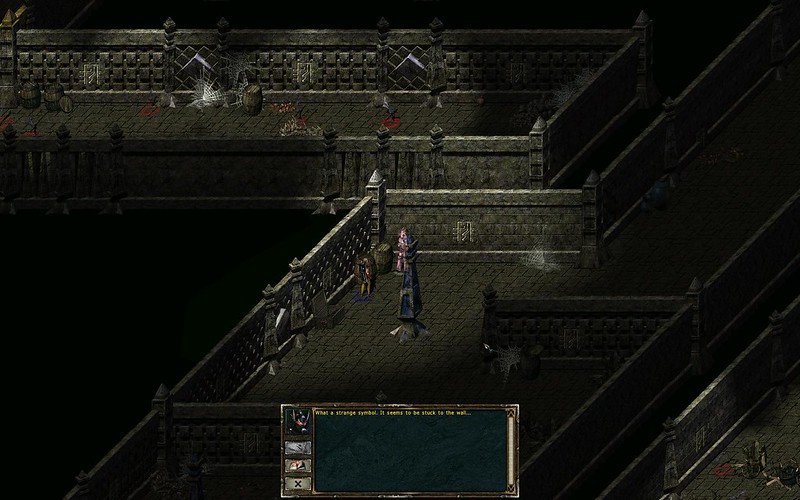
When you click on the Godly Symbols on the walls, you can briefly look behind walls and thereby locate enemies accurately for spells.
When you click on the Godly Symbols on the walls, you can briefly look behind walls and thereby locate enemies accurately for spells.

Level 5 - Raanaar Summoning Doll
Once you have all 3 Symbols, strip the Raanaar Summoning Doll of all gear or it will be lost when the Doll is removed from you.
Although the door to the Crystal Fragment is open, do not go there or the wrong dialogue will trigger. It appears harmless, but glitches can have uncertain effects.
We recommend you buy Beyond Divinity from Good Old Games (GOG) as you can get more prompt support. Also, it is an older game, and GOG offers a risk-free money-back guarantee.
Act 3
Levelling: We used Polymorph against the Blood Knights and occasionally elsewhere, but we did not use it all the time to get XP out of very low-level opponents. If you diligently use it, you can end up with a much higher level, even without exploiting the Battlefields.
- If you haven't already, get your Agility to 65+. For the Hero developing Strength to use some armour, it is even more important to get Agility higher, as high as 81+ to use some of the enchanted spears that show up with a base Required Agility of 56+ and can have base damage in the 200+ range after Sharpening, and pushing 300 after factoring in Agility.
- Hammer is a good spell to have if you need immediate respite to cast a healing spell, so make sure you have enough Mana to do that plus a Healing spell once or twice.
- Melee will still get you through most of your encounters, but in addition to boosts from equipment, you should have enough points to spread around more than just Agility. However, I recommend still focussing on Agility and Intelligence, and for the Hero, Strength as well.
- If you have Skill Points to spare, develop some Warrior Skills with Piercing Weapons. One-Handed Piercing with Shield is recommended, as two-handed weapons means you lose out on enchantments on a Shield. At this time, just 1 level with Accuracy, Damage, Critical Hits, and Deathblow is fine as there are significantly reduced returns on your skill point investment.
Blood Knights
The easiest way to kill these tough opponents is with the Polymorph spell. Pretty much whatever you transform them into -- even a Level 29 Shadow Creature -- will be easier to kill and may give you much more XP. If you transform them into something weak, like a Level 1 Rat, you will get no XP for the kill.
Crystal Gargoyles
Not too hard to kill, but their Spikes spell when they are weak can be annoying. Don't bunch up you characters -- have them on opposites sides of the Gargoyle, and the Spikes spell should hit only one character at a time.
Rapid Shot - Marksman's Friend (Guide page 150)
If you are not hardy enough to survive the trap on the container housing this item, use our grab-and-go strategy for Flamestinger in Act 2 as the same trap is there.
Brother Raze and the Holy Relic (Guide page 151)
If you have already found the Holy Relic prior to speaking with him, you need to drop it then pick it up again for him to recognize that you have it. Do this after accepting his quest.
Serrick's Tower and Teleporter (Guide page 177)
The density of enemies here can be very high, so Sneak around. If you are swarmed by the elementals, especially the Earth Elementals and their Earthquake attacks, just run until you are teleported away.
Probably the easiest way to handle this area is to first fix the teleporter. You only need to talk to the Earth Elemental King to get the required component. Then run to the teleporter nearby and fix it, then use the teleporter to get away from the mess and come back later.
Salt Mine (Guide page 188)
Once the miners become hostile, you must kill them. When you have killed all of them, a cutscene takes over and you end up leaving the location. Therefore, kill one at a time and pause the game to collect their extensive loot (because they are all merchants) before killing another one. You will miss loot from one of them, so before picking up the crystal, look at their inventories (or better, clean out their merchant inventories with the Pickpocket skill -- see our Character Generation guide on the best way to do this) to decide whose loot to leave behind.
Catacombs (Guide page 181+)
Level 2 - "Never hit an unarmed creature"
We found that if a Shadow Creature killed one of the unarmed persons, you will both fail and succeed the Goddess's test, and you will not be able to save your game -- it will crash at the 2/3rds point when saving.
To keep the unarmed persons alive if you can't kill the Shadow Creatures fast enough: (see pictures below)
- Stay near the door but do not pass through. Use spells like Hammer to kill as many Shadow Creatures as possible.
- Until you go through the doorway, the soldiers are all green/neutral and will not be harmed by your spells.
- The soldiers and Shadow Creatures on the west side of the room are too far to yet be activated and will not yet be fighting.
- Once the Shadow Creatures are dead, go back up the stairs and save your game progress before coming back down to continue.
- Rush over to the west side and kill all the Shadow Creatures in the room (but not the side rooms) as quickly as possible.
- Kill the armed soldiers. When the room is clear of all Shadow Creatures and armed Soldiers, you will receive a message "You understood the lesson."

.

Level 4 - Treasure Chests
You can exploit pausing the game to get all four treasures by positioning the Hero and Deathknight so that they can pick up all four keys while the game is paused. However, the treasure isn't really worthwhile to exploit in this way.
Level 5 - Black Bishop
If you are having trouble with his Paralysis Cloud, move your characters apart first so that only one of them will be in the cloud initially.
You can exploit pausing the game to get all four treasures by positioning the Hero and Deathknight so that they can pick up all four keys while the game is paused. However, the treasure isn't really worthwhile to exploit in this way.
Level 5 - Black Bishop
If you are having trouble with his Paralysis Cloud, move your characters apart first so that only one of them will be in the cloud initially.
Catacombs Wisdom Level (Guide page 184)
When you click on the Godly Symbols on the walls, you can briefly look behind walls and thereby locate enemies accurately for spells.
When you click on the Godly Symbols on the walls, you can briefly look behind walls and thereby locate enemies accurately for spells.

Level 5 - Raanaar Summoning Doll
Once you have all 3 Symbols, strip the Raanaar Summoning Doll of all gear or it will be lost when the Doll is removed from you.
Although the door to the Crystal Fragment is open, do not go there or the wrong dialogue will trigger. It appears harmless, but glitches can have uncertain effects.
No comments:
Post a Comment