Pages

The Best MARVEL and Superhero Games

As you may know, I have been playing MARVEL Avengers Academy, and although I was initially greatly in favour of the game, their recent events -- or more to the point, how they structured their events -- has been so bad that I've been forced to re-evaluate TinyCo's Avengers Academy.

Marvel Ultimate Alliance
On the Avengers Academy Facebook page, the topic naturally came up about where else someone could get a Marvel superheroes experience, and one I highly recommend is Marvel Ultimate Alliance.

The main reason is the sheer number of playable MARVEL characters in that game. Also, you get to fight a number of villains in a variety of story locations and mini-missions for various heroes. On top of that, you can earn different costumes for different heroes.

We had a series of posts about Marvel Ultimate Alliance, and you can see a number of posts detailing the cutscenes, artwork, and character costumes in Marvel Ultimate Alliance.

And one of the reasons it's called "Ultimate Alliance" is because from the list of heroes, you can mix and match into your own strike teams, some of which have special bonuses. And those teams can earn bonuses by staying together -- sort of like putting together your own Avengers portfolio of heroes and sending them out on missions regularly.

Needless to say the powers of the heroes (and villains) are faithful to the Marvel comic universe, and so you really have an iconic experience of the Marvel universe.

It's obviously an older game, but nevertheless highly recommended for the content and replayability (by trying different teams), all for a single low price.

X-Men Legends II: Rise of Apocalypse
X-Men Legends II is a sort of precursor to the Marvel Ultimate Alliance experience, and it's a bit older, but has similar attributes, including the winning trait of there being many heroes and being able to put together your own dream team.
If you like Marvel Ultimate Alliance, you'll like X-Men Legends II as well.

Look before you buy: We have cutscenes and artwork from the game, as well as a guide/walkthrough for X-Men Legends II: Rise of Apocalypse.

Freedom Force and Freedom Force vs. The Third Reich
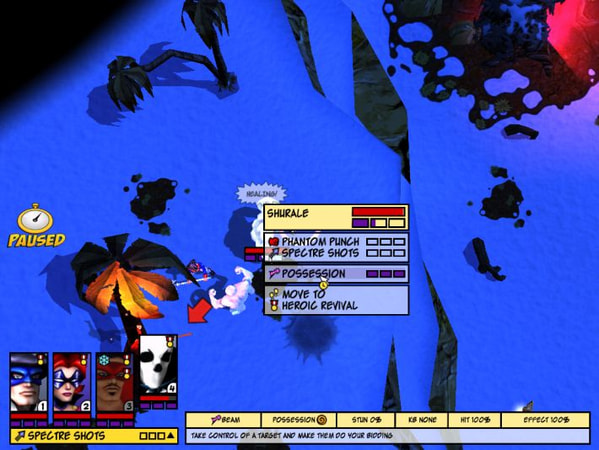
They aren't Marvel, but worthy of mention are the 4-colour comic book style Freedom Force games, which very much gives you a comic book feel:
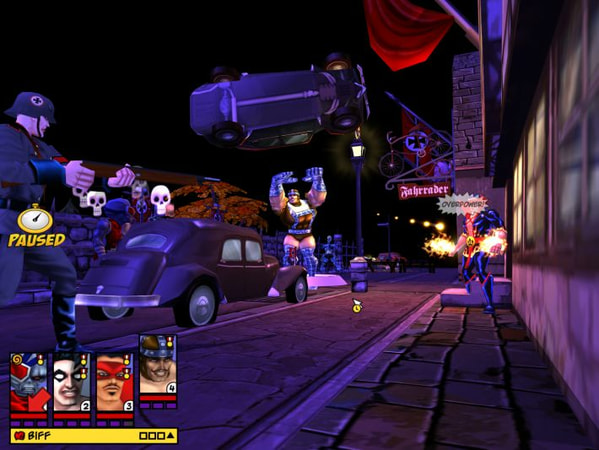
  • UI feedback for powers and damage comes in text bubbles just like you might see in a comic book.
  • You can grab things like cars and telephone poles to swing and throw.
  • The story involves rescuing civilians and you get bonuses for limiting collateral damage.
The real gem of this game, however, is the ability to CREATE YOUR OWN HERO. The powers are extremely customizable, making for an endless variety of builds. Also, they cleverly limited certain powers (such as self-healing) so you don't get builds that are too easy and in that way exploit the engine.
Freedom Force versus The Third Reich

Freedom Force versus The Third Reich

Freedom Force versus The Third Reich

Instead of getting Freedom Force from Amazon, I highly recommend instead getting it from GOG.com, which offers a money-back guarantee -- especially important for an older game.
As you may know, I have been playing MARVEL Avengers Academy, and although I was initially greatly in favour of the game, their recent events -- or more to the point, how they structured their events -- has been so bad that I've been forced to re-evaluate TinyCo's Avengers Academy.

Marvel Ultimate Alliance
On the Avengers Academy Facebook page, the topic naturally came up about where else someone could get a Marvel superheroes experience, and one I highly recommend is Marvel Ultimate Alliance.

The main reason is the sheer number of playable MARVEL characters in that game. Also, you get to fight a number of villains in a variety of story locations and mini-missions for various heroes. On top of that, you can earn different costumes for different heroes.

We had a series of posts about Marvel Ultimate Alliance, and you can see a number of posts detailing the cutscenes, artwork, and character costumes in Marvel Ultimate Alliance.

And one of the reasons it's called "Ultimate Alliance" is because from the list of heroes, you can mix and match into your own strike teams, some of which have special bonuses. And those teams can earn bonuses by staying together -- sort of like putting together your own Avengers portfolio of heroes and sending them out on missions regularly.

Needless to say the powers of the heroes (and villains) are faithful to the Marvel comic universe, and so you really have an iconic experience of the Marvel universe.

It's obviously an older game, but nevertheless highly recommended for the content and replayability (by trying different teams), all for a single low price.

X-Men Legends II: Rise of Apocalypse
X-Men Legends II is a sort of precursor to the Marvel Ultimate Alliance experience, and it's a bit older, but has similar attributes, including the winning trait of there being many heroes and being able to put together your own dream team.
If you like Marvel Ultimate Alliance, you'll like X-Men Legends II as well.

Look before you buy: We have cutscenes and artwork from the game, as well as a guide/walkthrough for X-Men Legends II: Rise of Apocalypse.

Freedom Force and Freedom Force vs. The Third Reich
They aren't Marvel, but worthy of mention are the 4-colour comic book style Freedom Force games, which very much gives you a comic book feel:
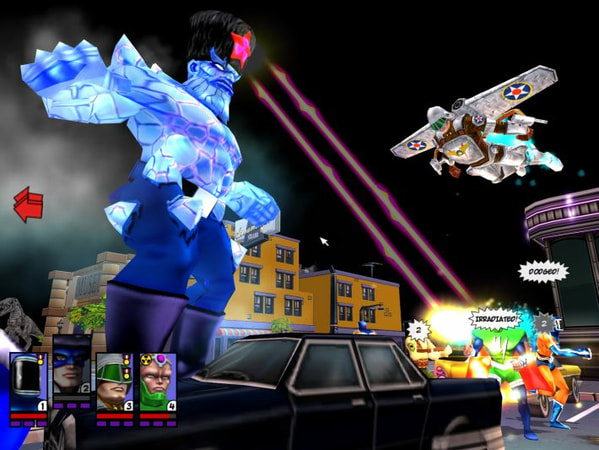
  • UI feedback for powers and damage comes in text bubbles just like you might see in a comic book.
  • You can grab things like cars and telephone poles to swing and throw.
  • The story involves rescuing civilians and you get bonuses for limiting collateral damage.
The real gem of this game, however, is the ability to CREATE YOUR OWN HERO. The powers are extremely customizable, making for an endless variety of builds. Also, they cleverly limited certain powers (such as self-healing) so you don't get builds that are too easy and in that way exploit the engine.
Freedom Force versus The Third Reich

Freedom Force versus The Third Reich

Freedom Force versus The Third Reich

Instead of getting Freedom Force from Amazon, I highly recommend instead getting it from GOG.com, which offers a money-back guarantee -- especially important for an older game.
reade more... Résuméabuiyad

Wasteland 2 Director's Cut - Team Building

 
Wasteland 2 Director's Cut Location Notes: Team Building

Play Wasteland 2 risk-free with money-back guarantee from Good Old Games.
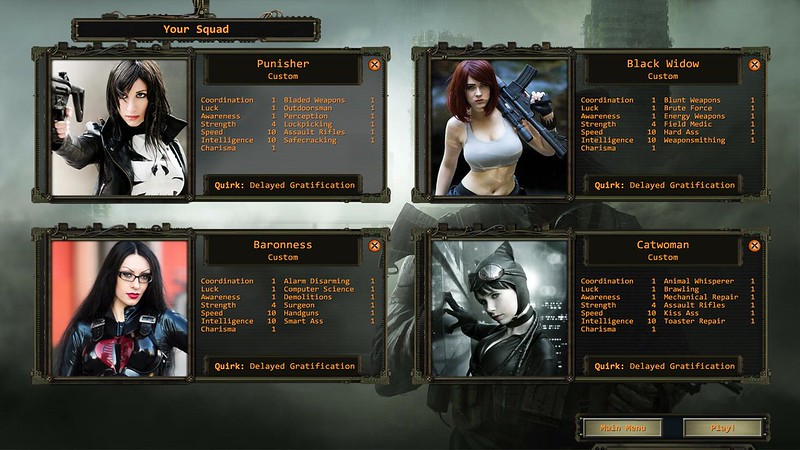
We build our team with the goal of getting all dialogue and skill encounters in the game. Therefore, we dropped certain skills (Barter, Leadership) because there were no role-playing events related to them.

In the early game, melee skills are strong because once you are in melee, you get many chances to attack, so even level 1 skill in Bladed or Blunt Weapons can be very useful. Trading blows with enemy melee or Handgunners is still risky, but once you are a higher level and have more CON, then against easy raider encounters you can basically use melee to clear them and that way get resources without using your own (and run back to a town for free healing, which you can safely do if your party Outdoorsman skill is high enough).
    The initial team was:

    Perception / Sniper
    • This character takes point when moving around the map because they have the Perception skill to spot dangers early.
    • Takes the first shot, initiating combat. Hopefully the Sniper skill will let them kill the enemy mid-range to long-range gunner, forcing remaining members to close the gap under fire.
    • Because Sniper Rifles are single-shot weapons in the short distances of this game they are generally good only as first-strike weapons, after which mid-range weapons and short-range or melee combat takes over. In which case you may just want to go with Assault Rifles for a more rounded character.
    • With all builds here, Handguns is superior to melee because you get both range and point blank range bonuses but it will be very ammunition intensive unless you have enough scrap to buy a lot of ammunition.
    • Skills
      • Handguns 1 OR Bladed Weapons 1
      • Sniper Rifles 1 OR Assault Rifle 1
      • Perception 1, Outdoorsman 1
        • Angela Deth has the Outdoorsman skill so you can delay taking it; if you rescue Highpool, Vulture's Cry also has this skill and you could maximize hers.
      • Lockpicking 1, Safecracking 1
    Hard Ass / Melee
    • Hard Ass has a combat perk and Brute Force has a melee weapon perk (see our list of Wasteland 2 Director's Cut perks sorted by skill), so this is the only melee weapon character. Also has the Field Medic to aim for the Stimpak perk to help them survive melee.
    • Skills
      • Blunt Weapons 1, Brute Force 1, Hard Ass 1
        • She is also our main melee combatant. In the early game when a lot of enemies do not have conductive armour and therefore energy weapons are not useful except when the target only has very few CON left, she advances into melee. In the late game, her melee is reinforced by the Stimpack perk from First Aid and other perks from Brute Force and Hard Ass.
      • Energy Weapons 1
        • Energy Weapons are weak at the start but stronger later on when enemies have conductive armor. So in the early game, she fulfills the melee role but can still use Energy Weapons against targets with very low HP left.
      • Field Medic
      • Weaponsmithing 1
        • Angela Deth has this skill so you could delay taking it and invest in a weapon skill instead; and then have Angela Deth maximize her Weaponsmithing.
    Smart Ass / Loot
    • Due to skill distribution, the only character without only one weapon proficiency. If you can keep her at mid-range, Assault Rifle is a good all-rounder. Otherwise, try a Handgun with a scope to give her utility from mid to short range.
    • Skills
      • Assault Rifles 1 OR Handguns 1
      • Smart Ass 1
      • Alarm Disarming 1, Computer Science 1, Demolitions 1
      • Surgeon 1
    Kiss Ass
    • Skills
      • Animal Whisperer 1, Kiss Ass 1
      • Assault Rifles 1
      • Handguns 1 OR Brawling 1
      • Mechanical Repair 1, Toaster Repair 1
    Wasteland 2 Director's Cut - team build

    Attributes
    Attributes were ruthlessly specialized. We aimed to improve Strength (for more CON) as we acquire levels (CON gains from Strength are retroactive). In the meantime we maximized Speed for Initiative and Evasion, and Intelligence for Skill Points as we are a skill-focussed party.
    Attributes are as follows:
    • Coordination 1, Luck 1, Awareness 1, Charisma 1
    • Strength 4
    • Speed 10, Intelligence 10
    An alternate build could have Coordination 4 Strength 1 and develop Coordination, to get a lot of Action Points.

    For the Trait, because we won't get Leadership we could take took Raised in a Circus for the +5% Evasion bonus, which helps us maximize Evasion. However, in practice this wasn't as useful as being competent in combat and taking down the enemy quickly, so in the end we went with Delayed Gratification (-1 skill points from levels 2-10, +1 skill points from level 11+).

    Early Game Skill Checks
    If you want to maximize your XP and game experience by succeeding in as many skill checks as possible, you'll need to consider what to do after the Radio Tower as in the early game you don't have many skill resources.
    • The Radio tower has a few easy skill checks but you will have to go back to that location later anyway.
    • Ag Center has a wide variety of skills, but only a few require high-level skills (though you might end up with a miserable chance of success and a lot of reloads). Also, some opportunities to make skills checks disappear if you progress too far in the mission; for example, you can break into Rose's lab and recruit her early, or you can wait for the door to be open for you later.
    • Highpool is a shorter mission with fewer checks but the skill requirements are higher. Fortunately, a lot of the checks can be delayed.
    • If you don't so far enough to get the initial Highpool SOS then you are not under any time pressure to choose. Theoretically, you could grind for levels to increase your skills before going to either Ag Center or Highpool.
      • You won't get a doctor to heal you for free -- you need to finish either Ag Center or Highpool to get this.
      • Therefore you need to find or buy medical resources unless you are lucky enough to avoid severe injury until you can level up (whereupon you are healed for free unless you are dying).
      • You will steadily run out of ammunition unless you have a lot of melee in your party, in which case you can grind the easier encounters that typically don't drop gear or ammunition.
      • You can also buy the radiation suit from the Citadel early and look for caches to the north. This will get you at least two suits of armor, though you might have to run from most encounters at a low 25% chance of success. If you can handle this you also have a good likelihood of encountering Rail raiders who can drop fairly good weapon loot.
    • You could use Veterans -- If your party dies they get exported and available for a new game. You lose your gear but keep your levelling.
      • A quick way to do this is to find the nuclear warhead in the Ranger Citadel museum and press the button.

    You can also get easy XP and Skill Points from Shrines in this area, though that is better done when you have a full roster (including NPCs) as you can only visit Shrines once for the bonus, and team members who weren't with you when you visited cannot get the benefit later.

     
    Wasteland 2 Director's Cut Location Notes: Team Building

    Play Wasteland 2 risk-free with money-back guarantee from Good Old Games.
    We build our team with the goal of getting all dialogue and skill encounters in the game. Therefore, we dropped certain skills (Barter, Leadership) because there were no role-playing events related to them.

    In the early game, melee skills are strong because once you are in melee, you get many chances to attack, so even level 1 skill in Bladed or Blunt Weapons can be very useful. Trading blows with enemy melee or Handgunners is still risky, but once you are a higher level and have more CON, then against easy raider encounters you can basically use melee to clear them and that way get resources without using your own (and run back to a town for free healing, which you can safely do if your party Outdoorsman skill is high enough).
      The initial team was:

      Perception / Sniper
      • This character takes point when moving around the map because they have the Perception skill to spot dangers early.
      • Takes the first shot, initiating combat. Hopefully the Sniper skill will let them kill the enemy mid-range to long-range gunner, forcing remaining members to close the gap under fire.
      • Because Sniper Rifles are single-shot weapons in the short distances of this game they are generally good only as first-strike weapons, after which mid-range weapons and short-range or melee combat takes over. In which case you may just want to go with Assault Rifles for a more rounded character.
      • With all builds here, Handguns is superior to melee because you get both range and point blank range bonuses but it will be very ammunition intensive unless you have enough scrap to buy a lot of ammunition.
      • Skills
        • Handguns 1 OR Bladed Weapons 1
        • Sniper Rifles 1 OR Assault Rifle 1
        • Perception 1, Outdoorsman 1
          • Angela Deth has the Outdoorsman skill so you can delay taking it; if you rescue Highpool, Vulture's Cry also has this skill and you could maximize hers.
        • Lockpicking 1, Safecracking 1
      Hard Ass / Melee
      • Hard Ass has a combat perk and Brute Force has a melee weapon perk (see our list of Wasteland 2 Director's Cut perks sorted by skill), so this is the only melee weapon character. Also has the Field Medic to aim for the Stimpak perk to help them survive melee.
      • Skills
        • Blunt Weapons 1, Brute Force 1, Hard Ass 1
          • She is also our main melee combatant. In the early game when a lot of enemies do not have conductive armour and therefore energy weapons are not useful except when the target only has very few CON left, she advances into melee. In the late game, her melee is reinforced by the Stimpack perk from First Aid and other perks from Brute Force and Hard Ass.
        • Energy Weapons 1
          • Energy Weapons are weak at the start but stronger later on when enemies have conductive armor. So in the early game, she fulfills the melee role but can still use Energy Weapons against targets with very low HP left.
        • Field Medic
        • Weaponsmithing 1
          • Angela Deth has this skill so you could delay taking it and invest in a weapon skill instead; and then have Angela Deth maximize her Weaponsmithing.
      Smart Ass / Loot
      • Due to skill distribution, the only character without only one weapon proficiency. If you can keep her at mid-range, Assault Rifle is a good all-rounder. Otherwise, try a Handgun with a scope to give her utility from mid to short range.
      • Skills
        • Assault Rifles 1 OR Handguns 1
        • Smart Ass 1
        • Alarm Disarming 1, Computer Science 1, Demolitions 1
        • Surgeon 1
      Kiss Ass
      • Skills
        • Animal Whisperer 1, Kiss Ass 1
        • Assault Rifles 1
        • Handguns 1 OR Brawling 1
        • Mechanical Repair 1, Toaster Repair 1
      Wasteland 2 Director's Cut - team build

      Attributes
      Attributes were ruthlessly specialized. We aimed to improve Strength (for more CON) as we acquire levels (CON gains from Strength are retroactive). In the meantime we maximized Speed for Initiative and Evasion, and Intelligence for Skill Points as we are a skill-focussed party.
      Attributes are as follows:
      • Coordination 1, Luck 1, Awareness 1, Charisma 1
      • Strength 4
      • Speed 10, Intelligence 10
      An alternate build could have Coordination 4 Strength 1 and develop Coordination, to get a lot of Action Points.

      For the Trait, because we won't get Leadership we could take took Raised in a Circus for the +5% Evasion bonus, which helps us maximize Evasion. However, in practice this wasn't as useful as being competent in combat and taking down the enemy quickly, so in the end we went with Delayed Gratification (-1 skill points from levels 2-10, +1 skill points from level 11+).

      Early Game Skill Checks
      If you want to maximize your XP and game experience by succeeding in as many skill checks as possible, you'll need to consider what to do after the Radio Tower as in the early game you don't have many skill resources.
      • The Radio tower has a few easy skill checks but you will have to go back to that location later anyway.
      • Ag Center has a wide variety of skills, but only a few require high-level skills (though you might end up with a miserable chance of success and a lot of reloads). Also, some opportunities to make skills checks disappear if you progress too far in the mission; for example, you can break into Rose's lab and recruit her early, or you can wait for the door to be open for you later.
      • Highpool is a shorter mission with fewer checks but the skill requirements are higher. Fortunately, a lot of the checks can be delayed.
      • If you don't so far enough to get the initial Highpool SOS then you are not under any time pressure to choose. Theoretically, you could grind for levels to increase your skills before going to either Ag Center or Highpool.
        • You won't get a doctor to heal you for free -- you need to finish either Ag Center or Highpool to get this.
        • Therefore you need to find or buy medical resources unless you are lucky enough to avoid severe injury until you can level up (whereupon you are healed for free unless you are dying).
        • You will steadily run out of ammunition unless you have a lot of melee in your party, in which case you can grind the easier encounters that typically don't drop gear or ammunition.
        • You can also buy the radiation suit from the Citadel early and look for caches to the north. This will get you at least two suits of armor, though you might have to run from most encounters at a low 25% chance of success. If you can handle this you also have a good likelihood of encountering Rail raiders who can drop fairly good weapon loot.
      • You could use Veterans -- If your party dies they get exported and available for a new game. You lose your gear but keep your levelling.
        • A quick way to do this is to find the nuclear warhead in the Ranger Citadel museum and press the button.

      You can also get easy XP and Skill Points from Shrines in this area, though that is better done when you have a full roster (including NPCs) as you can only visit Shrines once for the bonus, and team members who weren't with you when you visited cannot get the benefit later.

      reade more... Résuméabuiyad

      Mass Effect Series Table of Contents

      This is a table of contents for all our posts on the Mass Effect Trilogy:

      Mass Effect
      Mass Effect 2

      This is a table of contents for all our posts on the Mass Effect Trilogy:

      Mass Effect
      Mass Effect 2

      reade more... Résuméabuiyad

      Big Fish Games Happy 4th of July Sale

      Big Fish Games is having a sale on ALL GAMES -- All games are TWO FOR ONE from July 2nd to July 4th.

      New Customers can also use code FTC99 at checkout to get standard version games for just 99 cents. Offer valid from July 1st to July 4th.

      Big Fish Games is having a sale on ALL GAMES -- All games are TWO FOR ONE from July 2nd to July 4th.

      New Customers can also use code FTC99 at checkout to get standard version games for just 99 cents. Offer valid from July 1st to July 4th.

      reade more... Résuméabuiyad

      Wasteland 2 Director's Cut - Character Hacking and Respec

      Wasteland 2 Director's Cut: Character Hacking and Respec

      Play Wasteland 2 risk-free with money-back guarantee from Good Old Games.

      To edit your character's Attributes and Skills you can simply open a text file and edit it.

      Savegames are typically stored in ...\Documents\My Games\Wasteland2DC\Save Games\

      This directory will have subdirectories that are named based on the name you gave your savegame.
      Open the directory and you will find two files, a .bin and a .xml
      Open the .xml in a text editor and examine it to find the skills and attributes for each character. Start by searching for your character's name.

      Below is an sample section of the file comprising one character's entry. In larger font are attributes and associated values. Skill entries follow after.
      • For attributes, valid values are 1-10. Any value above 10 is treated as 10 in-game and flagged in red (but apparently harmless).
      • For skills, the values represent the number of Skill Points put into the skill -- NOT the skill level.
      Just edit the numbers and save the file as a text file (but of course do not change the file name).
      You can get away with less editing and do it in-game later by tweaking the <available...> entries, giving you Attribute Points, Skill Points, and Trait Points to spend in game.

      BONUS TIP: The .char files for custom rangers in the ...\Documents\My Games\Wasteland2DC\Characters directory are also plain text files with a similar structure. You could assign a character 10's in every Attribute and Skill (including the two hidden skills) and start with "perfect 10" characters to rapidly explore the Wasteland or replay the game to try different things.

      <pc><name><@>Lady Thor{F}</name><displayName><@>Lady Thor{F}</displayName><portraitName>cosplay Thor</portraitName><position><x>121.9337</x><y>6.401434</y><z>29.14721</z></position><rotationY>348.8566</rotationY><gender>2</gender><religion>None</religion><smokes>None</smokes><ethnicity>Russian</ethnicity><biography></biography><skinColor>0</skinColor><age>20</age><level>1</level><xp>0</xp><curHp>35</curHp><size>4</size><noOfKills>0</noOfKills><damageDone>0</damageDone><availableAttributePoints>0</availableAttributePoints><availableSkillPoints>0</availableSkillPoints><availableTraitPoints>0</availableTraitPoints><isSelected>True</isSelected><isHostage>False</isHostage><perceptionOn>False</perceptionOn><crouch>False</crouch><hasCommittedPoints>False</hasCommittedPoints><isCNPC>False</isCNPC><luckyHitpoints>0</luckyHitpoints><defaultEquipment><item /><item><resourceName>Fem_Robb_Hair_B</resourceName><ammoResourceName></ammoResourceName><slot>-1</slot><ammoCount>-1</ammoCount><firingModeIndex>0</firingModeIndex><isJammed>False</isJammed><quantity>1</quantity><junk>False</junk><fav>False</fav><isOriginalProperty>False</isOriginalProperty><inventoryGridX>-1</inventoryGridX><inventoryGridY>-1</inventoryGridY></item><item><resourceName>Fem_Topekan_Head_B</resourceName><ammoResourceName></ammoResourceName><slot>-1</slot><ammoCount>-1</ammoCount><firingModeIndex>0</firingModeIndex><isJammed>False</isJammed><quantity>1</quantity><junk>False</junk><fav>False</fav><isOriginalProperty>False</isOriginalProperty><inventoryGridX>-1</inventoryGridX><inventoryGridY>-1</inventoryGridY></item><item /><item><resourceName>Fem_UndWear_Torso_C</resourceName><ammoResourceName></ammoResourceName><slot>-1</slot><ammoCount>-1</ammoCount><firingModeIndex>0</firingModeIndex><isJammed>False</isJammed><quantity>1</quantity><junk>False</junk><fav>False</fav><isOriginalProperty>False</isOriginalProperty><inventoryGridX>-1</inventoryGridX><inventoryGridY>-1</inventoryGridY></item><item /><item><resourceName>Fem_UndWear_Legs_I</resourceName><ammoResourceName></ammoResourceName><slot>-1</slot><ammoCount>-1</ammoCount><firingModeIndex>0</firingModeIndex><isJammed>False</isJammed><quantity>1</quantity><junk>False</junk><fav>False</fav><isOriginalProperty>False</isOriginalProperty><inventoryGridX>-1</inventoryGridX><inventoryGridY>-1</inventoryGridY></item><item><resourceName>Fists</resourceName><ammoResourceName></ammoResourceName><slot>-1</slot><ammoCount>-1</ammoCount><firingModeIndex>0</firingModeIndex><isJammed>False</isJammed><quantity>1</quantity><junk>False</junk><fav>False</fav><isOriginalProperty>False</isOriginalProperty><inventoryGridX>-1</inventoryGridX><inventoryGridY>-1</inventoryGridY></item><item /><item><resourceName>Fists</resourceName><ammoResourceName></ammoResourceName><slot>-1</slot><ammoCount>-1</ammoCount><firingModeIndex>0</firingModeIndex><isJammed>False</isJammed><quantity>1</quantity><junk>False</junk><fav>False</fav><isOriginalProperty>False</isOriginalProperty><inventoryGridX>-1</inventoryGridX><inventoryGridY>-1</inventoryGridY></item><item /><item /><item /><item /><item /><item /><item /><item /></defaultEquipment><equipment><item /><item /><item /><item /><item><resourceName>Wearable_Topekan_Torso_B</resourceName><ammoResourceName></ammoResourceName><slot>4</slot><ammoCount>-1</ammoCount><firingModeIndex>0</firingModeIndex><isJammed>False</isJammed><quantity>1</quantity><junk>False</junk><fav>False</fav><isOriginalProperty>False</isOriginalProperty><inventoryGridX>-1</inventoryGridX><inventoryGridY>-1</inventoryGridY></item><item /><item><resourceName>Wearable_Topekan_Legs_A</resourceName><ammoResourceName></ammoResourceName><slot>6</slot><ammoCount>-1</ammoCount><firingModeIndex>0</firingModeIndex><isJammed>False</isJammed><quantity>1</quantity><junk>False</junk><fav>False</fav><isOriginalProperty>False</isOriginalProperty><inventoryGridX>-1</inventoryGridX><inventoryGridY>-1</inventoryGridY></item><item><resourceName>Blunt_Tier_1_1</resourceName><ammoResourceName></ammoResourceName><slot>7</slot><ammoCount>-1</ammoCount><firingModeIndex>0</firingModeIndex><isJammed>False</isJammed><quantity>1</quantity><junk>False</junk><fav>False</fav><isOriginalProperty>False</isOriginalProperty><inventoryGridX>-1</inventoryGridX><inventoryGridY>-1</inventoryGridY></item><item /><item><resourceName>Energy_Tier_1_1</resourceName><ammoResourceName>Ammo_EnergyCell</ammoResourceName><slot>9</slot><ammoCount>6</ammoCount><firingModeIndex>0</firingModeIndex><isJammed>False</isJammed><quantity>1</quantity><junk>False</junk><fav>False</fav><isOriginalProperty>False</isOriginalProperty><inventoryGridX>-1</inventoryGridX><inventoryGridY>-1</inventoryGridY></item><item /><item /><item /><item /><item /><item /><item /><item /></equipment><inventory><item><resourceName>Ammo_EnergyCell</resourceName><ammoResourceName></ammoResourceName><slot>-1</slot><ammoCount>-1</ammoCount><firingModeIndex>0</firingModeIndex><isJammed>False</isJammed><quantity>18</quantity><junk>False</junk><fav>False</fav><isOriginalProperty>False</isOriginalProperty><inventoryGridX>-1</inventoryGridX><inventoryGridY>-1</inventoryGridY></item><item><resourceName>Usable_PainRelievers_1</resourceName><ammoResourceName></ammoResourceName><slot>-1</slot><ammoCount>-1</ammoCount><firingModeIndex>0</firingModeIndex><isJammed>False</isJammed><quantity>2</quantity><junk>False</junk><fav>False</fav><isOriginalProperty>False</isOriginalProperty><inventoryGridX>-1</inventoryGridX><inventoryGridY>-1</inventoryGridY></item><item><resourceName>UsableShovel</resourceName><ammoResourceName></ammoResourceName><slot>-1</slot><ammoCount>-1</ammoCount><firingModeIndex>0</firingModeIndex><isJammed>False</isJammed><quantity>1</quantity><junk>False</junk><fav>False</fav><isOriginalProperty>False</isOriginalProperty><inventoryGridX>-1</inventoryGridX><inventoryGridY>-1</inventoryGridY></item></inventory><hotkeys><hotkey><skillOrItemName>perception</skillOrItemName><isItem>False</isItem></hotkey><hotkey><skillOrItemName>outdoorsman</skillOrItemName><isItem>False</isItem></hotkey><hotkey><skillOrItemName>mechanicalRepair</skillOrItemName><isItem>False</isItem></hotkey><hotkey><skillOrItemName>toasterRepair</skillOrItemName><isItem>False</isItem></hotkey><hotkey><skillOrItemName>Usable_PainRelievers_1</skillOrItemName><isItem>True</isItem></hotkey><hotkey><skillOrItemName>UsableShovel</skillOrItemName><isItem>True</isItem></hotkey><hotkey><skillOrItemName></skillOrItemName><isItem>False</isItem></hotkey><hotkey><skillOrItemName></skillOrItemName><isItem>False</isItem></hotkey></hotkeys><statusEffects><statusEffect><name>Status_Trait_CircusFreak</name><startTime>246436</startTime><nextHitpointChange>0</nextHitpointChange><elapsedTime>89608</elapsedTime><lastUpdate>336044</lastUpdate></statusEffect></statusEffects><attributes><pair><key>coordination</key><value>3</value></pair><pair><key>luck</key><value>3</value></pair><pair><key>awareness</key><value>3</value></pair><pair><key>strength</key><value>3</value></pair><pair><key>speed</key><value>5</value></pair><pair><key>intelligence</key><value>10</value></pair><pair><key>charisma</key><value>1</value></pair></attributes><skillXps><pair><key>alarmDisarm</key><value>0</value></pair><pair><key>animalWhisperer</key><value>0</value></pair><pair><key>atWeapons</key><value>0</value></pair><pair><key>barter</key><value>0</value></pair><pair><key>bladedWeapons</key><value>0</value></pair><pair><key>bluntWeapons</key><value>2</value></pair><pair><key>brawling</key><value>0</value></pair><pair><key>bruteForce</key><value>0</value></pair><pair><key>calvinBackerSkill</key><value>0</value></pair><pair><key>combatShooting</key><value>0</value></pair><pair><key>computerTech</key><value>0</value></pair><pair><key>demolitions</key><value>0</value></pair><pair><key>doctor</key><value>0</value></pair><pair><key>energyWeapons</key><value>2</value></pair><pair><key>fieldMedic</key><value>0</value></pair><pair><key>handgun</key><value>0</value></pair><pair><key>intimidate</key><value>0</value></pair><pair><key>leadership</key><value>0</value></pair><pair><key>manipulate</key><value>0</value></pair><pair><key>mechanicalRepair</key><value>2</value></pair><pair><key>outdoorsman</key><value>2</value></pair><pair><key>perception</key><value>2</value></pair><pair><key>pickLock</key><value>0</value></pair><pair><key>rifle</key><value>0</value></pair><pair><key>safecrack</key><value>0</value></pair><pair><key>shotgun</key><value>0</value></pair><pair><key>smg</key><value>0</value></pair><pair><key>sniperRifle</key><value>0</value></pair><pair><key>spotLie</key><value>0</value></pair><pair><key>toasterRepair</key><value>2</value></pair><pair><key>weaponSmith</key><value>0</value></pair></skillXps><traits><pair><key>Trait_RaisedInTheCircus</key><value>1</value></pair></traits></pc>

        Wasteland 2 Director's Cut: Character Hacking and Respec

        Play Wasteland 2 risk-free with money-back guarantee from Good Old Games.

        To edit your character's Attributes and Skills you can simply open a text file and edit it.

        Savegames are typically stored in ...\Documents\My Games\Wasteland2DC\Save Games\

        This directory will have subdirectories that are named based on the name you gave your savegame.
        Open the directory and you will find two files, a .bin and a .xml
        Open the .xml in a text editor and examine it to find the skills and attributes for each character. Start by searching for your character's name.

        Below is an sample section of the file comprising one character's entry. In larger font are attributes and associated values. Skill entries follow after.
        • For attributes, valid values are 1-10. Any value above 10 is treated as 10 in-game and flagged in red (but apparently harmless).
        • For skills, the values represent the number of Skill Points put into the skill -- NOT the skill level.
        Just edit the numbers and save the file as a text file (but of course do not change the file name).
        You can get away with less editing and do it in-game later by tweaking the <available...> entries, giving you Attribute Points, Skill Points, and Trait Points to spend in game.

        BONUS TIP: The .char files for custom rangers in the ...\Documents\My Games\Wasteland2DC\Characters directory are also plain text files with a similar structure. You could assign a character 10's in every Attribute and Skill (including the two hidden skills) and start with "perfect 10" characters to rapidly explore the Wasteland or replay the game to try different things.

        <pc><name><@>Lady Thor{F}</name><displayName><@>Lady Thor{F}</displayName><portraitName>cosplay Thor</portraitName><position><x>121.9337</x><y>6.401434</y><z>29.14721</z></position><rotationY>348.8566</rotationY><gender>2</gender><religion>None</religion><smokes>None</smokes><ethnicity>Russian</ethnicity><biography></biography><skinColor>0</skinColor><age>20</age><level>1</level><xp>0</xp><curHp>35</curHp><size>4</size><noOfKills>0</noOfKills><damageDone>0</damageDone><availableAttributePoints>0</availableAttributePoints><availableSkillPoints>0</availableSkillPoints><availableTraitPoints>0</availableTraitPoints><isSelected>True</isSelected><isHostage>False</isHostage><perceptionOn>False</perceptionOn><crouch>False</crouch><hasCommittedPoints>False</hasCommittedPoints><isCNPC>False</isCNPC><luckyHitpoints>0</luckyHitpoints><defaultEquipment><item /><item><resourceName>Fem_Robb_Hair_B</resourceName><ammoResourceName></ammoResourceName><slot>-1</slot><ammoCount>-1</ammoCount><firingModeIndex>0</firingModeIndex><isJammed>False</isJammed><quantity>1</quantity><junk>False</junk><fav>False</fav><isOriginalProperty>False</isOriginalProperty><inventoryGridX>-1</inventoryGridX><inventoryGridY>-1</inventoryGridY></item><item><resourceName>Fem_Topekan_Head_B</resourceName><ammoResourceName></ammoResourceName><slot>-1</slot><ammoCount>-1</ammoCount><firingModeIndex>0</firingModeIndex><isJammed>False</isJammed><quantity>1</quantity><junk>False</junk><fav>False</fav><isOriginalProperty>False</isOriginalProperty><inventoryGridX>-1</inventoryGridX><inventoryGridY>-1</inventoryGridY></item><item /><item><resourceName>Fem_UndWear_Torso_C</resourceName><ammoResourceName></ammoResourceName><slot>-1</slot><ammoCount>-1</ammoCount><firingModeIndex>0</firingModeIndex><isJammed>False</isJammed><quantity>1</quantity><junk>False</junk><fav>False</fav><isOriginalProperty>False</isOriginalProperty><inventoryGridX>-1</inventoryGridX><inventoryGridY>-1</inventoryGridY></item><item /><item><resourceName>Fem_UndWear_Legs_I</resourceName><ammoResourceName></ammoResourceName><slot>-1</slot><ammoCount>-1</ammoCount><firingModeIndex>0</firingModeIndex><isJammed>False</isJammed><quantity>1</quantity><junk>False</junk><fav>False</fav><isOriginalProperty>False</isOriginalProperty><inventoryGridX>-1</inventoryGridX><inventoryGridY>-1</inventoryGridY></item><item><resourceName>Fists</resourceName><ammoResourceName></ammoResourceName><slot>-1</slot><ammoCount>-1</ammoCount><firingModeIndex>0</firingModeIndex><isJammed>False</isJammed><quantity>1</quantity><junk>False</junk><fav>False</fav><isOriginalProperty>False</isOriginalProperty><inventoryGridX>-1</inventoryGridX><inventoryGridY>-1</inventoryGridY></item><item /><item><resourceName>Fists</resourceName><ammoResourceName></ammoResourceName><slot>-1</slot><ammoCount>-1</ammoCount><firingModeIndex>0</firingModeIndex><isJammed>False</isJammed><quantity>1</quantity><junk>False</junk><fav>False</fav><isOriginalProperty>False</isOriginalProperty><inventoryGridX>-1</inventoryGridX><inventoryGridY>-1</inventoryGridY></item><item /><item /><item /><item /><item /><item /><item /><item /></defaultEquipment><equipment><item /><item /><item /><item /><item><resourceName>Wearable_Topekan_Torso_B</resourceName><ammoResourceName></ammoResourceName><slot>4</slot><ammoCount>-1</ammoCount><firingModeIndex>0</firingModeIndex><isJammed>False</isJammed><quantity>1</quantity><junk>False</junk><fav>False</fav><isOriginalProperty>False</isOriginalProperty><inventoryGridX>-1</inventoryGridX><inventoryGridY>-1</inventoryGridY></item><item /><item><resourceName>Wearable_Topekan_Legs_A</resourceName><ammoResourceName></ammoResourceName><slot>6</slot><ammoCount>-1</ammoCount><firingModeIndex>0</firingModeIndex><isJammed>False</isJammed><quantity>1</quantity><junk>False</junk><fav>False</fav><isOriginalProperty>False</isOriginalProperty><inventoryGridX>-1</inventoryGridX><inventoryGridY>-1</inventoryGridY></item><item><resourceName>Blunt_Tier_1_1</resourceName><ammoResourceName></ammoResourceName><slot>7</slot><ammoCount>-1</ammoCount><firingModeIndex>0</firingModeIndex><isJammed>False</isJammed><quantity>1</quantity><junk>False</junk><fav>False</fav><isOriginalProperty>False</isOriginalProperty><inventoryGridX>-1</inventoryGridX><inventoryGridY>-1</inventoryGridY></item><item /><item><resourceName>Energy_Tier_1_1</resourceName><ammoResourceName>Ammo_EnergyCell</ammoResourceName><slot>9</slot><ammoCount>6</ammoCount><firingModeIndex>0</firingModeIndex><isJammed>False</isJammed><quantity>1</quantity><junk>False</junk><fav>False</fav><isOriginalProperty>False</isOriginalProperty><inventoryGridX>-1</inventoryGridX><inventoryGridY>-1</inventoryGridY></item><item /><item /><item /><item /><item /><item /><item /><item /></equipment><inventory><item><resourceName>Ammo_EnergyCell</resourceName><ammoResourceName></ammoResourceName><slot>-1</slot><ammoCount>-1</ammoCount><firingModeIndex>0</firingModeIndex><isJammed>False</isJammed><quantity>18</quantity><junk>False</junk><fav>False</fav><isOriginalProperty>False</isOriginalProperty><inventoryGridX>-1</inventoryGridX><inventoryGridY>-1</inventoryGridY></item><item><resourceName>Usable_PainRelievers_1</resourceName><ammoResourceName></ammoResourceName><slot>-1</slot><ammoCount>-1</ammoCount><firingModeIndex>0</firingModeIndex><isJammed>False</isJammed><quantity>2</quantity><junk>False</junk><fav>False</fav><isOriginalProperty>False</isOriginalProperty><inventoryGridX>-1</inventoryGridX><inventoryGridY>-1</inventoryGridY></item><item><resourceName>UsableShovel</resourceName><ammoResourceName></ammoResourceName><slot>-1</slot><ammoCount>-1</ammoCount><firingModeIndex>0</firingModeIndex><isJammed>False</isJammed><quantity>1</quantity><junk>False</junk><fav>False</fav><isOriginalProperty>False</isOriginalProperty><inventoryGridX>-1</inventoryGridX><inventoryGridY>-1</inventoryGridY></item></inventory><hotkeys><hotkey><skillOrItemName>perception</skillOrItemName><isItem>False</isItem></hotkey><hotkey><skillOrItemName>outdoorsman</skillOrItemName><isItem>False</isItem></hotkey><hotkey><skillOrItemName>mechanicalRepair</skillOrItemName><isItem>False</isItem></hotkey><hotkey><skillOrItemName>toasterRepair</skillOrItemName><isItem>False</isItem></hotkey><hotkey><skillOrItemName>Usable_PainRelievers_1</skillOrItemName><isItem>True</isItem></hotkey><hotkey><skillOrItemName>UsableShovel</skillOrItemName><isItem>True</isItem></hotkey><hotkey><skillOrItemName></skillOrItemName><isItem>False</isItem></hotkey><hotkey><skillOrItemName></skillOrItemName><isItem>False</isItem></hotkey></hotkeys><statusEffects><statusEffect><name>Status_Trait_CircusFreak</name><startTime>246436</startTime><nextHitpointChange>0</nextHitpointChange><elapsedTime>89608</elapsedTime><lastUpdate>336044</lastUpdate></statusEffect></statusEffects><attributes><pair><key>coordination</key><value>3</value></pair><pair><key>luck</key><value>3</value></pair><pair><key>awareness</key><value>3</value></pair><pair><key>strength</key><value>3</value></pair><pair><key>speed</key><value>5</value></pair><pair><key>intelligence</key><value>10</value></pair><pair><key>charisma</key><value>1</value></pair></attributes><skillXps><pair><key>alarmDisarm</key><value>0</value></pair><pair><key>animalWhisperer</key><value>0</value></pair><pair><key>atWeapons</key><value>0</value></pair><pair><key>barter</key><value>0</value></pair><pair><key>bladedWeapons</key><value>0</value></pair><pair><key>bluntWeapons</key><value>2</value></pair><pair><key>brawling</key><value>0</value></pair><pair><key>bruteForce</key><value>0</value></pair><pair><key>calvinBackerSkill</key><value>0</value></pair><pair><key>combatShooting</key><value>0</value></pair><pair><key>computerTech</key><value>0</value></pair><pair><key>demolitions</key><value>0</value></pair><pair><key>doctor</key><value>0</value></pair><pair><key>energyWeapons</key><value>2</value></pair><pair><key>fieldMedic</key><value>0</value></pair><pair><key>handgun</key><value>0</value></pair><pair><key>intimidate</key><value>0</value></pair><pair><key>leadership</key><value>0</value></pair><pair><key>manipulate</key><value>0</value></pair><pair><key>mechanicalRepair</key><value>2</value></pair><pair><key>outdoorsman</key><value>2</value></pair><pair><key>perception</key><value>2</value></pair><pair><key>pickLock</key><value>0</value></pair><pair><key>rifle</key><value>0</value></pair><pair><key>safecrack</key><value>0</value></pair><pair><key>shotgun</key><value>0</value></pair><pair><key>smg</key><value>0</value></pair><pair><key>sniperRifle</key><value>0</value></pair><pair><key>spotLie</key><value>0</value></pair><pair><key>toasterRepair</key><value>2</value></pair><pair><key>weaponSmith</key><value>0</value></pair></skillXps><traits><pair><key>Trait_RaisedInTheCircus</key><value>1</value></pair></traits></pc>

          reade more... Résuméabuiyad

          Wasteland 2 Director's Cut - Perk Trees (sorted by Skill and Prerequisites)

           
          Wasteland 2 Director's Cut Perk Trees (sorted by Skill and Prerequisites)

          Play Wasteland 2 risk-free with money-back guarantee from Good Old Games.


          This page sorts the Perks into categories by Skill to help you plan how deeply you want to specialize in a Skill. Requirements are in square brackets.

          NO SKILL
          • Hardened - +1 base Armor
          • Healthy - +1 CON per character level (retroactive)
          • Hit the Deck! - -25% damage from Explosives
          • Hoarder - +20% Max Carry Weight
          • Limber - Crouching and Standing Up costs -1 AP
          • Powder Packer - +10% Chance of finding bonus Ammo when looting (party-wide)
          • Tormentor - +10% damage to enemies in cover
          • Turtle - +10% Evasion bonus from cover
          • Weathered - -15% damage taken from Critical Hits
          ALARM DISARMING
          • [Alarm Disarming 2, Computer Science 2] Cyber Scrounger - Gain Energy Cells when using Computer Science and Alarm Disarming
          • [3] Ghost - No longer trigger Ambushes
          • [6, Ghost] Quick Reflexes - +3% Evasion
          ANIMAL WHISPERER
          • [3] Camel - -10% Water Consumption on World Map, stacks with multiple squad members
          • [6] Big Game Hunter - +20% damage vs. Animals
          ASSAULT RIFLES
          • [4] Full Metal Jacket - +1 Armor Penetration when using Assault Rifles
          • [6] Melee Shooting - -35% close range penalty when using Assault Rifles
          • [8] Gunner - -5% Chance to Hit penalty on Burst Fire attacks
          BARTER
          • [3] Pawner - +20% more Scrap from selling junk items
          • [7] Loose Change - +15% chance of finding bonus Scrap when looting containers (party-wide)
          BLADED WEAPONS
          • [5] Glancing Strike (Bladed) - Gain Bladed Attacks of Opportunity against enemies when they move past you in combat, dealing 50% normal damage
          • [7, Glancing Strike (Bladed)] Opportune Strike (Bladed) - Bladed Attacks of Opportunity deal 75% normal damage
          • [9, Opportune Strike (Bladed)] Strategic Strike (Bladed) - Bladed Attacks of Opportunity deal full damage
          • [3] Self Defense - +1 Armor at close range with Bladed Weapons
          • [6] Samurai - +1 Armor Penetration when using Bladed Weapons
          • [8] Adrenaline Rush - +2 AP when below 25% MAXCON
          BLUNT WEAPONS
          • [5] Glancing Strike (Blunt) - Gain Blunt Attacks of Opportunity against enemies when they move past you in combat, dealing 50% normal damage
          • [7, Glancing Strike (Blunt)] Opportune Strike - Blunt Attacks of Opportunity deal 75% normal damage
          • [9, Opportune Strike (Blunt)] Strategic Strike (Blunt) - Blunt Attacks of Opportunity deal full damage
          • [4] Charge! - +0.5 Combat Speed bonus on first turn of combat
          • [6] Shoulder the Load - -25% Combat Speed penalty when wearing Heavy Armor
          • [8] Slayer - +10% chance your Blunt attacks use no Action Points
          BRAWLING
          • [4] Free-For-All - +10% chance to inflict random Precision Strike status effects on enemies when attacking with Brawling
          • [5] Glancing Strike (Brawling) - Gain Brawling Attacks of Opportunity against enemies when they move past you in combat, dealing 50% normal damage
          • [7, Glancing Strike (Brawling)] Opportune Strike (Brawling) - Brawling Attacks of Opportunity deal 75% normal damage
          • [9, Opportune Strike (Brawling)] Strategic Strike (Brawling) - Brawling Attacks of Opportunity deal full damage
          • [8] Rush 'N Attack - On first turn of combat, your first Brawling attack costs no Action Points
          BRUTE FORCE
          • [5] Applied Force - +5% chance to Stun enemies when using melee weapons
          • [7, Applied Force] Stunning Force - +10% chance to Stun enemies when using melee weapons
          • [9, Stunning Force] Staggering Force - +15% chance to Stun enemies when using melee weapons
          COMPUTER SCIENCE
          • [Alarm Disarming 2, Computer Science 2] Cyber Scrounger - Gain Energy Cells when using Computer Science and Alarm Disarming
          • [5] Roboticist - +20% damage vs. robots and synths
          • [8] Overclocker - Hacked enemy robots automatically gain Overclocked buff
          DEMOLITIONS
          • [2] Long Arm - +15% maximum range when throwing Grenade type weapons
          • [4] Improvised Explosives - +15% chance to recover a Grenade type weapon when disarming booby traps and mines
          • [6] Bomberman - +20% larger Area of Effect when using Explosives
          ENERGY WEAPONS
          • [3] Overcharge - +10% damage using Energy Weapons against non-Conductive Armor
          • [5, Overcharge] Overload - +20% damage using Energy Weapons against non-Conductive Armor
          • [7, Overload] Atomize - +30% damage using Energy Weapons against non-Conductive Armor
          • [3] Solar Powered - +15% chance your Energy Weapon attacks use no ammo
          FIELD MEDIC
          • [3] On the Mend - +10% effectiveness from healing items
          • [7] Stimpacks - +2% CON automatically healed per turn when in combat
          HANDGUNS
          • [4] Zeroed - +2% stacking Critical Chance bonus when repeatedly attacking a target with Handguns. Bonus lost when switching to another target
          • [5] Bandit - 4% free attack chance with Handguns
          • [7, Bandit] Gunslinger - +4% free attack chance with Handguns
          • [9, Gunslinger] Desperado - +4% free attack chance with Handguns
          HARD ASS
          • [1] Intimidating - +2 Hard Ass
          • [7] Bloodthirsty - +1 Action Point when killing an enemy
          HEAVY WEAPONS
          • [5] Battering Fire - +1% chance of inflicting Precision Strike effects per bullet when using normal Heavy Weapon attacks
          • [7, Battering Fire] Overwhelming Fire - +3% chance of inflicting Precision Strike effects per bullet when using normal Heavy Weapon attacks
          • [9, Overwhelming Fire] Devastating - +5% chance of inflicting Precision Strike effects per bullet when using normal Heavy Weapon attacks
          • [10] Bullet-Ridden - -1 Armor inflicted on enemies when attacking them with Heavy Weapons
          KISS ASS
          • [1] Affable - +2 Kiss Ass
          • [7] Silver-Tongued - +5% discount on all purchases
          LEADERSHIP
          • [3] Taunt - -3% Chance to Hit for enemies within Leadership range
          • [5, Taunt] Enrage - -5% Chance to Hit for enemies within Leadership range
          • [8, Enrage] Infuriate - -7% Chanceto Hit for enemies within Leadership range
          LOCKPICKING
          • [10 Lockpicking, 10 Safecracking] Master Thief - No Critical Failures when using Lockpicking or Safecracking
          MECHANICAL REPAIR
          • [3] Handyman - No Critical Failures when using Mechanical Repair
          • [6] Armor Maintenance - -20% damage suffered from Energy Weapons
          OUTDOORSMAN
          • [3] Scout - +25% Vision Range on World Map, applies to Hidden Caches
          • [5, Scout] Explorer - +50% Vision Range on World Map, applies to Hidden Caches and Mysterious Shrines
          • [7, Explorer] World Traveler - All hidden caches and shrines revealed.
          PERCEPTION
          • [3] Tactical Positioning - +25% damage dealt to enemies from behind when using melee or ranged weapons
          • [6] Dowsing - +25% chance of finding bonus Scrap when digging up holes (party-wide)
          SAFECRACKING
          • [10 Lockpicking, 10 Safecracking] Master Thief - No Critical Failures when using Lockpicking or Safecracking
          SHOTGUNS
          • [2] Careful Hunter - -25% chance of Friendly Fire when using Shotguns
          • [5, Careful Hunter] Precise Hunter - -50% chance of Friendly Fire when using Shotguns
          • [8, Precise Hunter] Master Hunter - No Friendly Fire when using Shotguns
          • [6] Obliterator - Attacking cover with Shotguns always completely destroys it
          SMART ASS
          • [1] Know-it-All - +2 Smart Ass
          • [5] Radiant Personality - 2x Charisma effectiveness when recruiting followers
          SNIPER RIFLES
          • [5] Focused Shooter - -15% Under Pressure penalty
          • [7, Focused Shooter] Confident Shooter - -30% Under Pressure penalty
          • [9, Confident Shooter] Zen Shooter - -45% Under Pressure penalty
          • [10] Deadeye - -1 Action Point cost when firing Sniper Rifles if you haven't moved during your combat turn
          • [3] Watchman - No Chance to Hit penalty when using Ambush
          SUBMACHINE GUNS
          • [4] Fast Reload - -1 Action Point cost to reload with Submachine Guns
          • [6] Whack-a-Mole - +15% Chance to Hit against enemies who are in cover
          SURGEON
          • [3] Trained Physician - -25% post-revival status effect duration
          • [9, Trained Physician] Expert Physician - -50% post-revival status effect duration
          • [6] Smooth Operator - +20 CON healed when reviving downed squad members
          TOASTER REPAIR
          • [2] Junk Diver - Upon finding a junk item, 50% chance of finding another junk item
          • [6] Toaster Expert - 50% chance to find bonus loot when using Toaster Repair (party-wide)
          WEAPONSMITHING
          • [2] Tinkerer - +1 Action Point when wearing Light Armor
          • [5] Deconstructor - +25% more Weapon Parts gained when breaking down weapons with Weaponsmithing
          • [8] Reinforced Plating - +1 Armor when wearing Heavy Armor
           
          Wasteland 2 Director's Cut Perk Trees (sorted by Skill and Prerequisites)

          Play Wasteland 2 risk-free with money-back guarantee from Good Old Games.


          This page sorts the Perks into categories by Skill to help you plan how deeply you want to specialize in a Skill. Requirements are in square brackets.

          NO SKILL
          • Hardened - +1 base Armor
          • Healthy - +1 CON per character level (retroactive)
          • Hit the Deck! - -25% damage from Explosives
          • Hoarder - +20% Max Carry Weight
          • Limber - Crouching and Standing Up costs -1 AP
          • Powder Packer - +10% Chance of finding bonus Ammo when looting (party-wide)
          • Tormentor - +10% damage to enemies in cover
          • Turtle - +10% Evasion bonus from cover
          • Weathered - -15% damage taken from Critical Hits
          ALARM DISARMING
          • [Alarm Disarming 2, Computer Science 2] Cyber Scrounger - Gain Energy Cells when using Computer Science and Alarm Disarming
          • [3] Ghost - No longer trigger Ambushes
          • [6, Ghost] Quick Reflexes - +3% Evasion
          ANIMAL WHISPERER
          • [3] Camel - -10% Water Consumption on World Map, stacks with multiple squad members
          • [6] Big Game Hunter - +20% damage vs. Animals
          ASSAULT RIFLES
          • [4] Full Metal Jacket - +1 Armor Penetration when using Assault Rifles
          • [6] Melee Shooting - -35% close range penalty when using Assault Rifles
          • [8] Gunner - -5% Chance to Hit penalty on Burst Fire attacks
          BARTER
          • [3] Pawner - +20% more Scrap from selling junk items
          • [7] Loose Change - +15% chance of finding bonus Scrap when looting containers (party-wide)
          BLADED WEAPONS
          • [5] Glancing Strike (Bladed) - Gain Bladed Attacks of Opportunity against enemies when they move past you in combat, dealing 50% normal damage
          • [7, Glancing Strike (Bladed)] Opportune Strike (Bladed) - Bladed Attacks of Opportunity deal 75% normal damage
          • [9, Opportune Strike (Bladed)] Strategic Strike (Bladed) - Bladed Attacks of Opportunity deal full damage
          • [3] Self Defense - +1 Armor at close range with Bladed Weapons
          • [6] Samurai - +1 Armor Penetration when using Bladed Weapons
          • [8] Adrenaline Rush - +2 AP when below 25% MAXCON
          BLUNT WEAPONS
          • [5] Glancing Strike (Blunt) - Gain Blunt Attacks of Opportunity against enemies when they move past you in combat, dealing 50% normal damage
          • [7, Glancing Strike (Blunt)] Opportune Strike - Blunt Attacks of Opportunity deal 75% normal damage
          • [9, Opportune Strike (Blunt)] Strategic Strike (Blunt) - Blunt Attacks of Opportunity deal full damage
          • [4] Charge! - +0.5 Combat Speed bonus on first turn of combat
          • [6] Shoulder the Load - -25% Combat Speed penalty when wearing Heavy Armor
          • [8] Slayer - +10% chance your Blunt attacks use no Action Points
          BRAWLING
          • [4] Free-For-All - +10% chance to inflict random Precision Strike status effects on enemies when attacking with Brawling
          • [5] Glancing Strike (Brawling) - Gain Brawling Attacks of Opportunity against enemies when they move past you in combat, dealing 50% normal damage
          • [7, Glancing Strike (Brawling)] Opportune Strike (Brawling) - Brawling Attacks of Opportunity deal 75% normal damage
          • [9, Opportune Strike (Brawling)] Strategic Strike (Brawling) - Brawling Attacks of Opportunity deal full damage
          • [8] Rush 'N Attack - On first turn of combat, your first Brawling attack costs no Action Points
          BRUTE FORCE
          • [5] Applied Force - +5% chance to Stun enemies when using melee weapons
          • [7, Applied Force] Stunning Force - +10% chance to Stun enemies when using melee weapons
          • [9, Stunning Force] Staggering Force - +15% chance to Stun enemies when using melee weapons
          COMPUTER SCIENCE
          • [Alarm Disarming 2, Computer Science 2] Cyber Scrounger - Gain Energy Cells when using Computer Science and Alarm Disarming
          • [5] Roboticist - +20% damage vs. robots and synths
          • [8] Overclocker - Hacked enemy robots automatically gain Overclocked buff
          DEMOLITIONS
          • [2] Long Arm - +15% maximum range when throwing Grenade type weapons
          • [4] Improvised Explosives - +15% chance to recover a Grenade type weapon when disarming booby traps and mines
          • [6] Bomberman - +20% larger Area of Effect when using Explosives
          ENERGY WEAPONS
          • [3] Overcharge - +10% damage using Energy Weapons against non-Conductive Armor
          • [5, Overcharge] Overload - +20% damage using Energy Weapons against non-Conductive Armor
          • [7, Overload] Atomize - +30% damage using Energy Weapons against non-Conductive Armor
          • [3] Solar Powered - +15% chance your Energy Weapon attacks use no ammo
          FIELD MEDIC
          • [3] On the Mend - +10% effectiveness from healing items
          • [7] Stimpacks - +2% CON automatically healed per turn when in combat
          HANDGUNS
          • [4] Zeroed - +2% stacking Critical Chance bonus when repeatedly attacking a target with Handguns. Bonus lost when switching to another target
          • [5] Bandit - 4% free attack chance with Handguns
          • [7, Bandit] Gunslinger - +4% free attack chance with Handguns
          • [9, Gunslinger] Desperado - +4% free attack chance with Handguns
          HARD ASS
          • [1] Intimidating - +2 Hard Ass
          • [7] Bloodthirsty - +1 Action Point when killing an enemy
          HEAVY WEAPONS
          • [5] Battering Fire - +1% chance of inflicting Precision Strike effects per bullet when using normal Heavy Weapon attacks
          • [7, Battering Fire] Overwhelming Fire - +3% chance of inflicting Precision Strike effects per bullet when using normal Heavy Weapon attacks
          • [9, Overwhelming Fire] Devastating - +5% chance of inflicting Precision Strike effects per bullet when using normal Heavy Weapon attacks
          • [10] Bullet-Ridden - -1 Armor inflicted on enemies when attacking them with Heavy Weapons
          KISS ASS
          • [1] Affable - +2 Kiss Ass
          • [7] Silver-Tongued - +5% discount on all purchases
          LEADERSHIP
          • [3] Taunt - -3% Chance to Hit for enemies within Leadership range
          • [5, Taunt] Enrage - -5% Chance to Hit for enemies within Leadership range
          • [8, Enrage] Infuriate - -7% Chanceto Hit for enemies within Leadership range
          LOCKPICKING
          • [10 Lockpicking, 10 Safecracking] Master Thief - No Critical Failures when using Lockpicking or Safecracking
          MECHANICAL REPAIR
          • [3] Handyman - No Critical Failures when using Mechanical Repair
          • [6] Armor Maintenance - -20% damage suffered from Energy Weapons
          OUTDOORSMAN
          • [3] Scout - +25% Vision Range on World Map, applies to Hidden Caches
          • [5, Scout] Explorer - +50% Vision Range on World Map, applies to Hidden Caches and Mysterious Shrines
          • [7, Explorer] World Traveler - All hidden caches and shrines revealed.
          PERCEPTION
          • [3] Tactical Positioning - +25% damage dealt to enemies from behind when using melee or ranged weapons
          • [6] Dowsing - +25% chance of finding bonus Scrap when digging up holes (party-wide)
          SAFECRACKING
          • [10 Lockpicking, 10 Safecracking] Master Thief - No Critical Failures when using Lockpicking or Safecracking
          SHOTGUNS
          • [2] Careful Hunter - -25% chance of Friendly Fire when using Shotguns
          • [5, Careful Hunter] Precise Hunter - -50% chance of Friendly Fire when using Shotguns
          • [8, Precise Hunter] Master Hunter - No Friendly Fire when using Shotguns
          • [6] Obliterator - Attacking cover with Shotguns always completely destroys it
          SMART ASS
          • [1] Know-it-All - +2 Smart Ass
          • [5] Radiant Personality - 2x Charisma effectiveness when recruiting followers
          SNIPER RIFLES
          • [5] Focused Shooter - -15% Under Pressure penalty
          • [7, Focused Shooter] Confident Shooter - -30% Under Pressure penalty
          • [9, Confident Shooter] Zen Shooter - -45% Under Pressure penalty
          • [10] Deadeye - -1 Action Point cost when firing Sniper Rifles if you haven't moved during your combat turn
          • [3] Watchman - No Chance to Hit penalty when using Ambush
          SUBMACHINE GUNS
          • [4] Fast Reload - -1 Action Point cost to reload with Submachine Guns
          • [6] Whack-a-Mole - +15% Chance to Hit against enemies who are in cover
          SURGEON
          • [3] Trained Physician - -25% post-revival status effect duration
          • [9, Trained Physician] Expert Physician - -50% post-revival status effect duration
          • [6] Smooth Operator - +20 CON healed when reviving downed squad members
          TOASTER REPAIR
          • [2] Junk Diver - Upon finding a junk item, 50% chance of finding another junk item
          • [6] Toaster Expert - 50% chance to find bonus loot when using Toaster Repair (party-wide)
          WEAPONSMITHING
          • [2] Tinkerer - +1 Action Point when wearing Light Armor
          • [5] Deconstructor - +25% more Weapon Parts gained when breaking down weapons with Weaponsmithing
          • [8] Reinforced Plating - +1 Armor when wearing Heavy Armor
          reade more... Résuméabuiyad

          Updated Game Review -- MARVEL Avengers Academy

          Game Review: MARVEL Avengers Academy
          Score: FAIL

          Previously I scored MARVEL Avengers Academy a respectable +7/-3. However, since that time they have put out several special events that are aimed at ruining all the fun in the game. They had an excellent casual smartphone game. They had aimed it to be "midcore" but the gameplay demands now are pushing it to hardcore. You not only have to strategize on how you spend money on the game, but the time demands are high as they introduce scheduling and systems that force you to constantly check your phone to keep the event going.

          Here is an example of a frustrating mechanic:
          • Film Rolls are needed for just about everything in this first stage, especially the very-limited-time Spider-Crates and Limited Time Prizes. They are only some of the many resources needed.
          • You can have up to four stations: 1 per 4 hours, 2 per 8 hours, 2 per 8 hours, and 3 per 12 hours. If all four are constantly active and you you click-to-collect-and-restart-the-timer all the time, you are basically getting a rate of 4 per 4 hours.
            • This seems like a lot, except "octobots" will randomly attack a station every few hours. An "attack" is to freeze the production counter until you remove the Octobot with a Web Shooter. So far the mechanics are unclear, but it looks like the more stations you have, the more are likely to be attacked, but the time in between attacks is also greater.
            • The timing between attacks is not clear so you can't just periodically check at set intervals.
            • If you fail to remove them all at the same time, you've screwed up the counters so you no longer have all of them in 4-hour cycles -- necessitating even more phone-checking.
            • To remove an Octobot you need a Web Shooter, which needs 2 vials of Web Fibers which drop from the special event Mission Board, which typically requires a Mission involving a character working on a task of at least 4 hours.
              • Sometimes you get a shorter mission but you only receive 1 vial, which is not enough. Sometimes you get a longer mission (8 hours) but you get 3 vials.
              • In any case, if a character is tied up elsewhere or if another character is already at the building station the task requires, you either have to wait and therefore the time to get a vial increases; or if you have a lot of characters from main game progression, you could try cancelling the mission and getting a new one. There is however a 70-minute cooldown before a mission is replaced.
              • Once you have 2 vials, it requires 2 hours to actually manufacture a Web Shooter, meaning a minimum of 6 hours to get one Web Shooter.
          Obviously they are playing on fear-of-missing-out to get you to spend money, but if you are on the Facebook page you will see just how much resentment this causes. Even people who spend money on the game to get premium characters are frustrated. Obviously, like most game companies, TinyCo needs money to keep going and it isn't different from most game companies in how they want your money. But there is a better way: Offering real value.

          So if you play MARVEL Avengers Academy, look VERY carefully at what advantage you are buying with your money and THINK whether you are spending your Shards wisely.
          In the particular case of the current Spider-Man event, you needed to watch the game carefully and get advance warning from players who've moved ahead to look into the mechanics. You would have seen that buying the premium content does NOT get you ahead.
          For example, buying the Spider-Ham character helped you with various drops toward getting Reporter Wasp, Spider-Crates, and Limited Time Prizes, but you are still dependent on Film Rolls for Reporter Wasp and Spider-Crates, so that's where the bottleneck really was and Spider-Ham or any other premium content really can't address it. Even the Spider-Signal and Spider-Spotlight buildings (which are useless after the event) only help keep your production free of octobots, but it doesn't actually increase production.

          TinyCo still has a great and unique product but they really need to shift their paradigm away from creating resentment.

          My recommendations:
          • Show value
            • If someone has spent money, show that the money they spent enhances their game. Do away with premium (need to be purchased with Shards, which cost real money) buildings that will be useless afterwards.
            • If someone bought a character, make sure that character isn't unused afterwards -- a very common complaint so far.
            • If someone buys a character during an event, make sure the benefit is really there. During the Civil War, players complained that premium characters only INCREASED the workload because they were scrambling to work on those characters too, and their help during the event wasn't actually that great.
          • Reduce complication
            • The current mission-board style of generating resources is complicated for the different schedules it creates and the jigsawing of charcters and trying to queue them into spots.
            • Instead, for each mission, choose a building, and populate its spots fully with valid characters (no overlaps, no characters chosen more than once for the same mission, no characters queuing for spots in that building for the same mission). The net hours characters spend working there will determine the amount of rewards.
            • Instead of selling additional resources, sell automation to reduce work and checking.
              • For example, the current Spider-Man event has buildings you can buy (using real money) to drop Web Shooters to remove Octobots. Instead, have the building automatically remove Octobots without the player having to click to collect Web Shooters and continue monitoring for the appearance of Octobots.
          • Reduce event complication and focus on story
            • Instead of getting people to jump through so many hoops and luring people to buy premium characters for supposed benefits during the event, make ALL event characters playable for the event.
              • This will give players a good idea of whether they like that character based on their story interactions with other characters.
              • It would also make the game story-driven rather than task/mechanics/systems driven.
            • Instead of making weird mechanics to accomplish tasks, do away with all that. For event items like Decor pieces, have event missions drop the event currency or tokens needed -- and therefore players can do it while advancing the event character storylines at their own pace.
            • For premium characters, let players have them too but to keep them in the Academy after, ask players to buy them with Shards/money.
          Game Review: MARVEL Avengers Academy
          Score: FAIL

          Previously I scored MARVEL Avengers Academy a respectable +7/-3. However, since that time they have put out several special events that are aimed at ruining all the fun in the game. They had an excellent casual smartphone game. They had aimed it to be "midcore" but the gameplay demands now are pushing it to hardcore. You not only have to strategize on how you spend money on the game, but the time demands are high as they introduce scheduling and systems that force you to constantly check your phone to keep the event going.

          Here is an example of a frustrating mechanic:
          • Film Rolls are needed for just about everything in this first stage, especially the very-limited-time Spider-Crates and Limited Time Prizes. They are only some of the many resources needed.
          • You can have up to four stations: 1 per 4 hours, 2 per 8 hours, 2 per 8 hours, and 3 per 12 hours. If all four are constantly active and you you click-to-collect-and-restart-the-timer all the time, you are basically getting a rate of 4 per 4 hours.
            • This seems like a lot, except "octobots" will randomly attack a station every few hours. An "attack" is to freeze the production counter until you remove the Octobot with a Web Shooter. So far the mechanics are unclear, but it looks like the more stations you have, the more are likely to be attacked, but the time in between attacks is also greater.
            • The timing between attacks is not clear so you can't just periodically check at set intervals.
            • If you fail to remove them all at the same time, you've screwed up the counters so you no longer have all of them in 4-hour cycles -- necessitating even more phone-checking.
            • To remove an Octobot you need a Web Shooter, which needs 2 vials of Web Fibers which drop from the special event Mission Board, which typically requires a Mission involving a character working on a task of at least 4 hours.
              • Sometimes you get a shorter mission but you only receive 1 vial, which is not enough. Sometimes you get a longer mission (8 hours) but you get 3 vials.
              • In any case, if a character is tied up elsewhere or if another character is already at the building station the task requires, you either have to wait and therefore the time to get a vial increases; or if you have a lot of characters from main game progression, you could try cancelling the mission and getting a new one. There is however a 70-minute cooldown before a mission is replaced.
              • Once you have 2 vials, it requires 2 hours to actually manufacture a Web Shooter, meaning a minimum of 6 hours to get one Web Shooter.
          Obviously they are playing on fear-of-missing-out to get you to spend money, but if you are on the Facebook page you will see just how much resentment this causes. Even people who spend money on the game to get premium characters are frustrated. Obviously, like most game companies, TinyCo needs money to keep going and it isn't different from most game companies in how they want your money. But there is a better way: Offering real value.

          So if you play MARVEL Avengers Academy, look VERY carefully at what advantage you are buying with your money and THINK whether you are spending your Shards wisely.
          In the particular case of the current Spider-Man event, you needed to watch the game carefully and get advance warning from players who've moved ahead to look into the mechanics. You would have seen that buying the premium content does NOT get you ahead.
          For example, buying the Spider-Ham character helped you with various drops toward getting Reporter Wasp, Spider-Crates, and Limited Time Prizes, but you are still dependent on Film Rolls for Reporter Wasp and Spider-Crates, so that's where the bottleneck really was and Spider-Ham or any other premium content really can't address it. Even the Spider-Signal and Spider-Spotlight buildings (which are useless after the event) only help keep your production free of octobots, but it doesn't actually increase production.

          TinyCo still has a great and unique product but they really need to shift their paradigm away from creating resentment.

          My recommendations:
          • Show value
            • If someone has spent money, show that the money they spent enhances their game. Do away with premium (need to be purchased with Shards, which cost real money) buildings that will be useless afterwards.
            • If someone bought a character, make sure that character isn't unused afterwards -- a very common complaint so far.
            • If someone buys a character during an event, make sure the benefit is really there. During the Civil War, players complained that premium characters only INCREASED the workload because they were scrambling to work on those characters too, and their help during the event wasn't actually that great.
          • Reduce complication
            • The current mission-board style of generating resources is complicated for the different schedules it creates and the jigsawing of charcters and trying to queue them into spots.
            • Instead, for each mission, choose a building, and populate its spots fully with valid characters (no overlaps, no characters chosen more than once for the same mission, no characters queuing for spots in that building for the same mission). The net hours characters spend working there will determine the amount of rewards.
            • Instead of selling additional resources, sell automation to reduce work and checking.
              • For example, the current Spider-Man event has buildings you can buy (using real money) to drop Web Shooters to remove Octobots. Instead, have the building automatically remove Octobots without the player having to click to collect Web Shooters and continue monitoring for the appearance of Octobots.
          • Reduce event complication and focus on story
            • Instead of getting people to jump through so many hoops and luring people to buy premium characters for supposed benefits during the event, make ALL event characters playable for the event.
              • This will give players a good idea of whether they like that character based on their story interactions with other characters.
              • It would also make the game story-driven rather than task/mechanics/systems driven.
            • Instead of making weird mechanics to accomplish tasks, do away with all that. For event items like Decor pieces, have event missions drop the event currency or tokens needed -- and therefore players can do it while advancing the event character storylines at their own pace.
            • For premium characters, let players have them too but to keep them in the Academy after, ask players to buy them with Shards/money.
          reade more... Résuméabuiyad